# Franka
We assume that you have a NUC running with a [real-time kernel](https://frankarobotics.github.io/docs/libfranka/docs/real_time_kernel.html) as the Franka controller, and a separate workstation for policy inference, on the same network.
## Gripper hardware setup
Follow this guide to assemble the gripper: [Assembly Guide](https://nyu-gripper.pages.dev/robot-gripper)
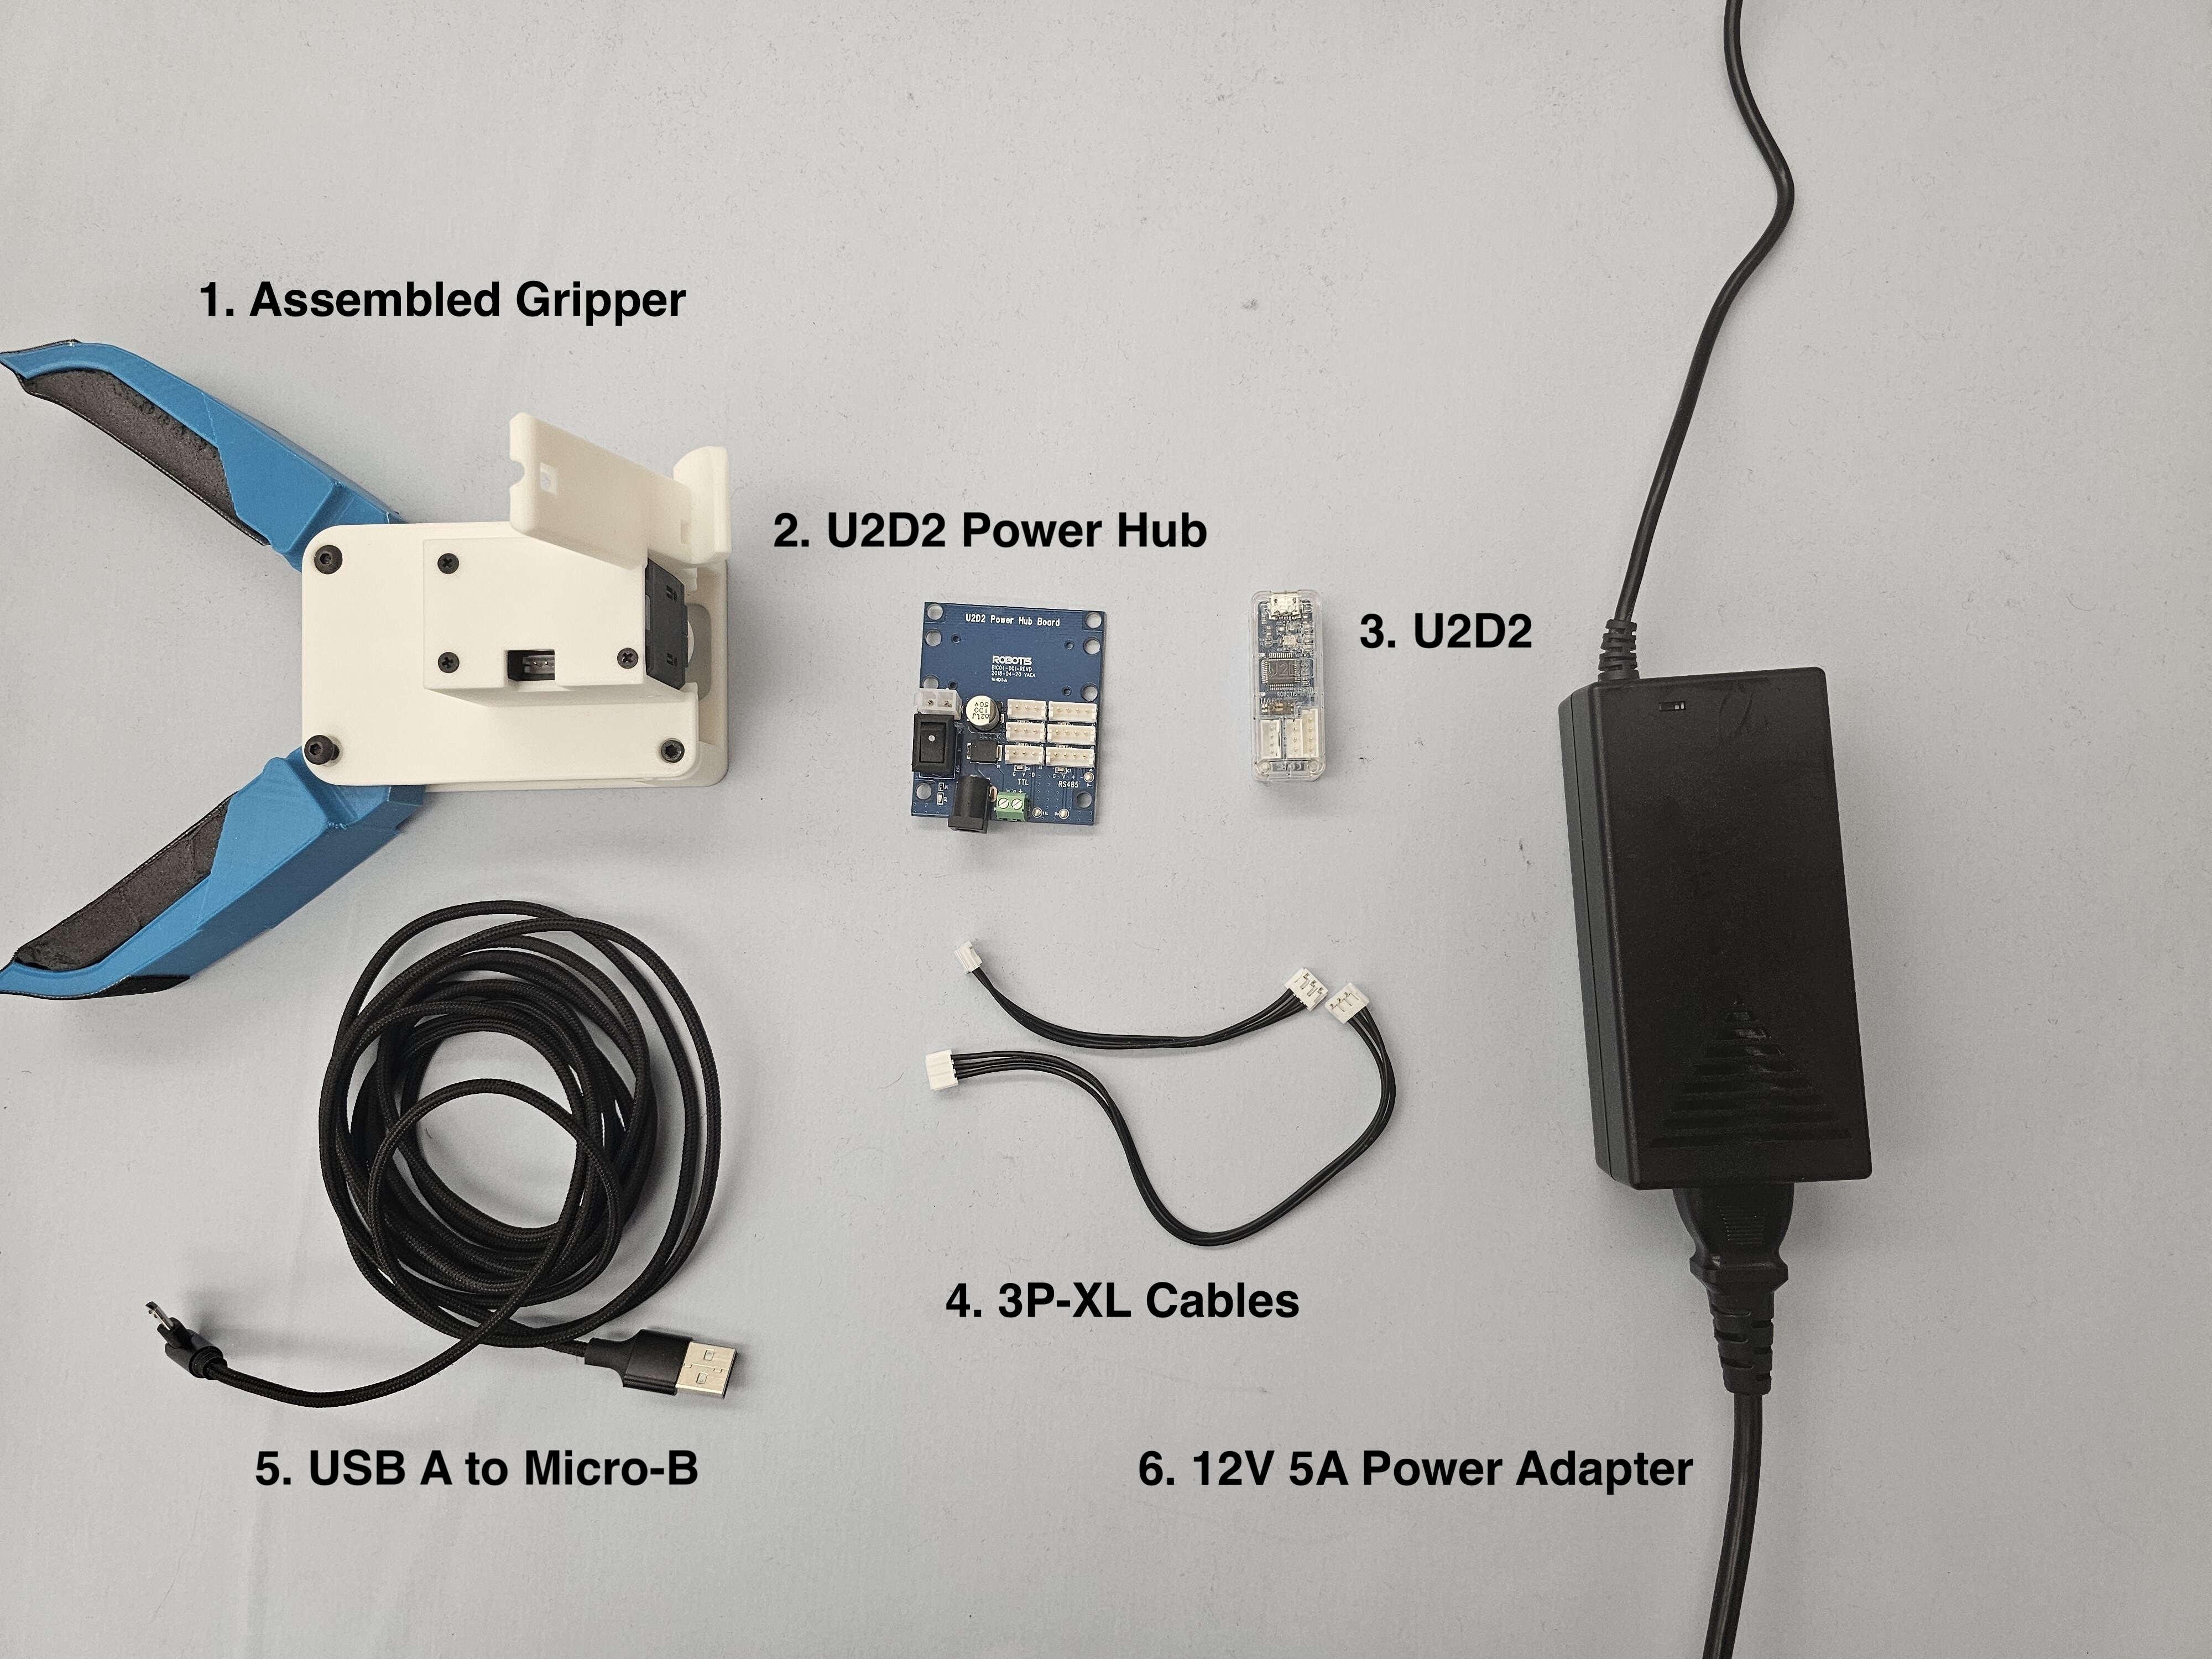
Have the following materials ready:
* Download and print the [gripper mount](https://nyu-gripper.pages.dev/cad/Robot%20_Gripper/Franka_with_controller.stl)
* 4 M6 x 10mm Screws
* 4 M2.5 x 10mm Screws
* The [Dynamixel Starter Set](https://www.robotis.us/dynamixel-starter-set-us/), which includes parts 2-6 in the photo below:
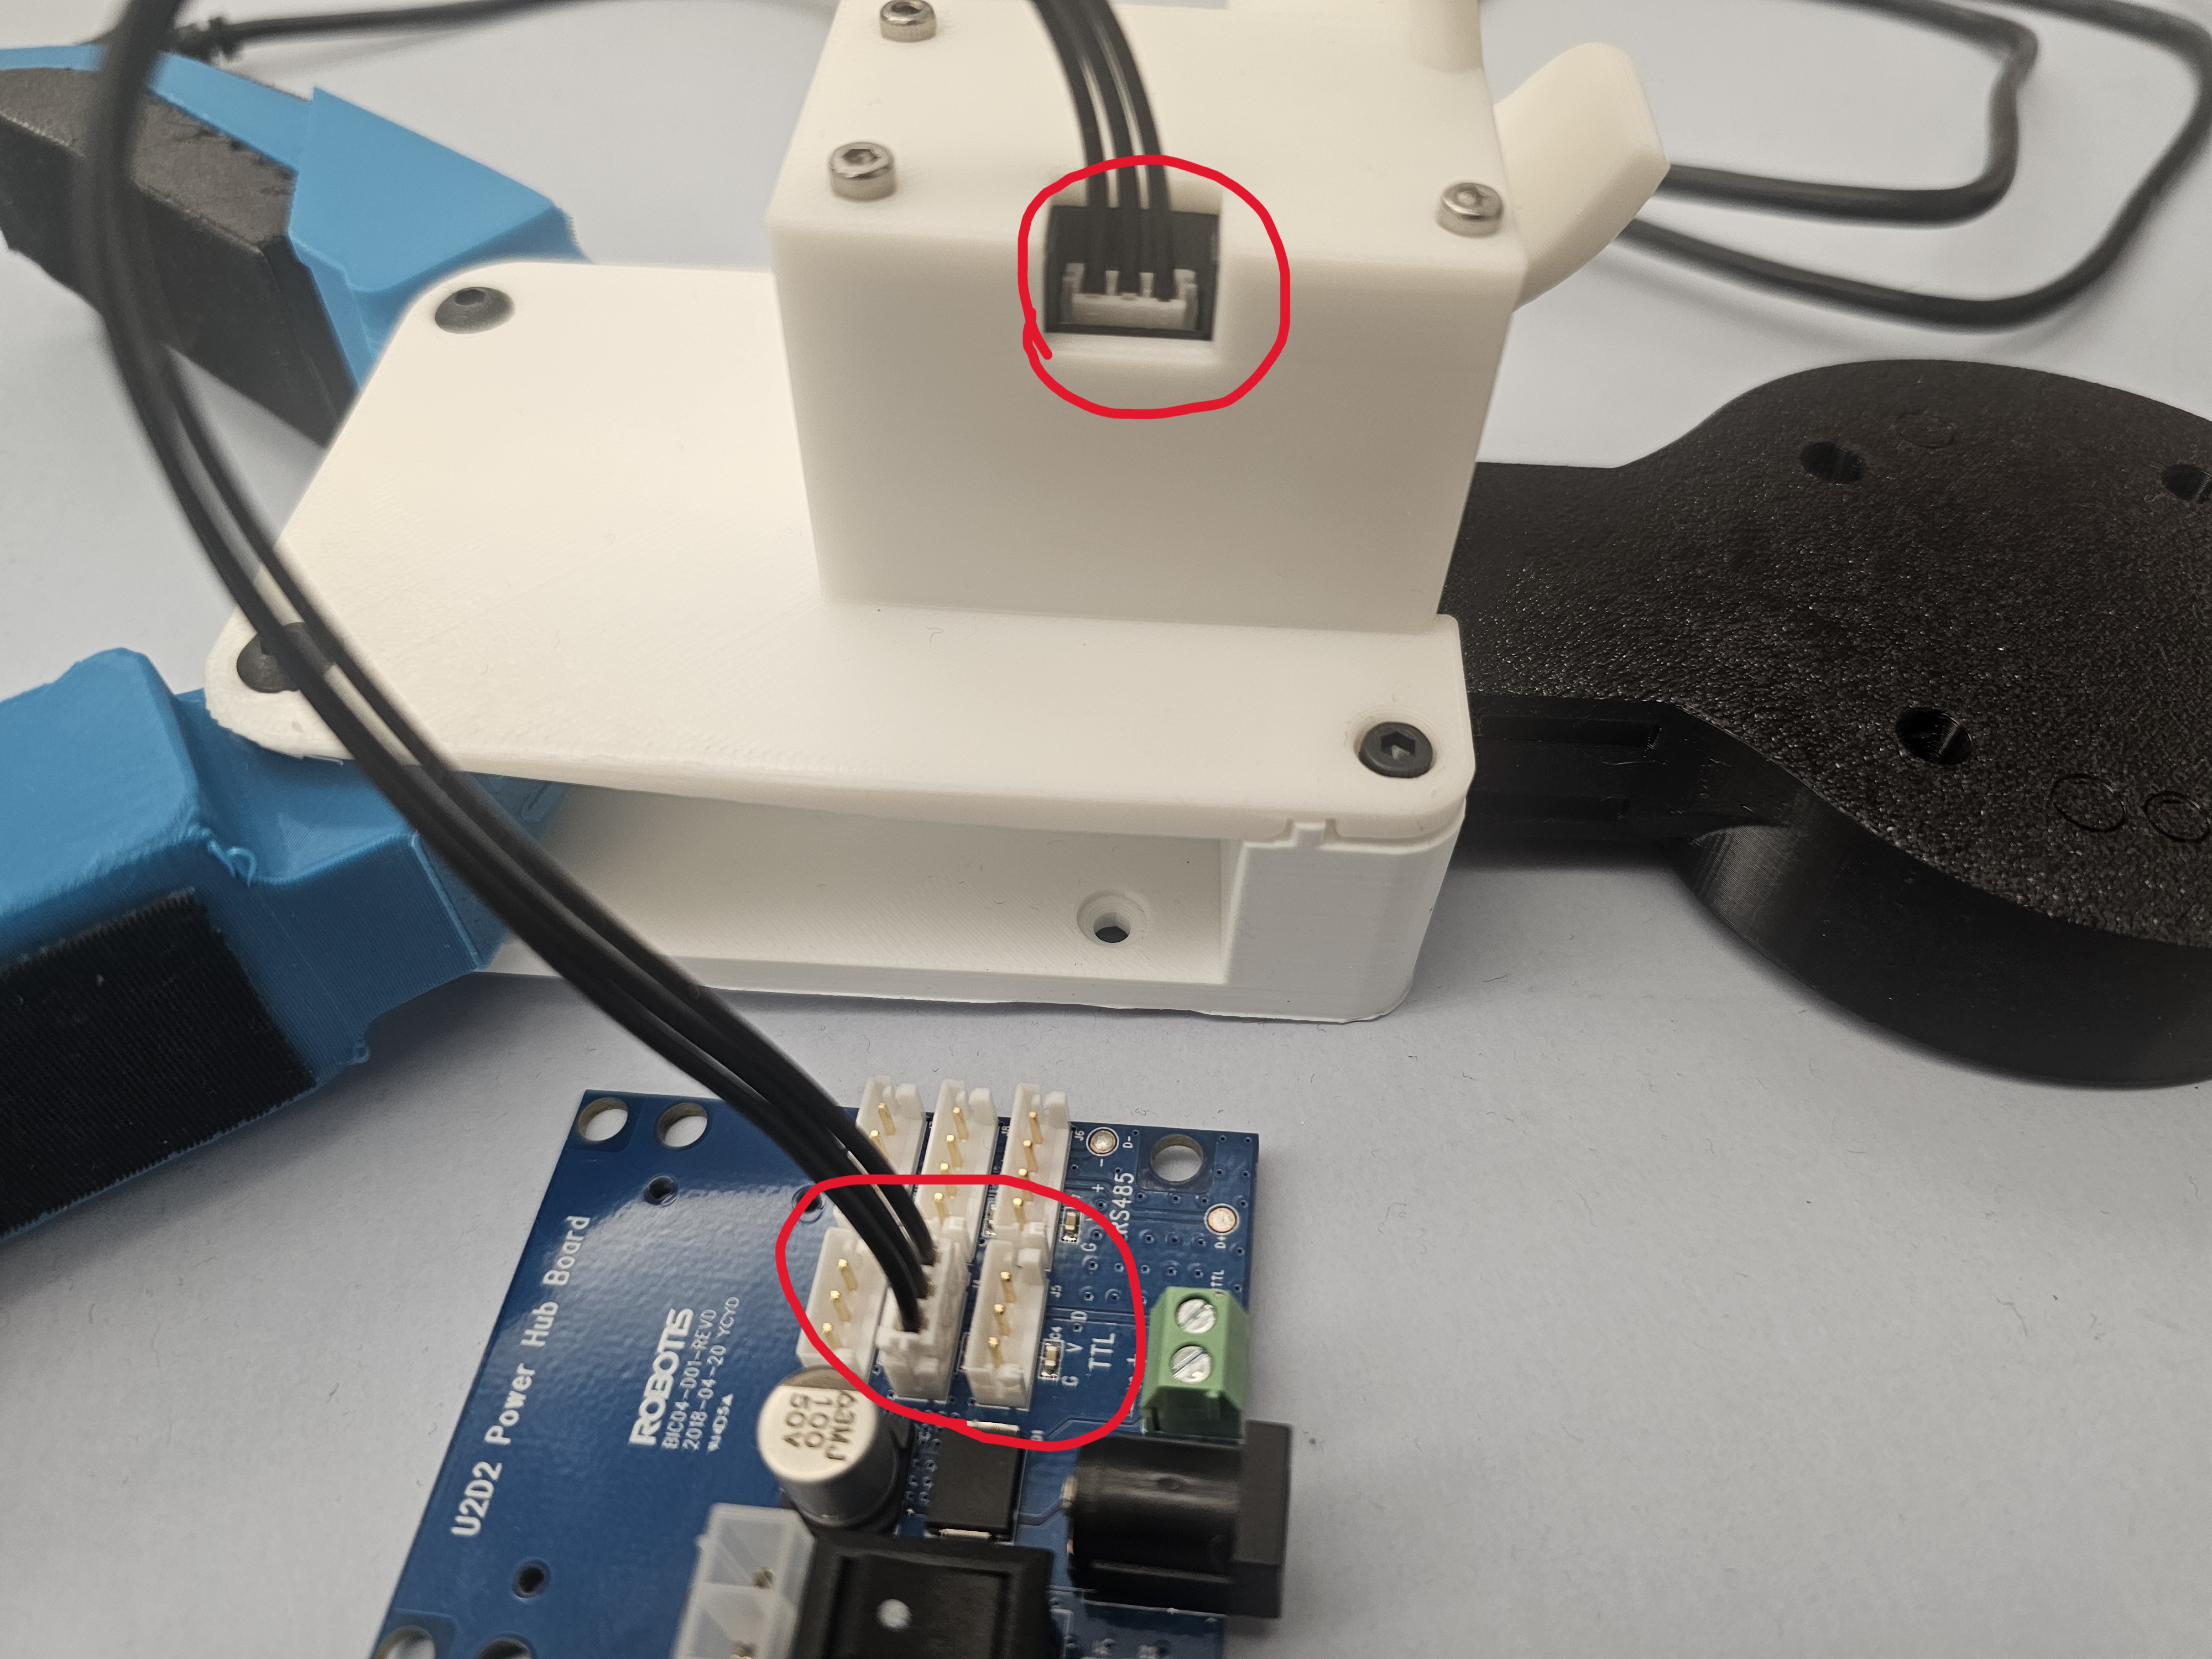
1. Connect the Dynamixel Motor to the U2D2 Power Hub. You will hear a clicking sound when connected:
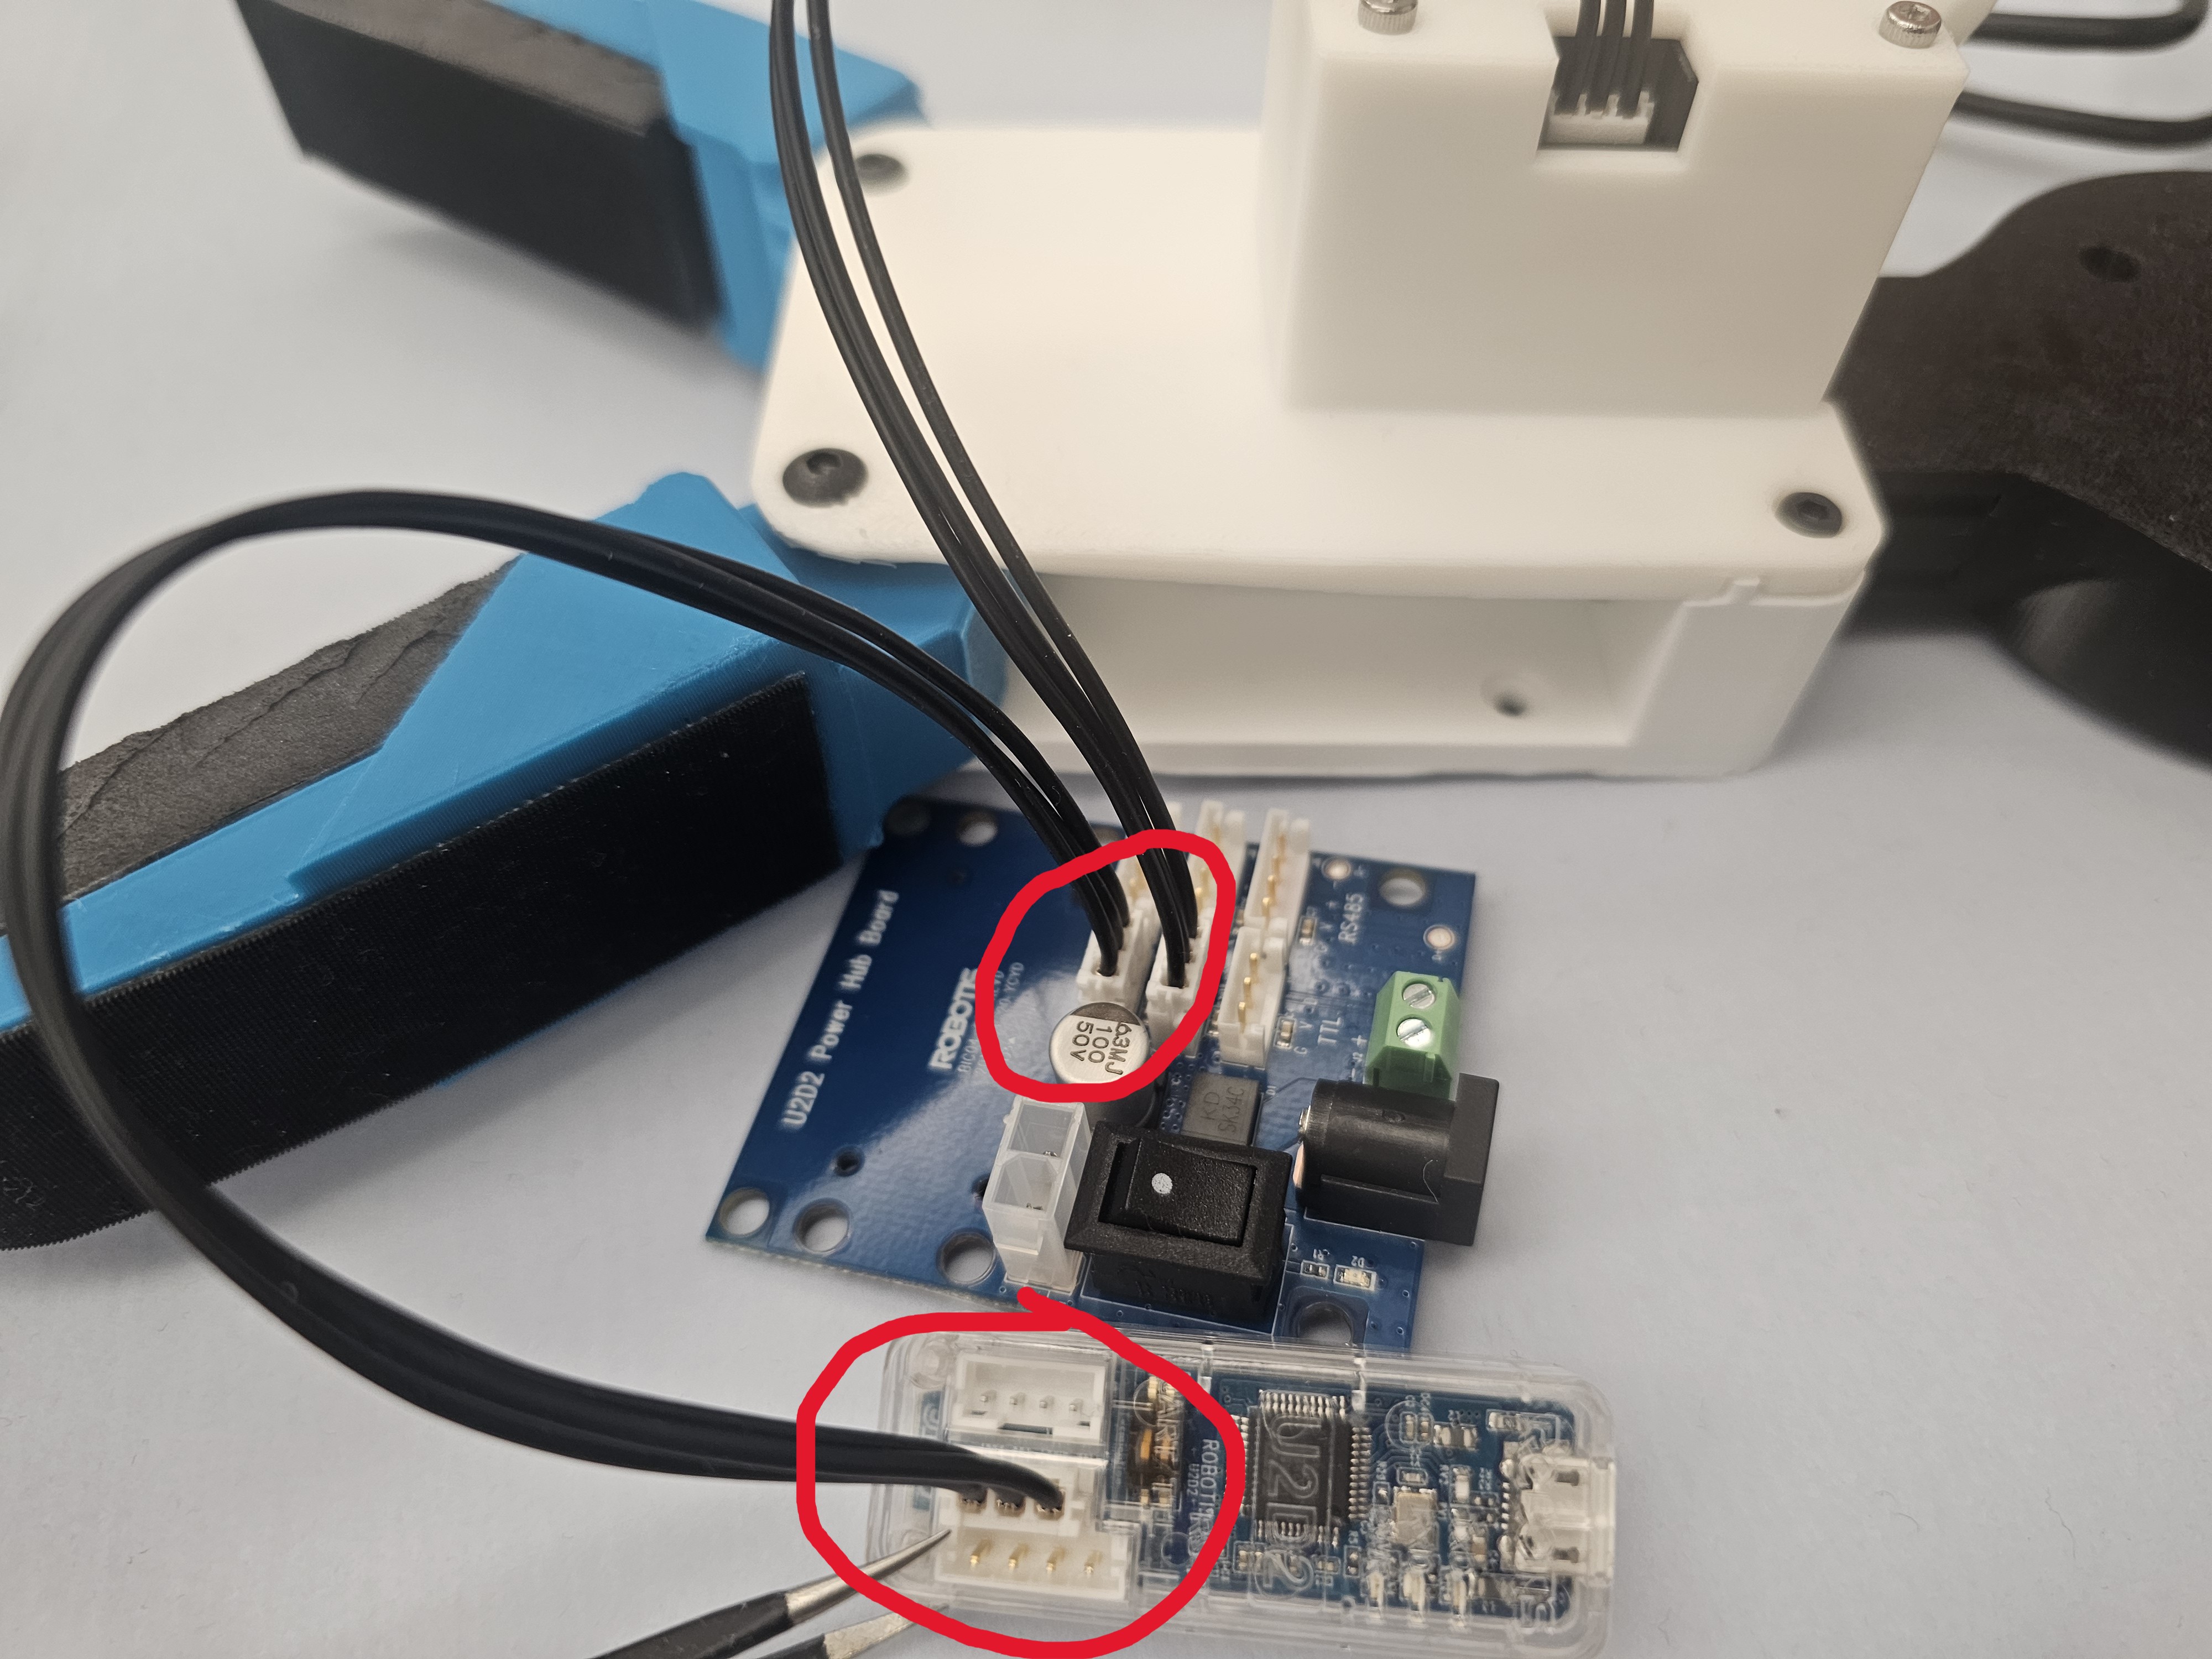
2. Connect the Power Hub to the U2D2 Board
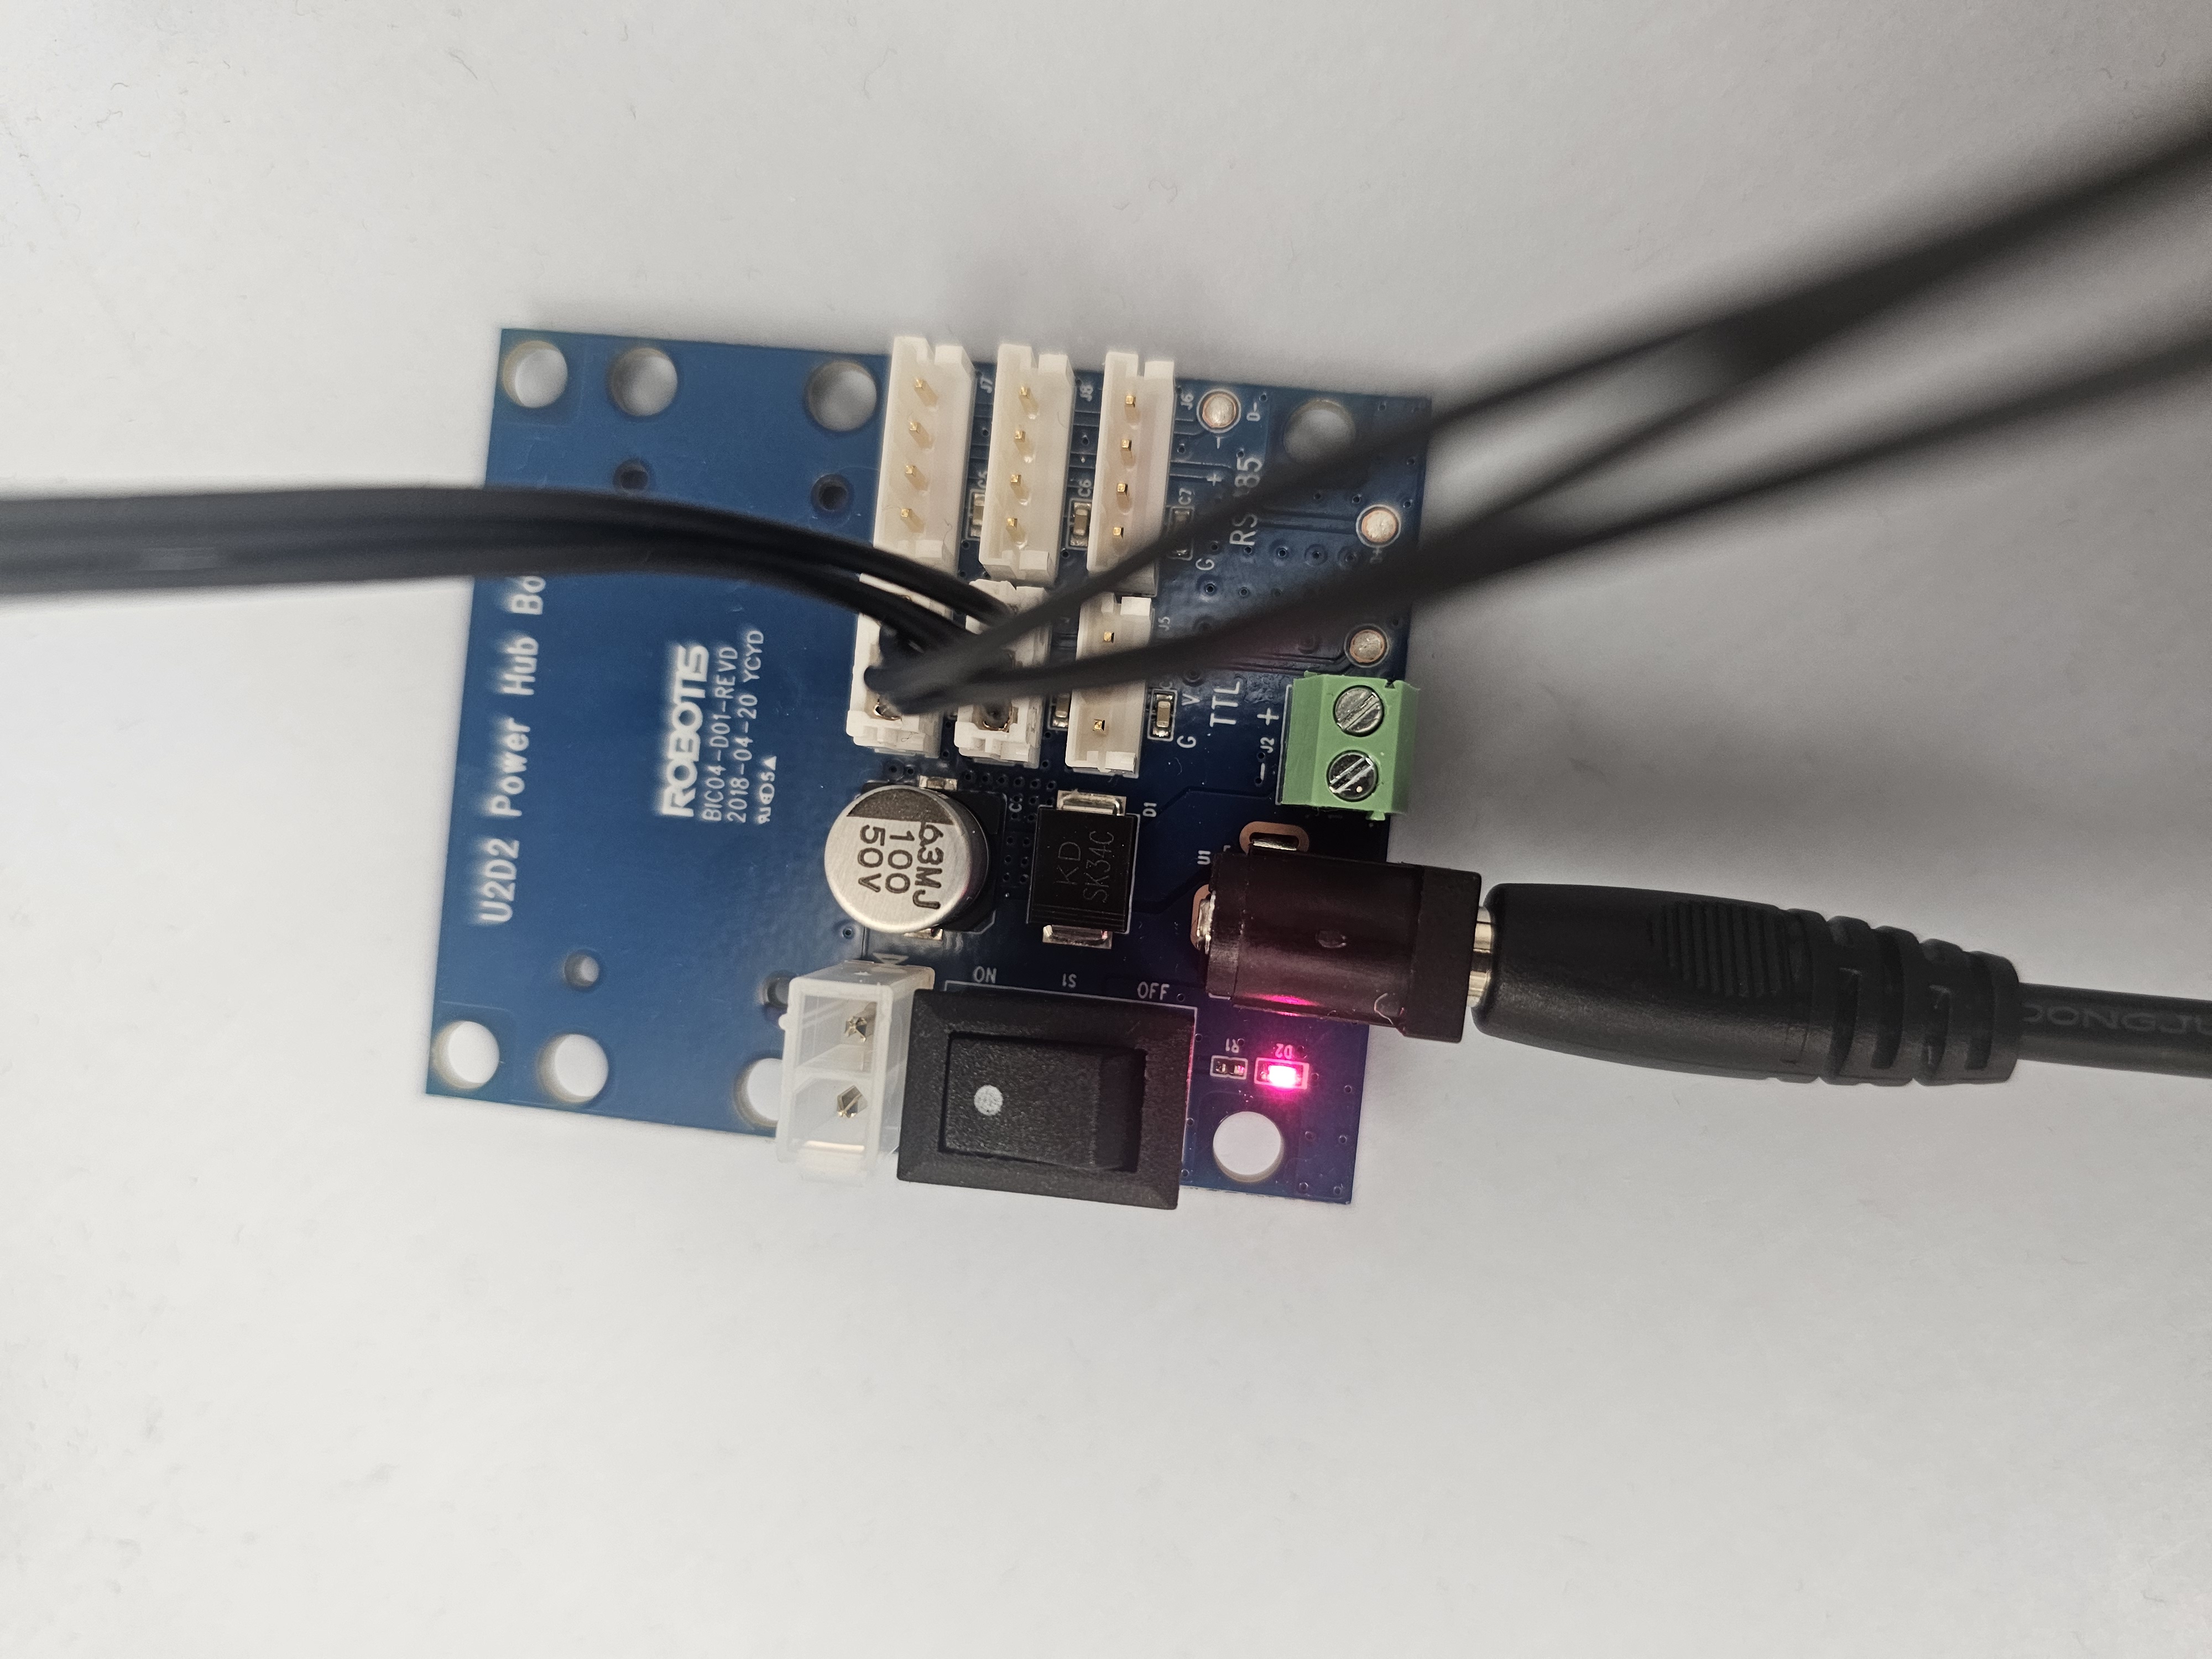
3. Connect the U2D2 and your computer with the USB cable. A red light will turn on.
4. Plug the 12V 5A power supply into the U2D2 Power Hub board and switch on the power. A red LED should turn on.
Go to the `robot-server` directory and run this script to initialize the gripper:
```bash
cd robot-server
python gripper_init.py
```
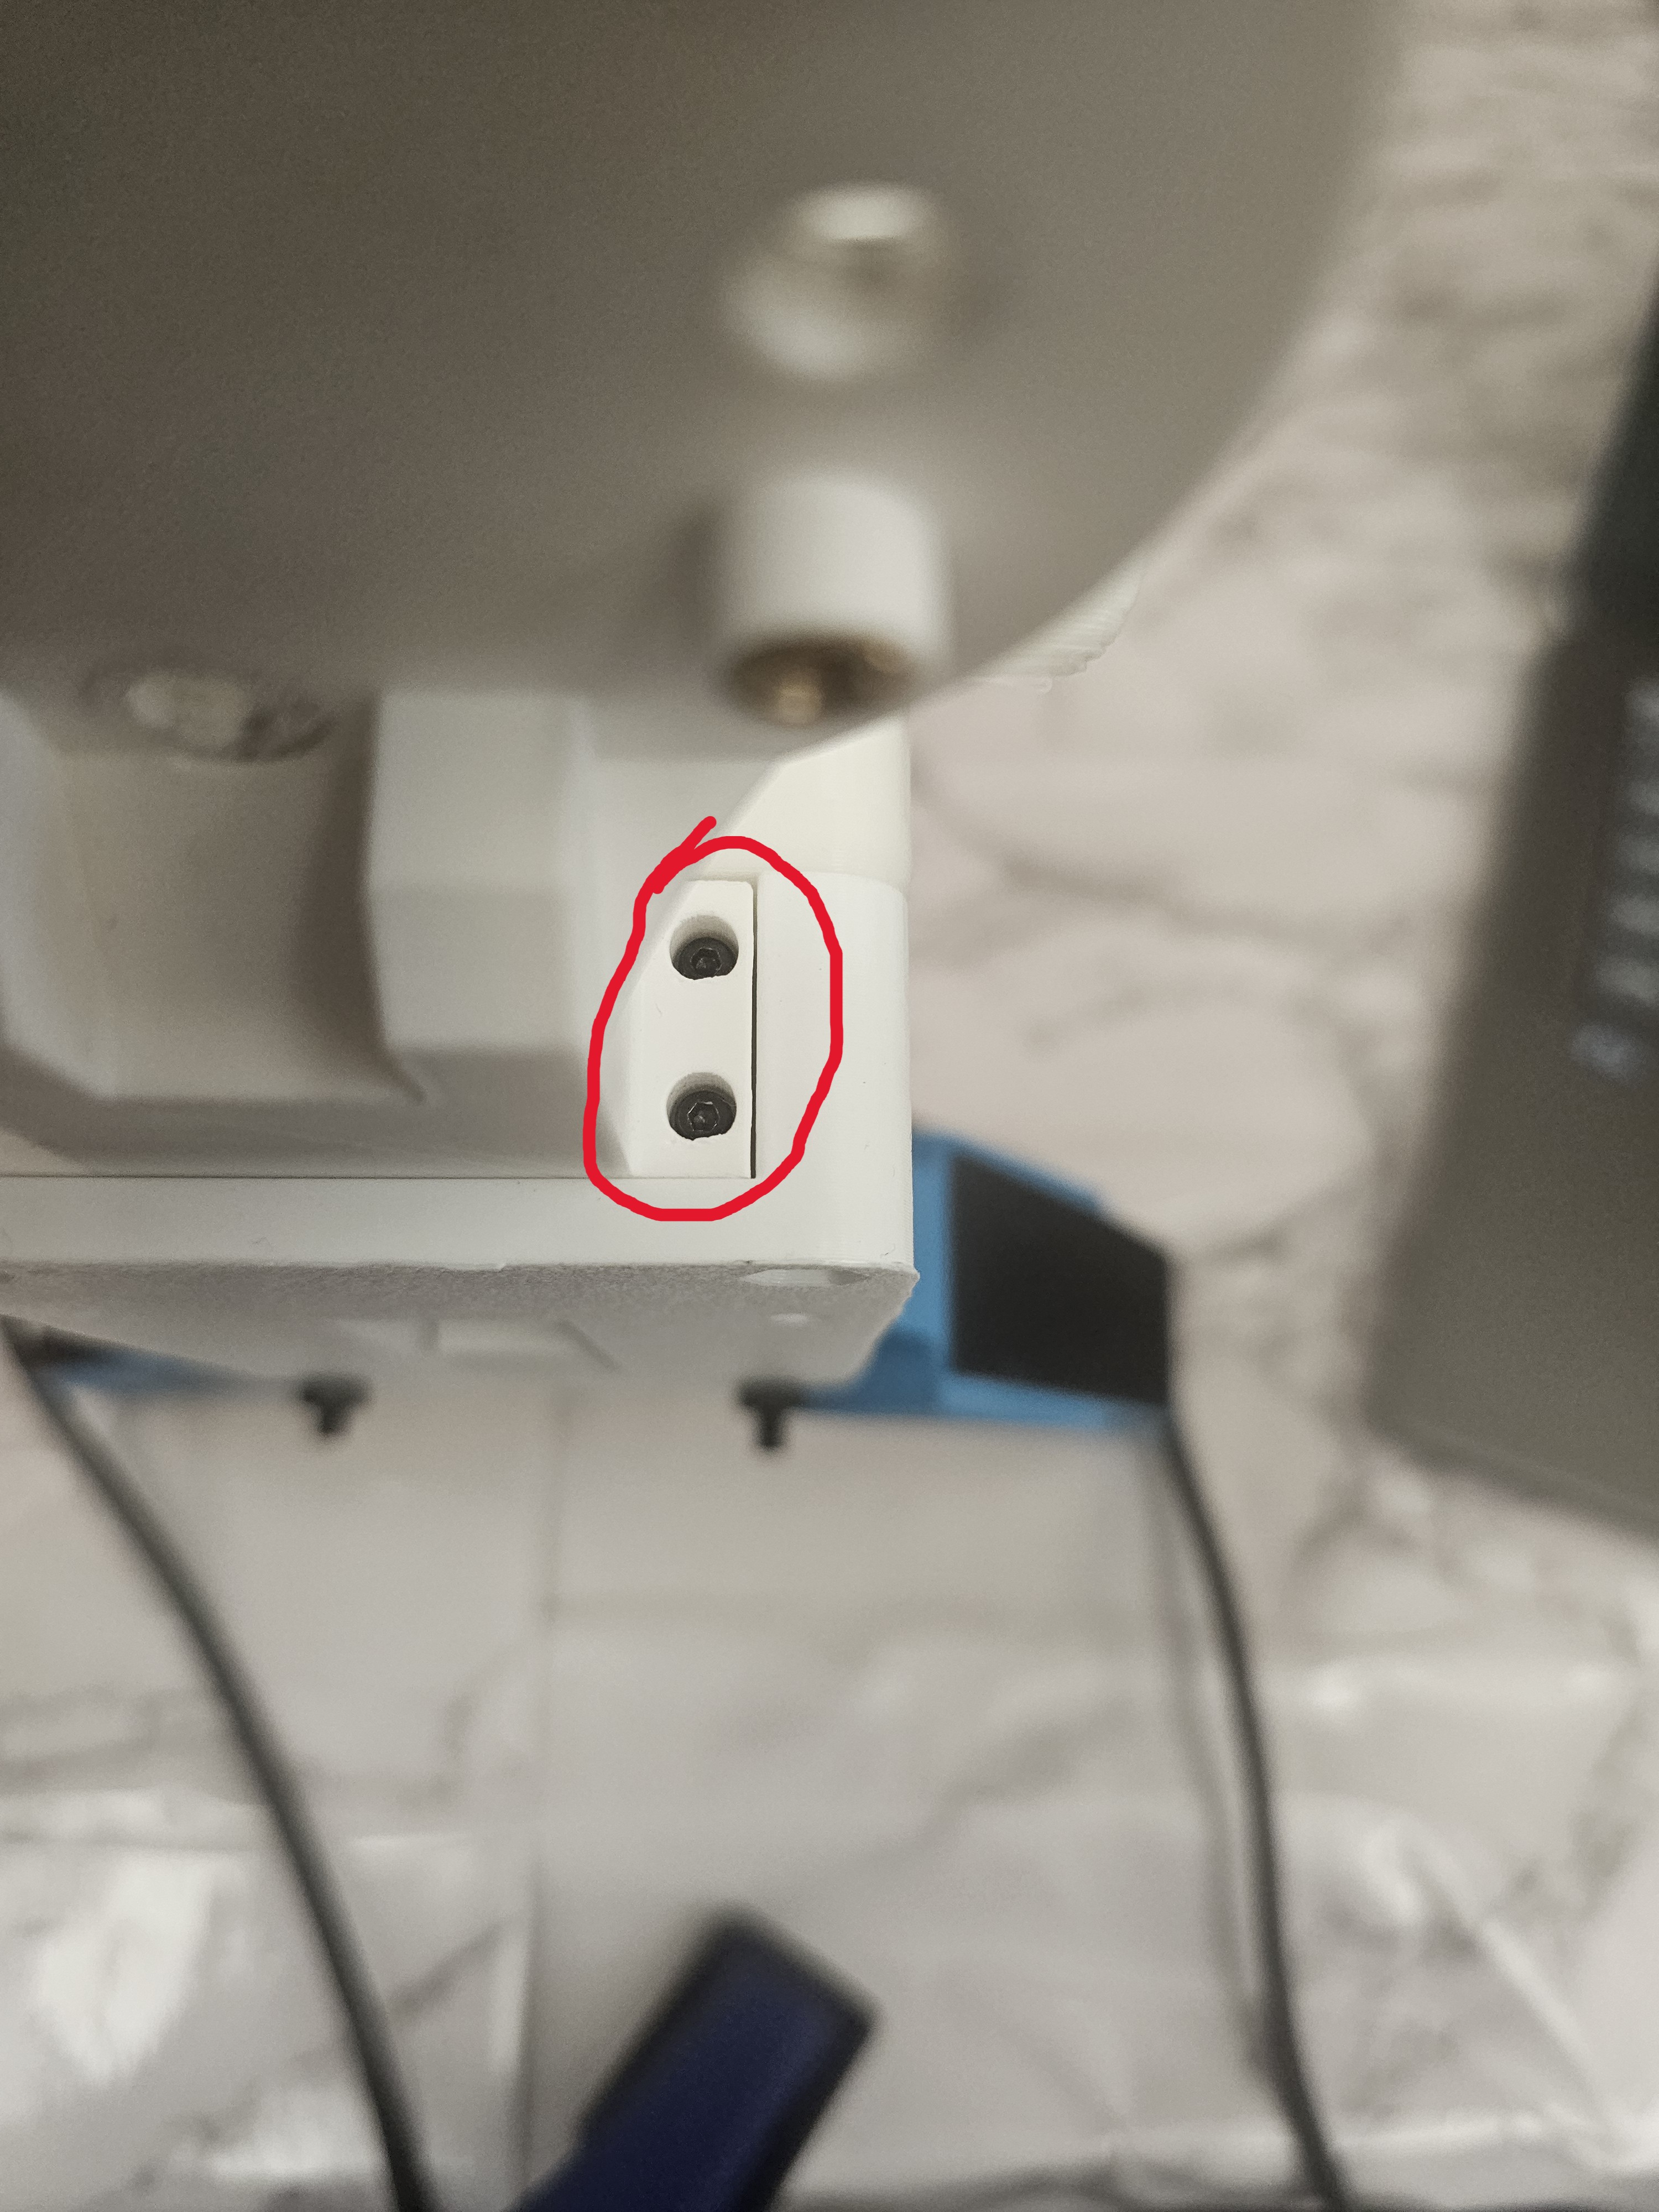
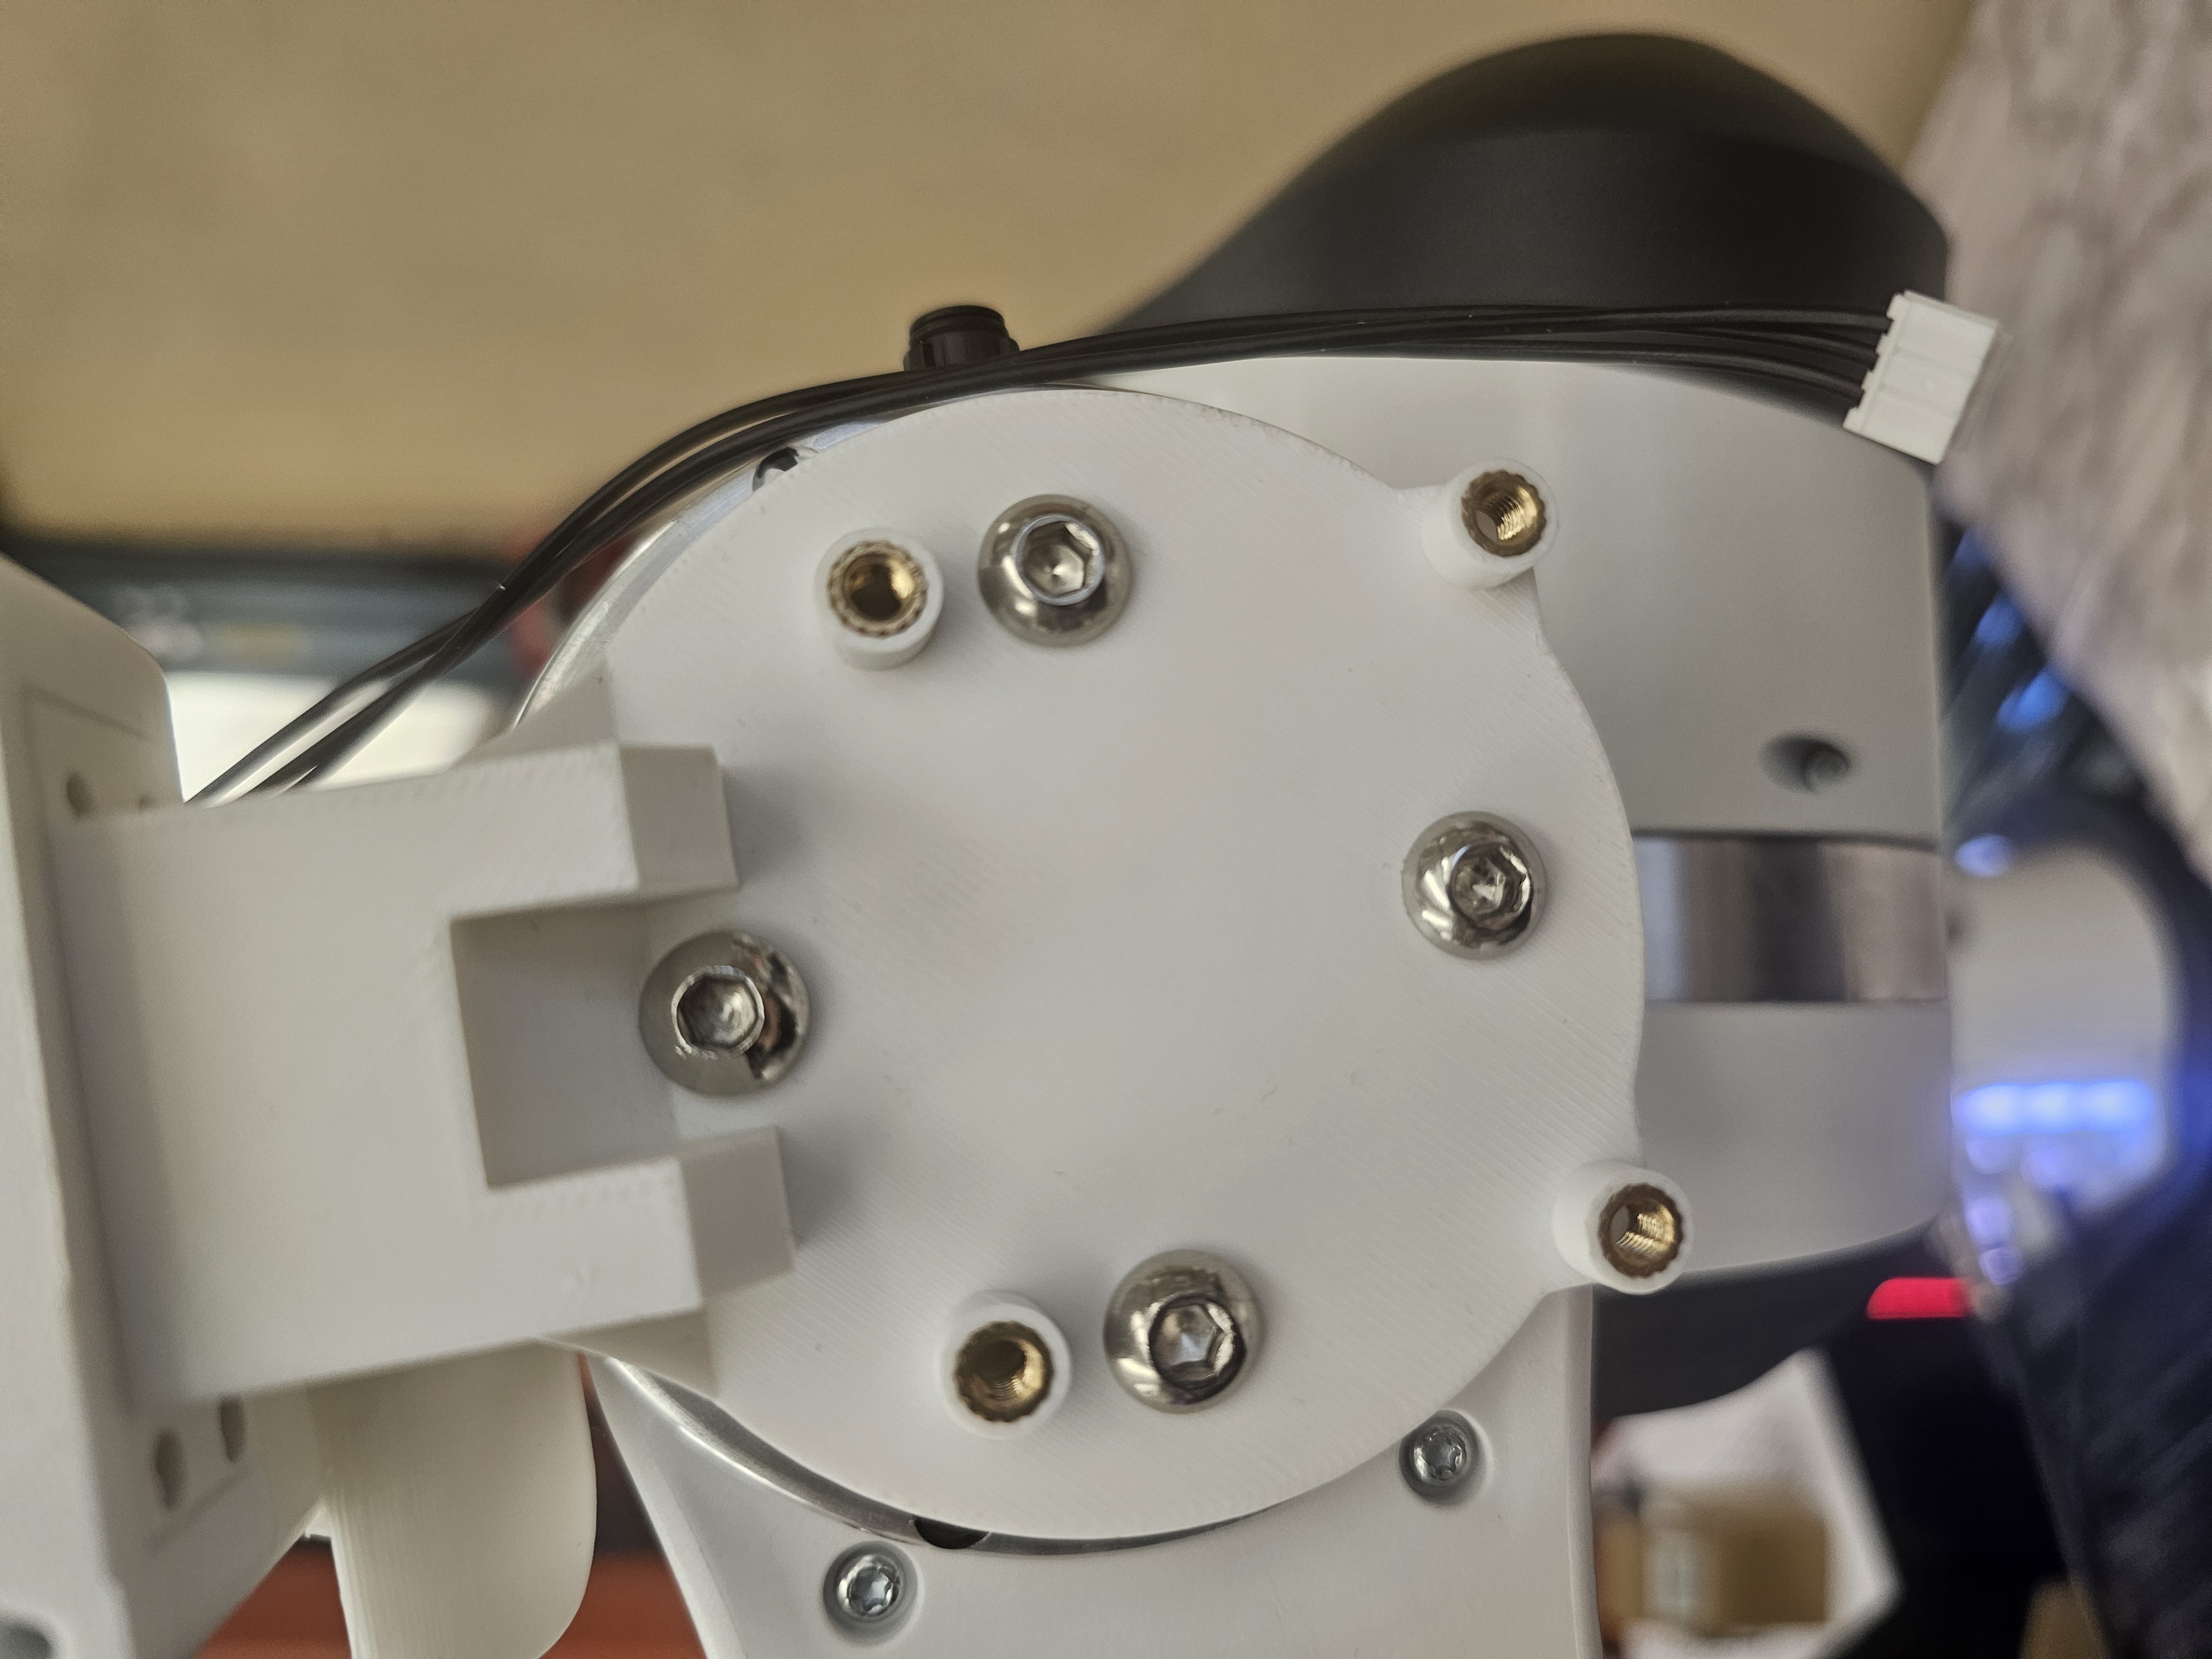
5. **Attach gripper to the mount** with M2.5 x 10mm screws
6. **Mount your 3D printed franka mount** with M6 x 10mm screws
## NUC Set-Up
1. **SSH into the NUC** hosting your Franka.
```bash
ssh -o LogLevel=ERROR -D 1337 user@nuc_IP
```
```
Host nuc
HostName (nuc_IP)
User ???
LogLevel ERROR
DynamicForward 1337
```
2. Setup Deoxys, select **0.13.3 for libfranka when prompted**
```bash
git clone git@github.com:NYU-robot-learning/deoxys_control.git
cd deoxys_control/deoxys
# Instructions from deoxys repo (this takes a while to build everything)
./InstallPackage
make -j build_deoxys=1
```
3. Input necessary IPs into the following config
```
./deoxys_control/deoxys/config/franka_config.yml
```
```yml
PC:
NAME: "lambda"
IP: ??? ## <<<<<<
NUC:
NAME: "nuc"
IP: ??? ## <<<<<<
PUB_PORT: 5566
SUB_PORT: 5565
GRIPPER_PUB_PORT: 5568
GRIPPER_SUB_PORT: 5567
ROBOT:
IP: ??? ## <<<<<<
...
```
4. Run the following from the **deoxys** directory to start deoxys server.
* Errors will repeat until the next section is complete
```bash
./auto_scripts/auto_arm.sh config/franka_config.yml
```
## Franka Setup
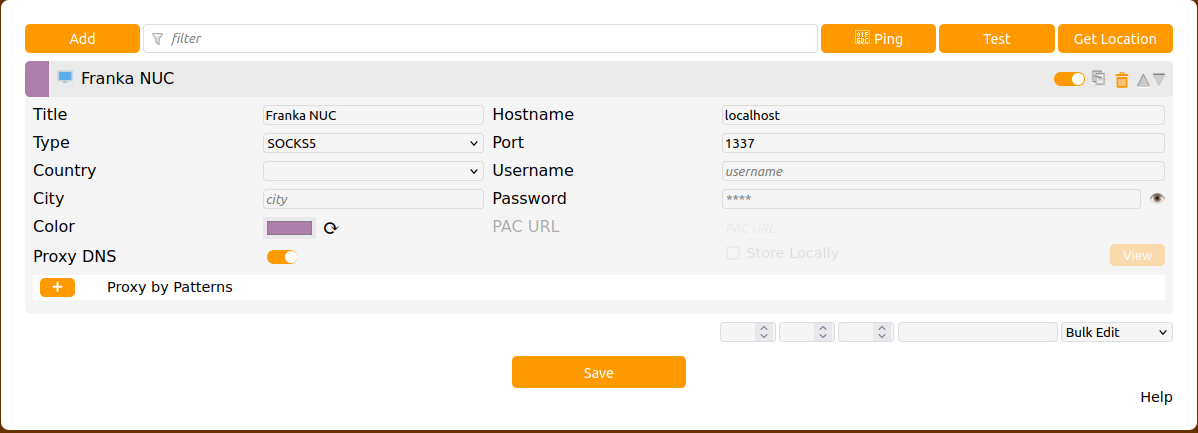
1. **Setup and activate a proxy** in your browser (e.g., FoxyProxy on Firefox).
* Example FoxyProxy config:
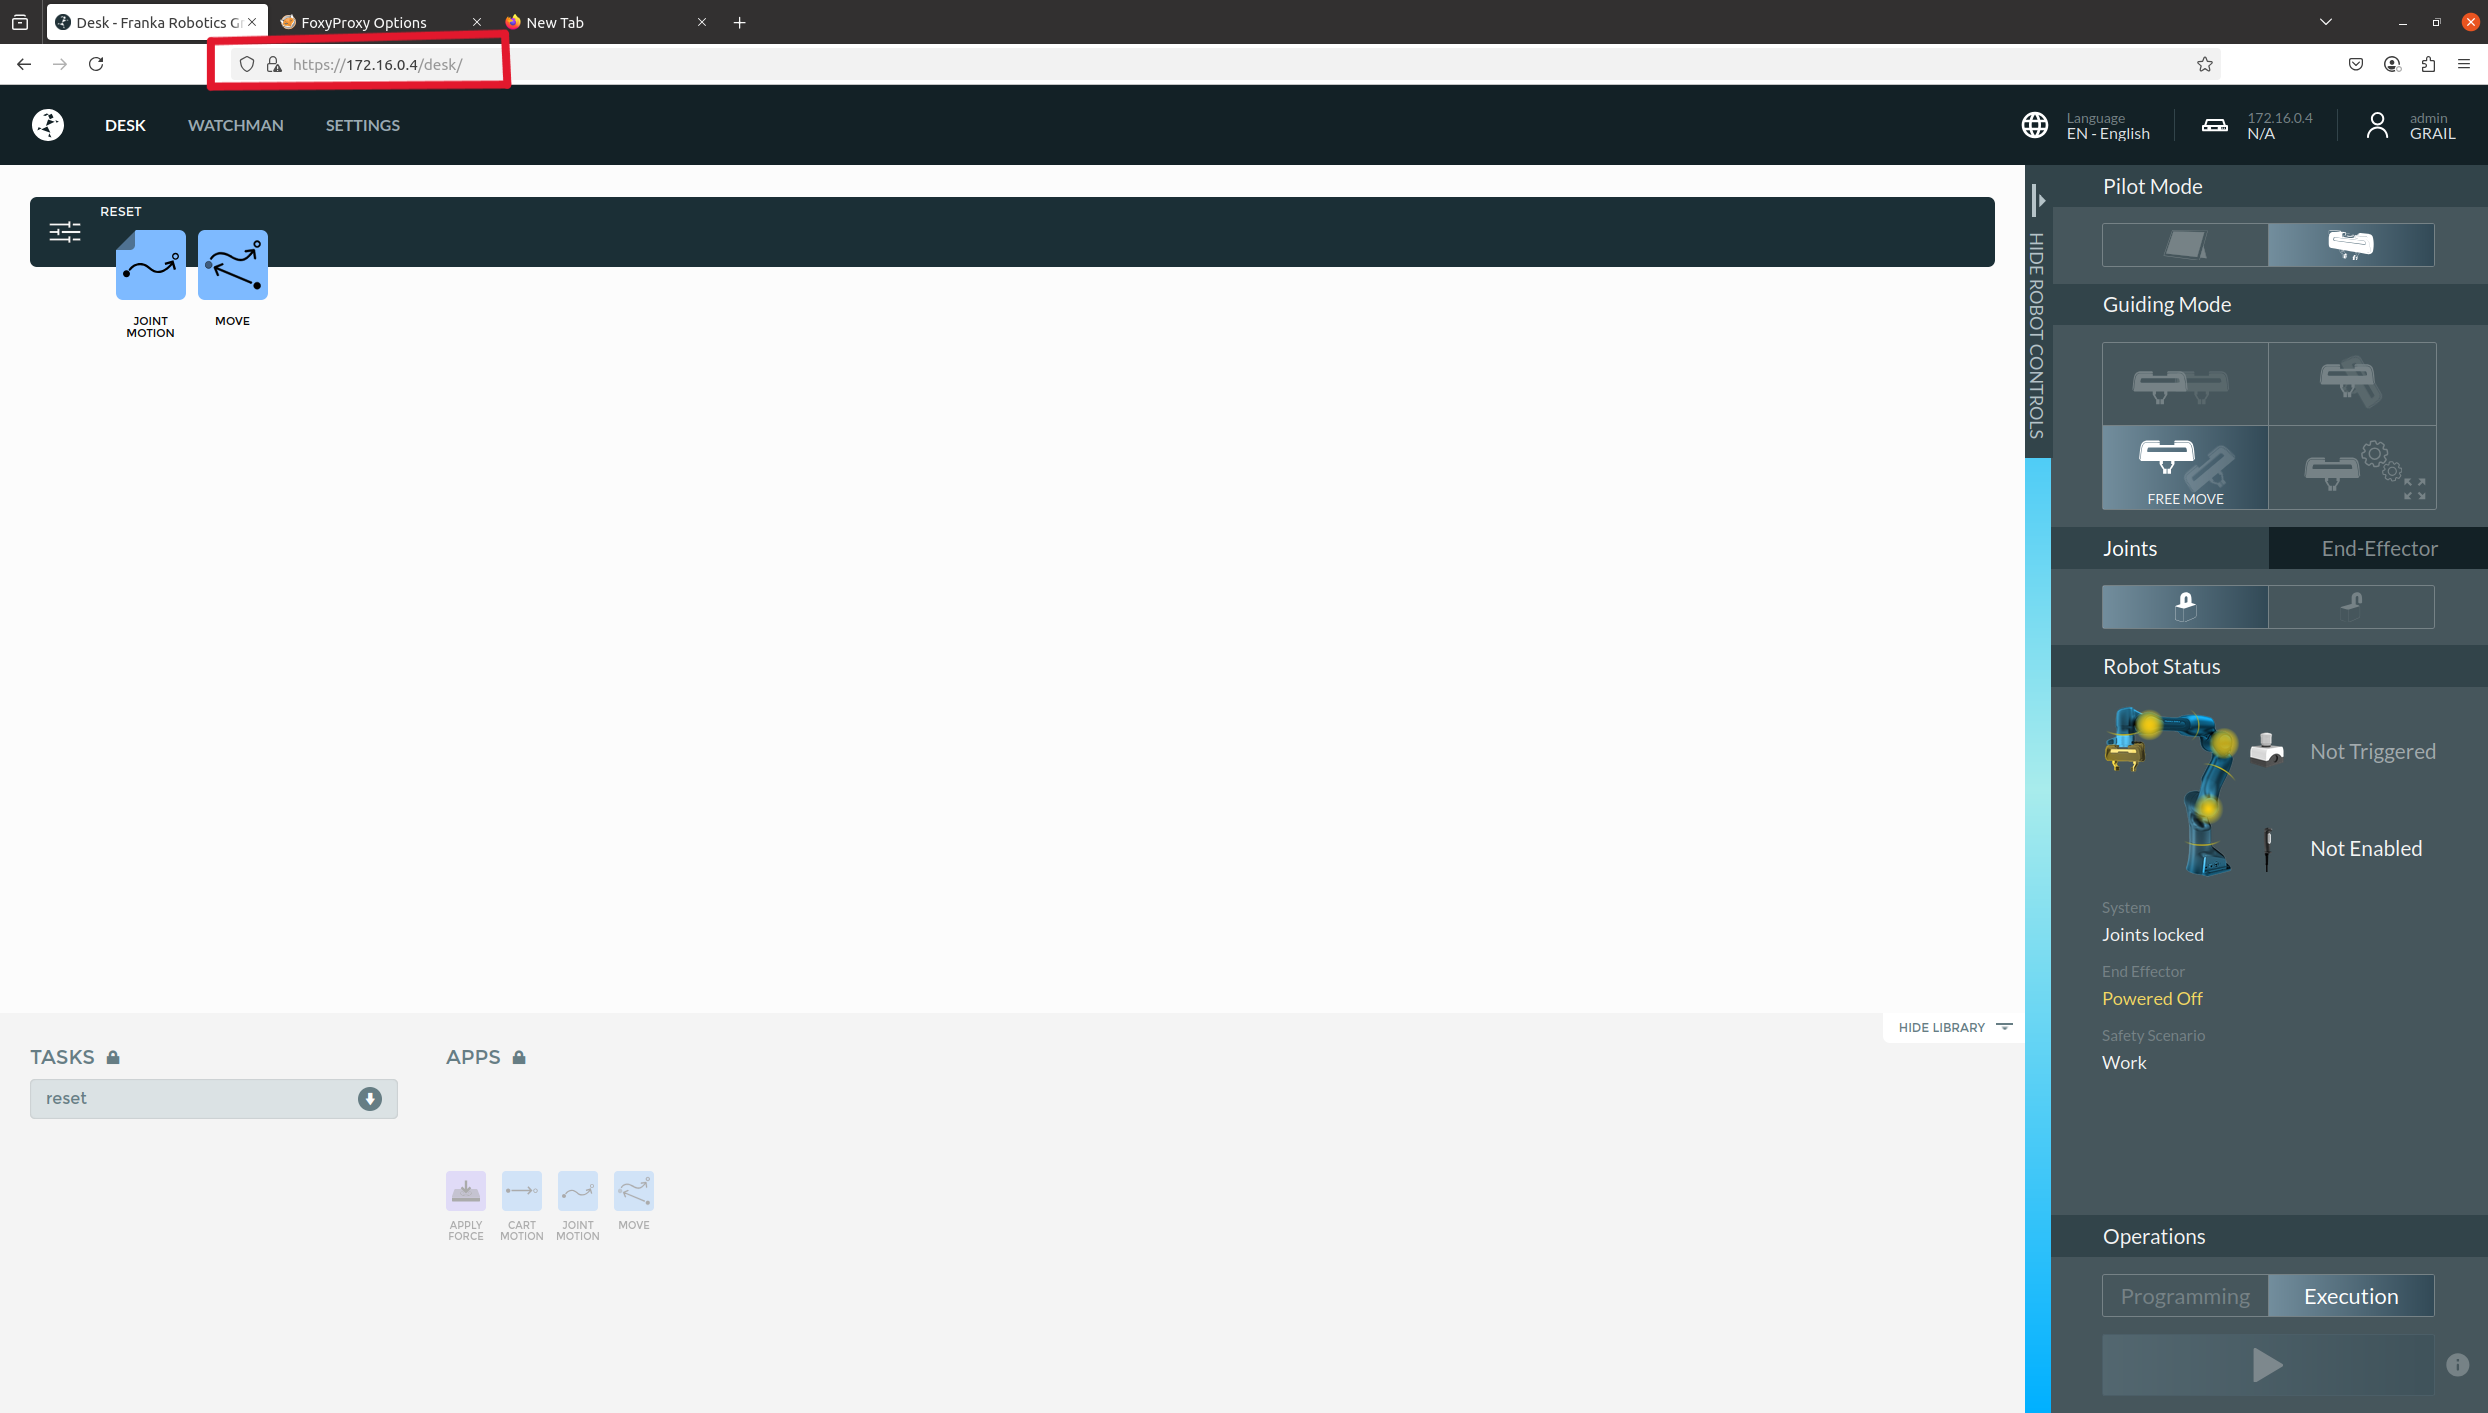
2. **Connect to Franka Desk** using the Franka IP inputted into the config.
* Where the URL is, you'll see the input is an IP:
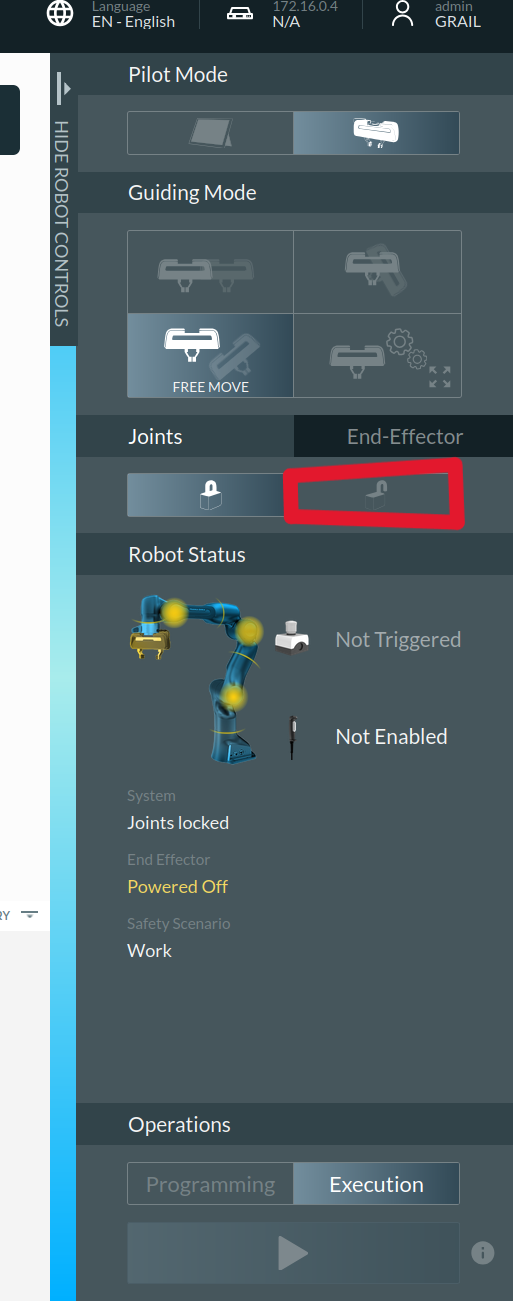
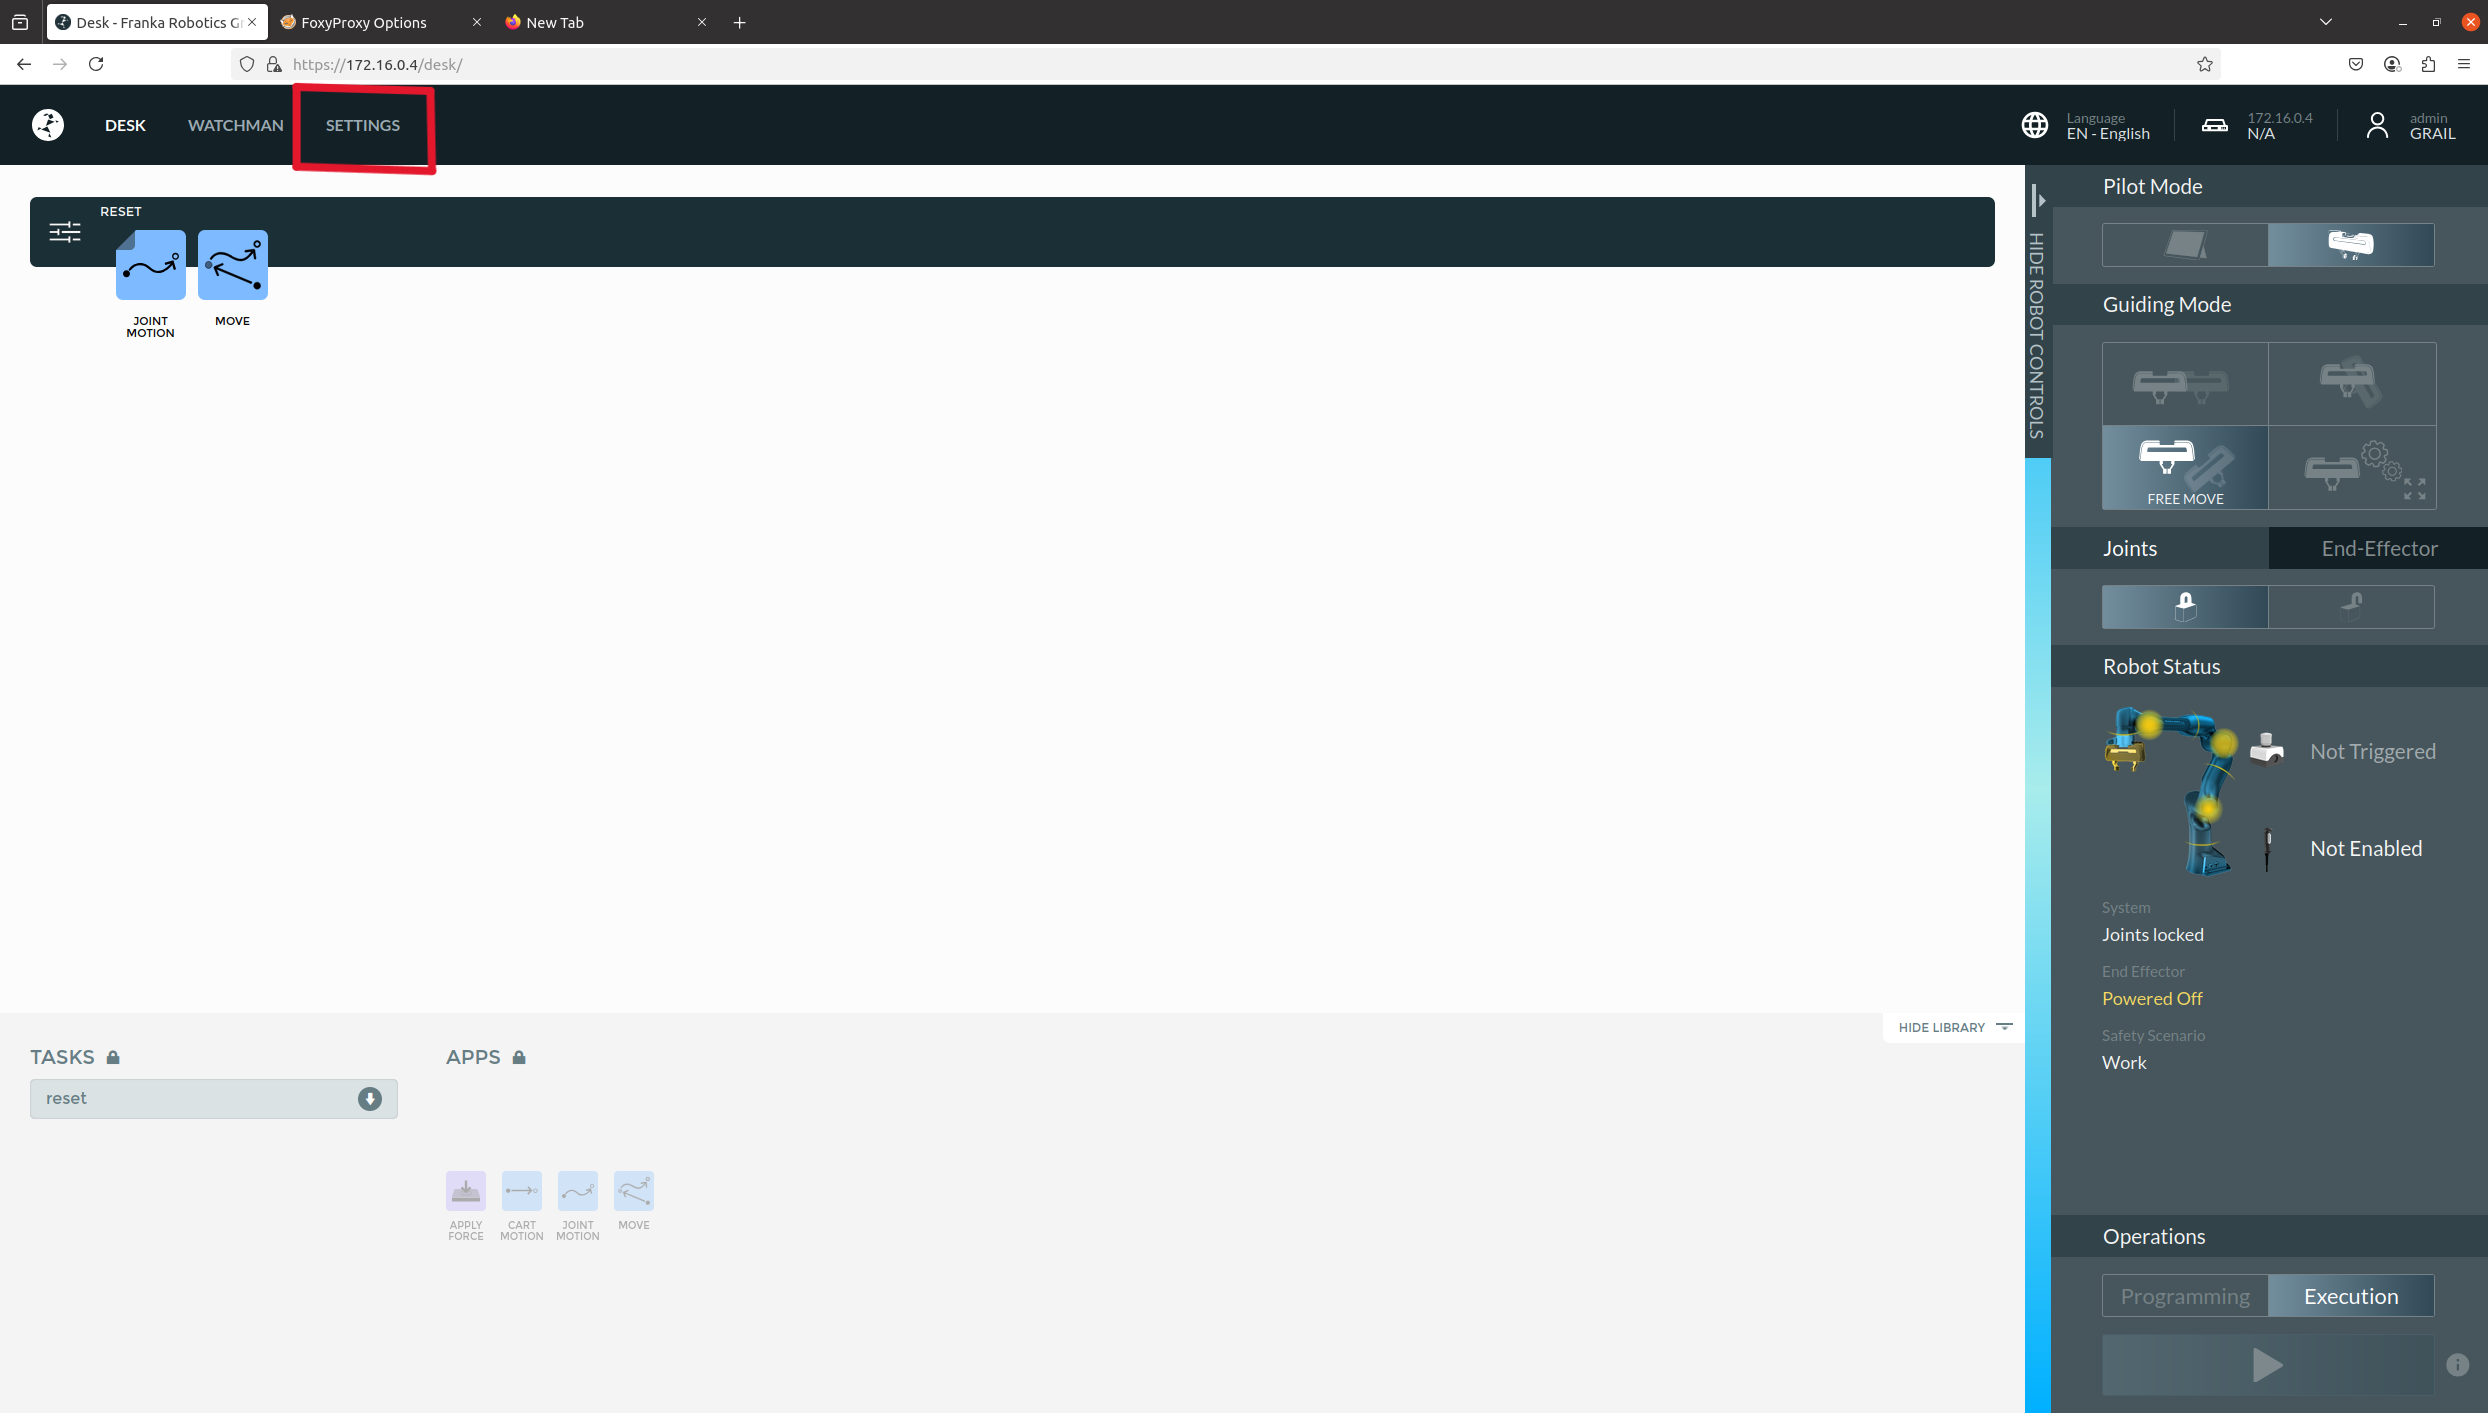
3. **Unlock the joints** in Franka Desk (open lock icon under the Joints tab).
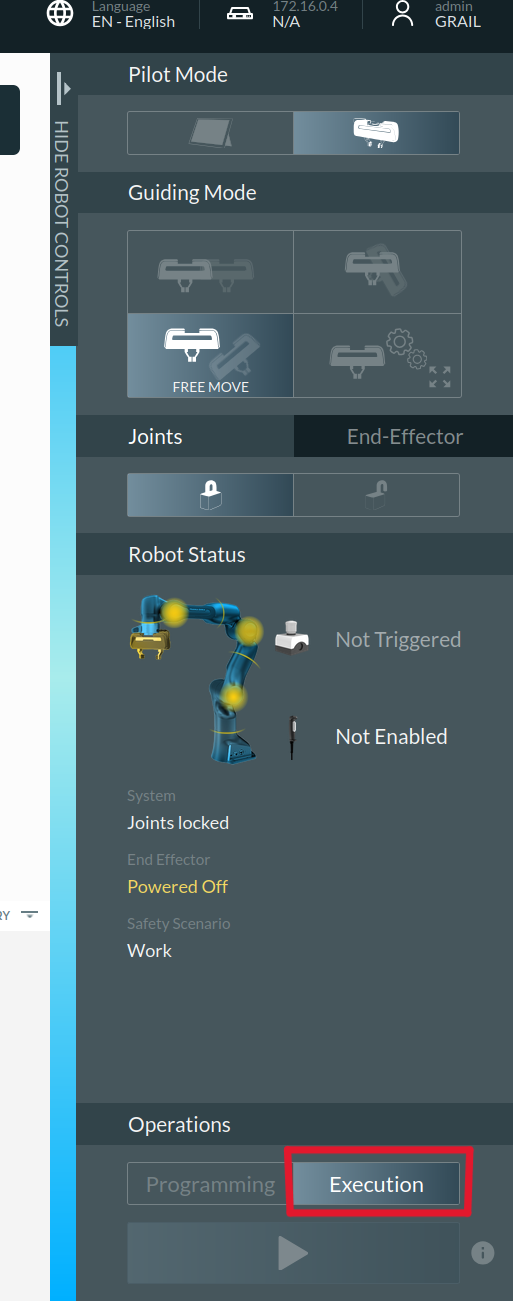
4. Set **Execution mode** (bottom-right in the UI).
5. **Activate FCI mode**:
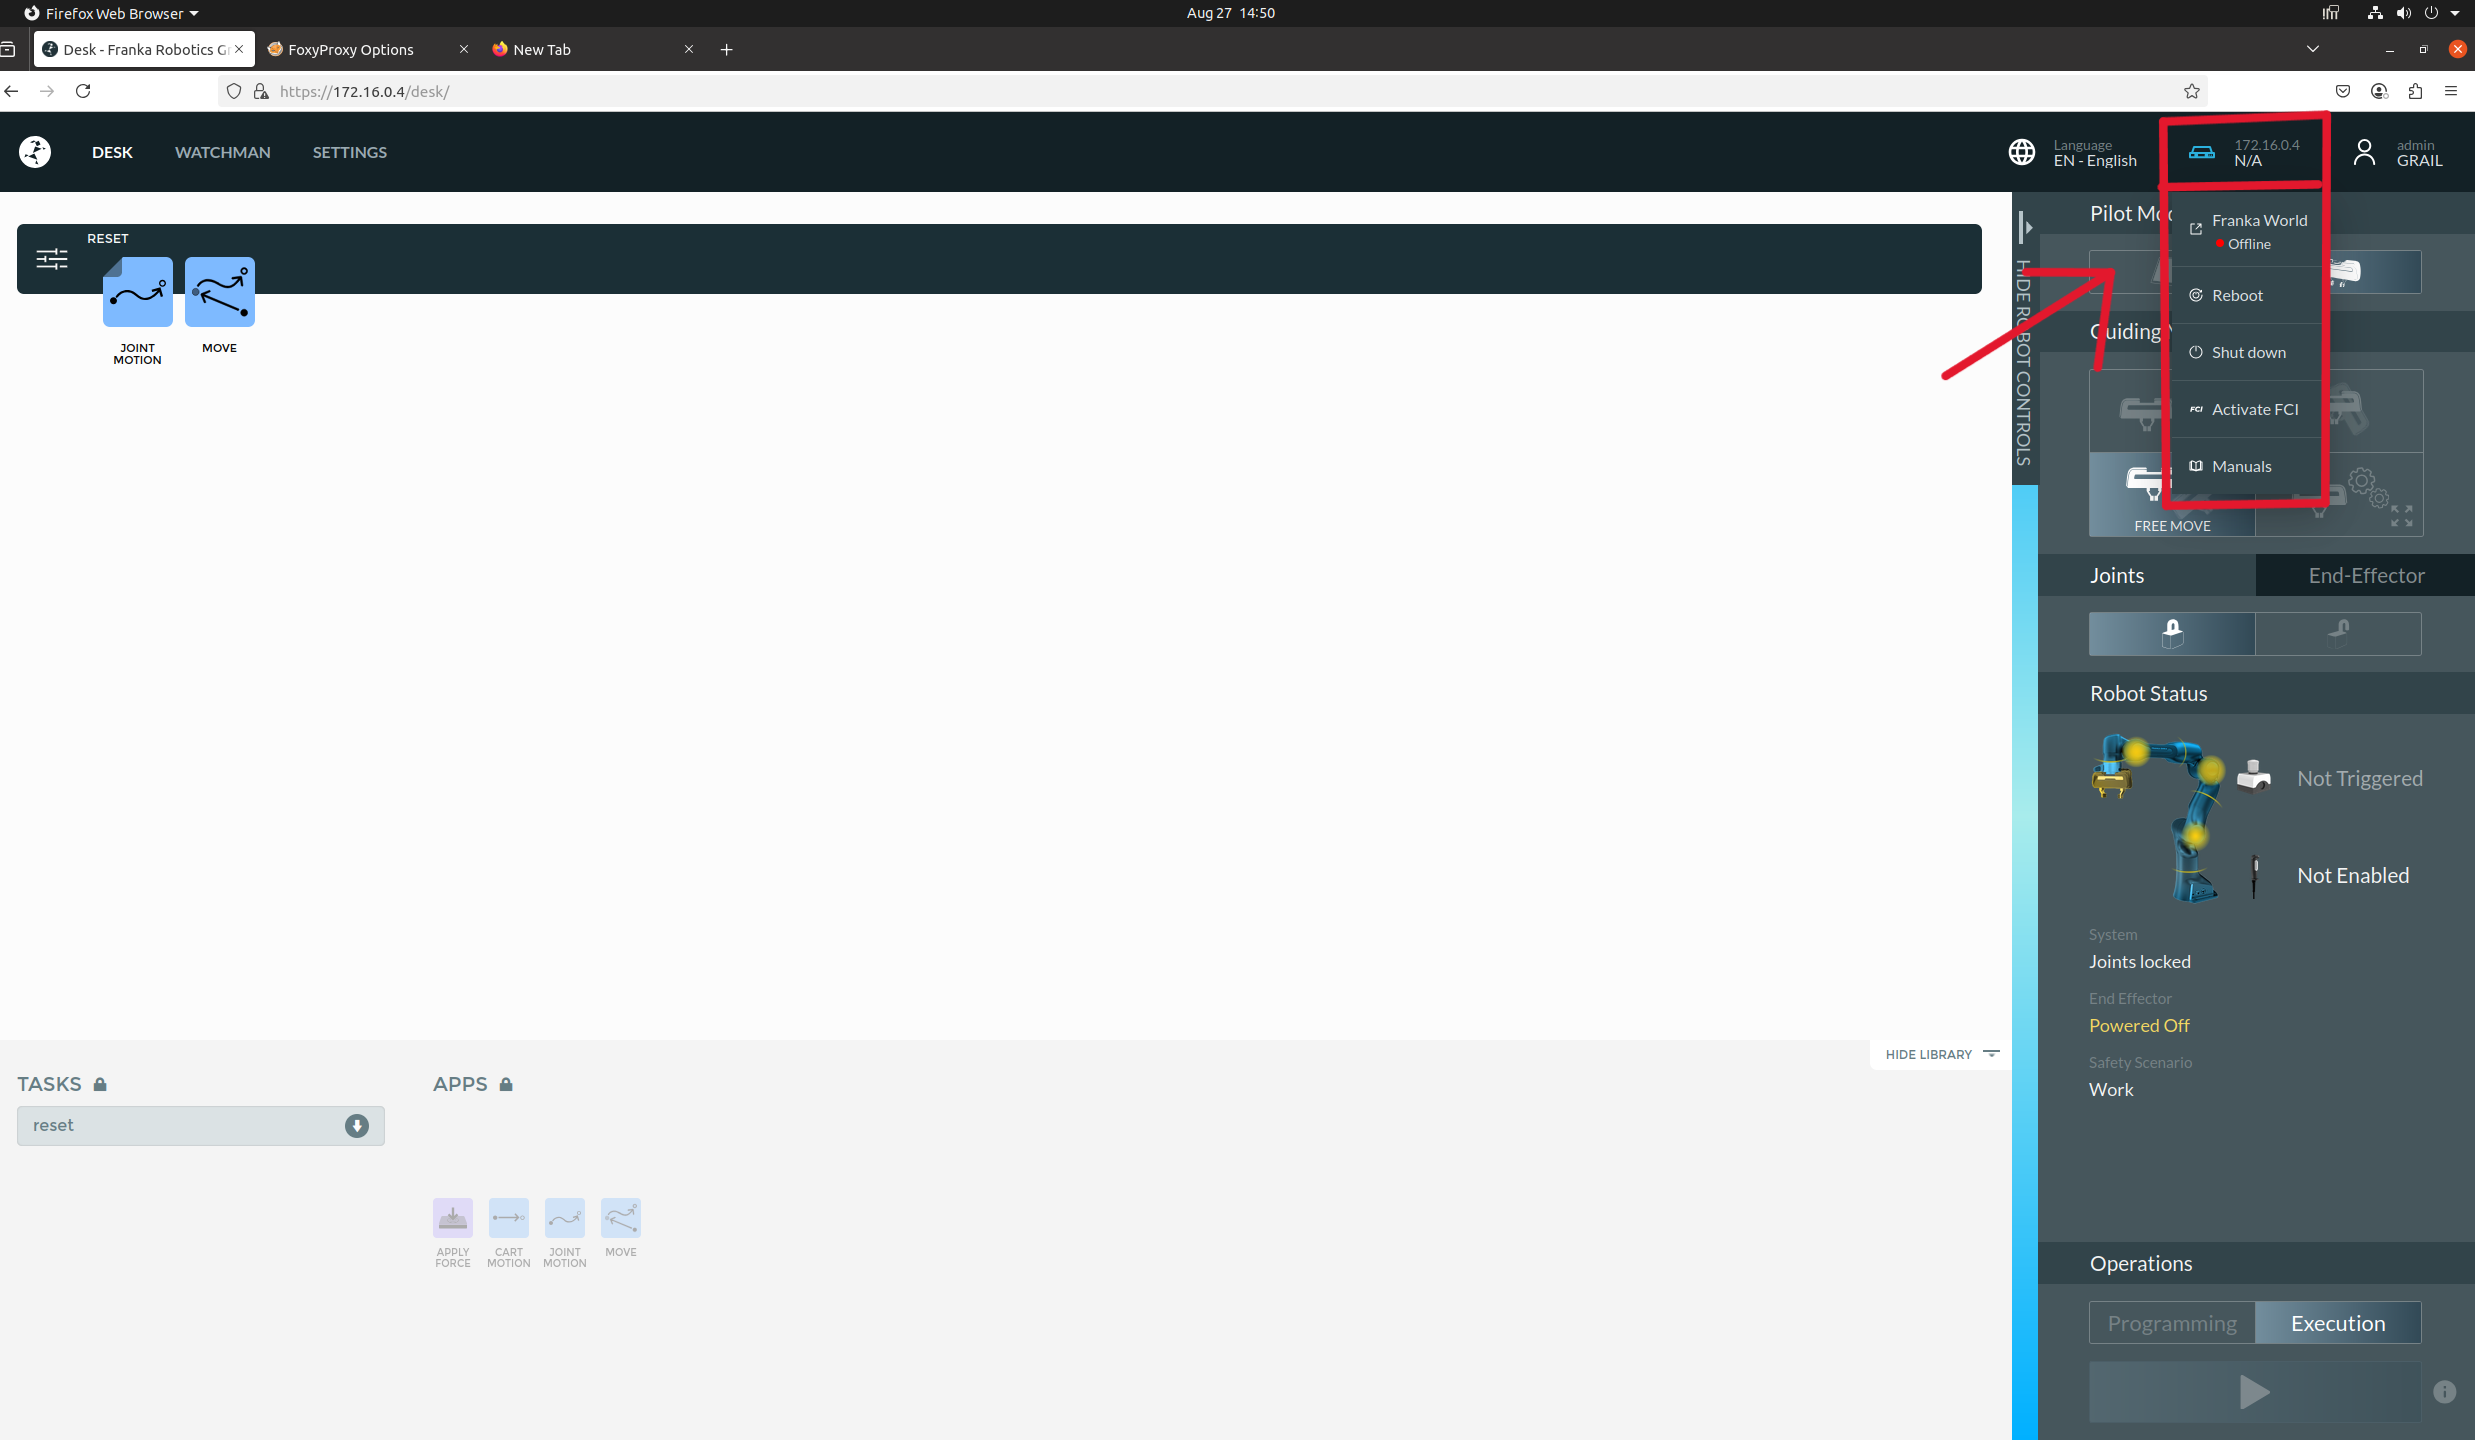
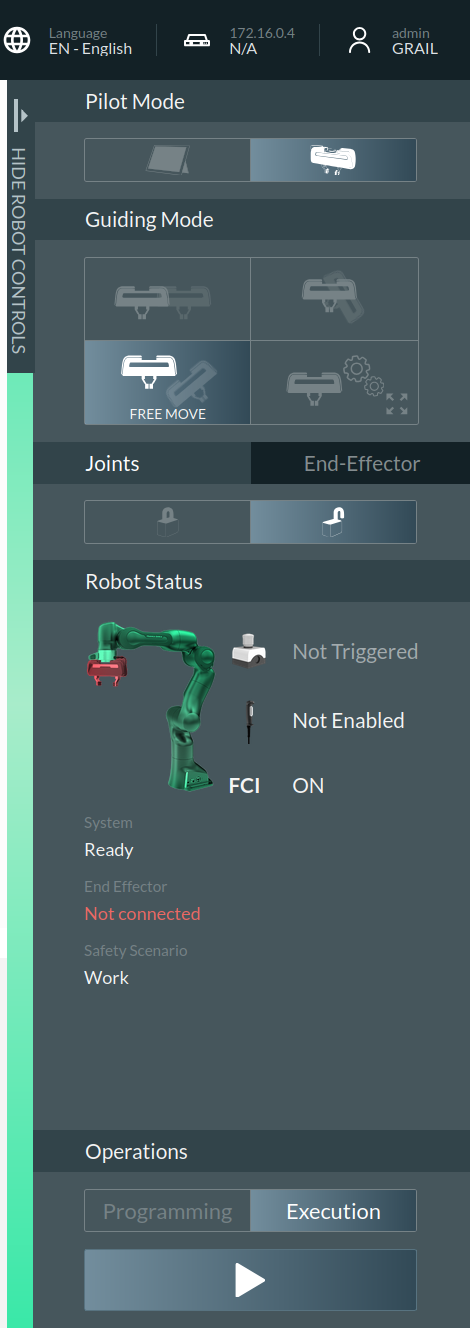
* Click the **IP** (top-right) → **Activate FCI Mode**. The arm indicator should turn **green (Not guaranteed for all versions of Franka)**:
6. Review NUC SSH terminal that errors have stopped.
7. Download the Franka gripper profile below
{% file src="" %}
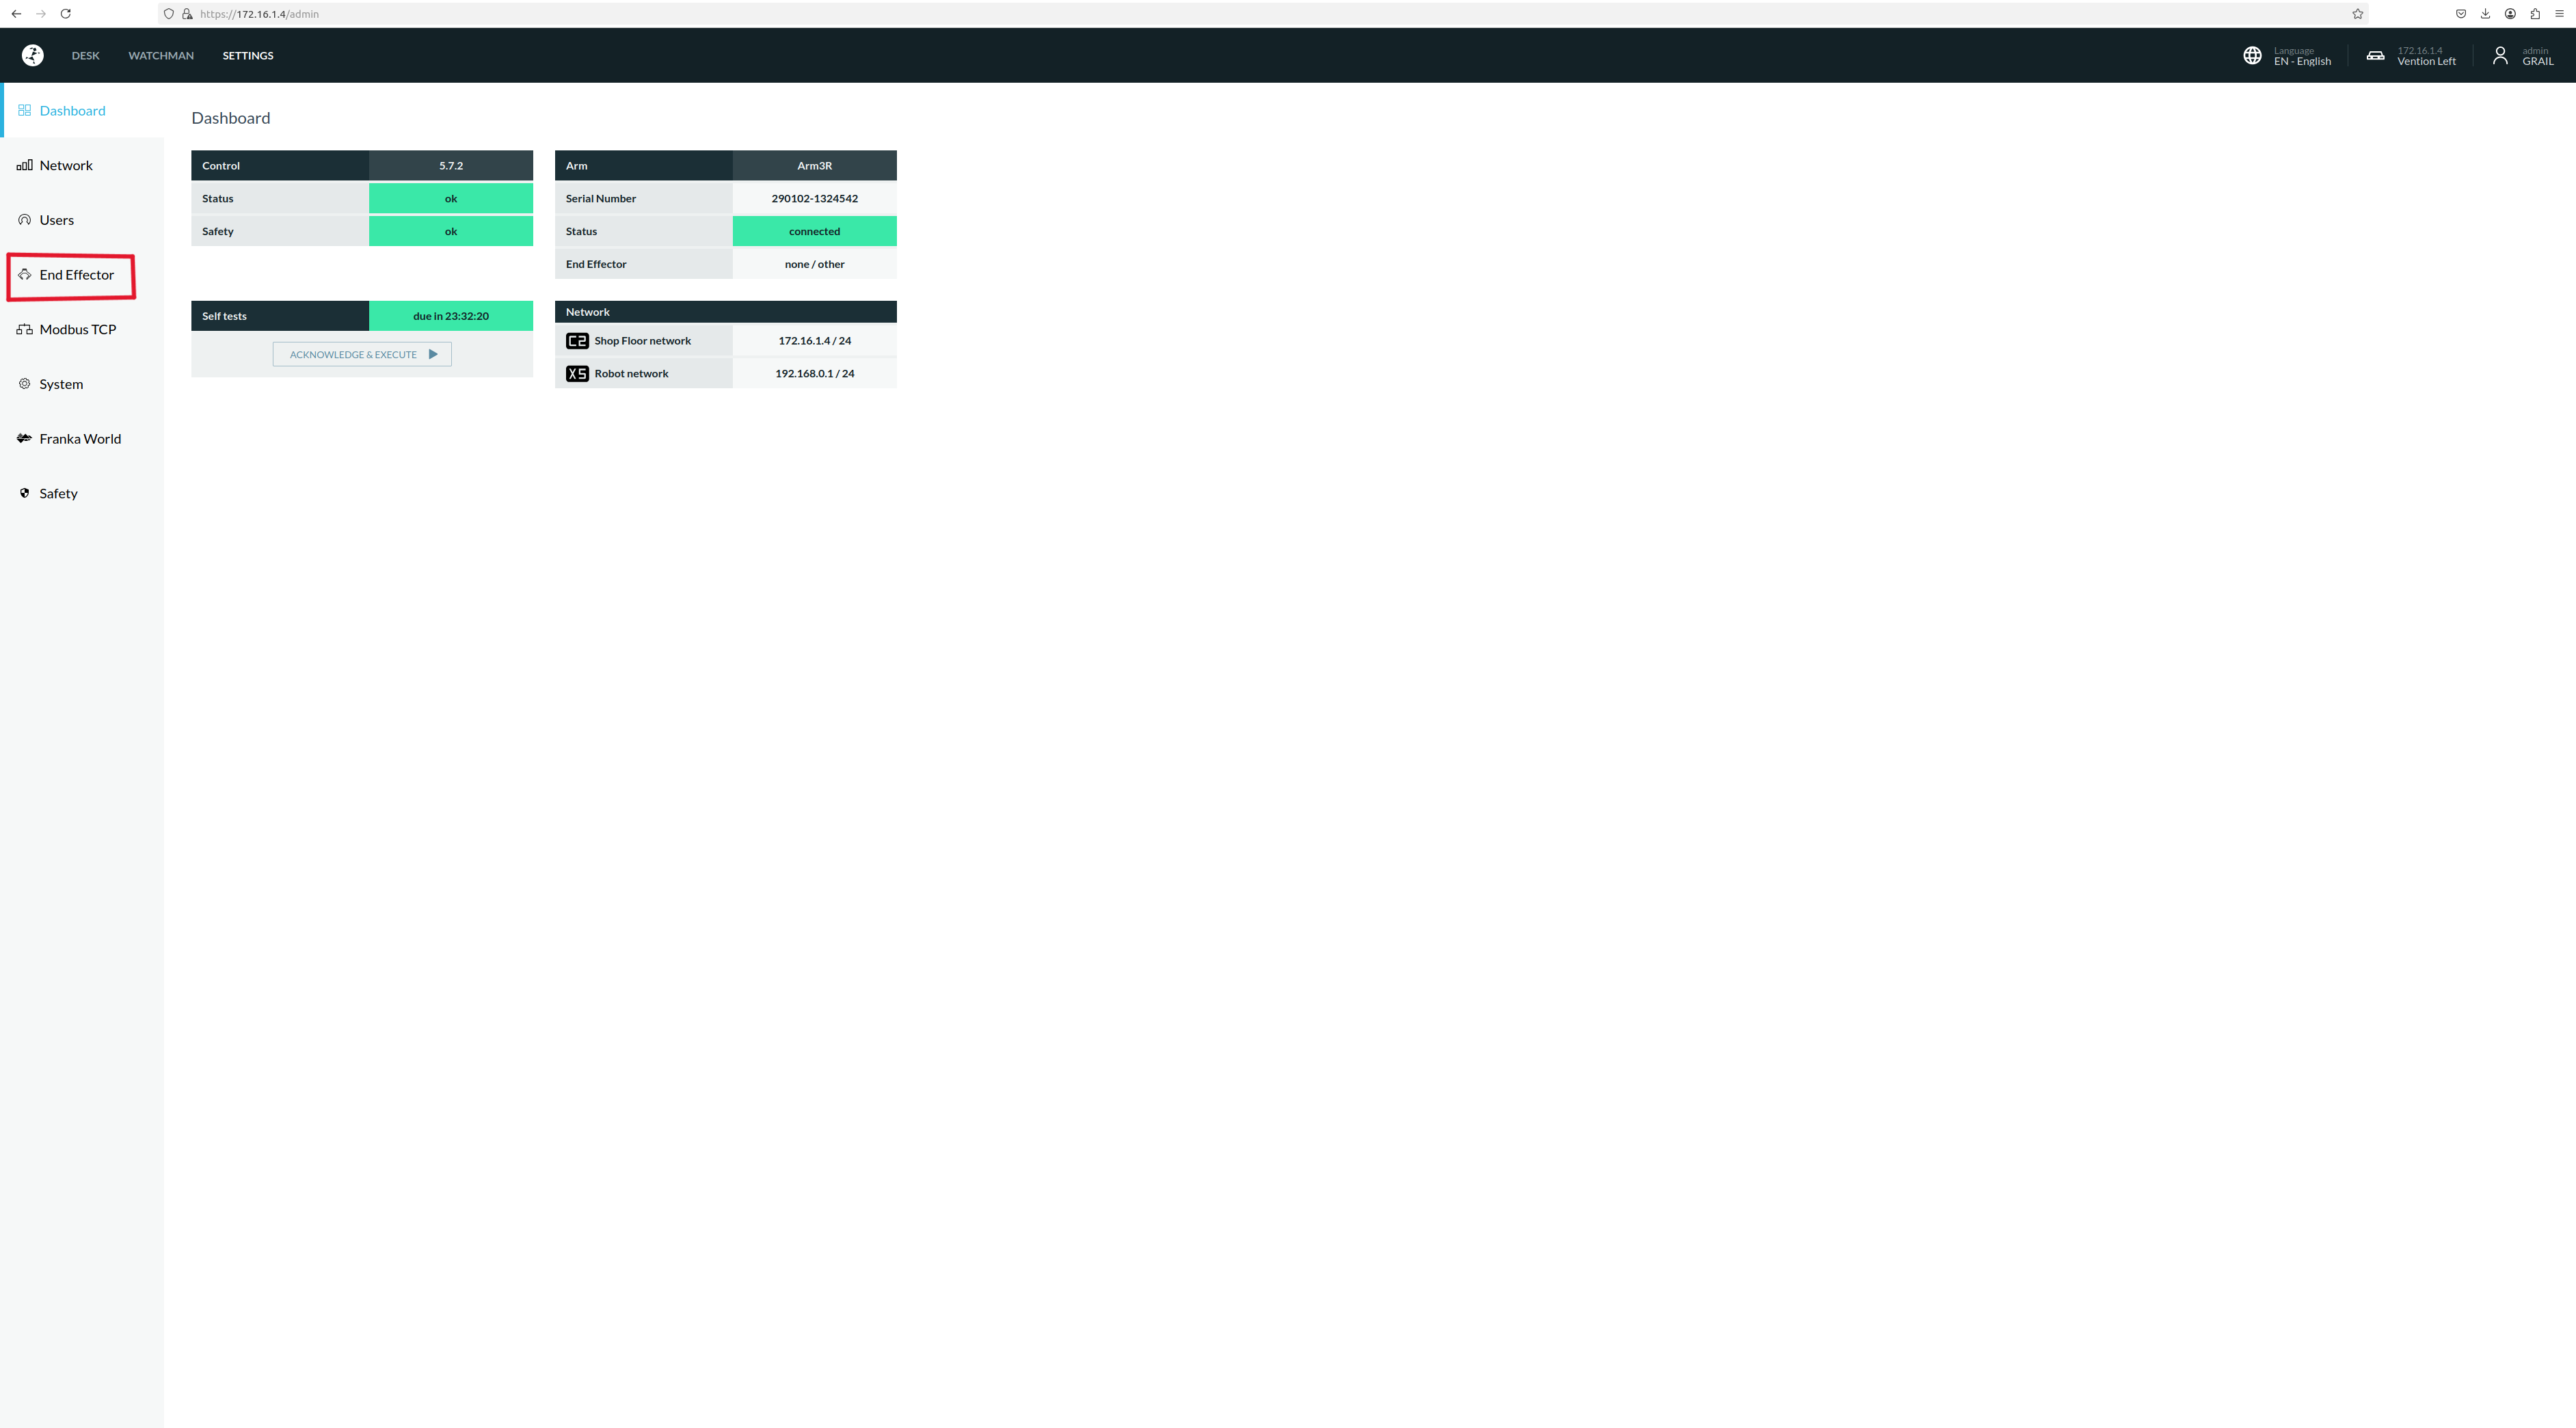
8. Head to Settings in Franka Desk
9. Click on End Effector
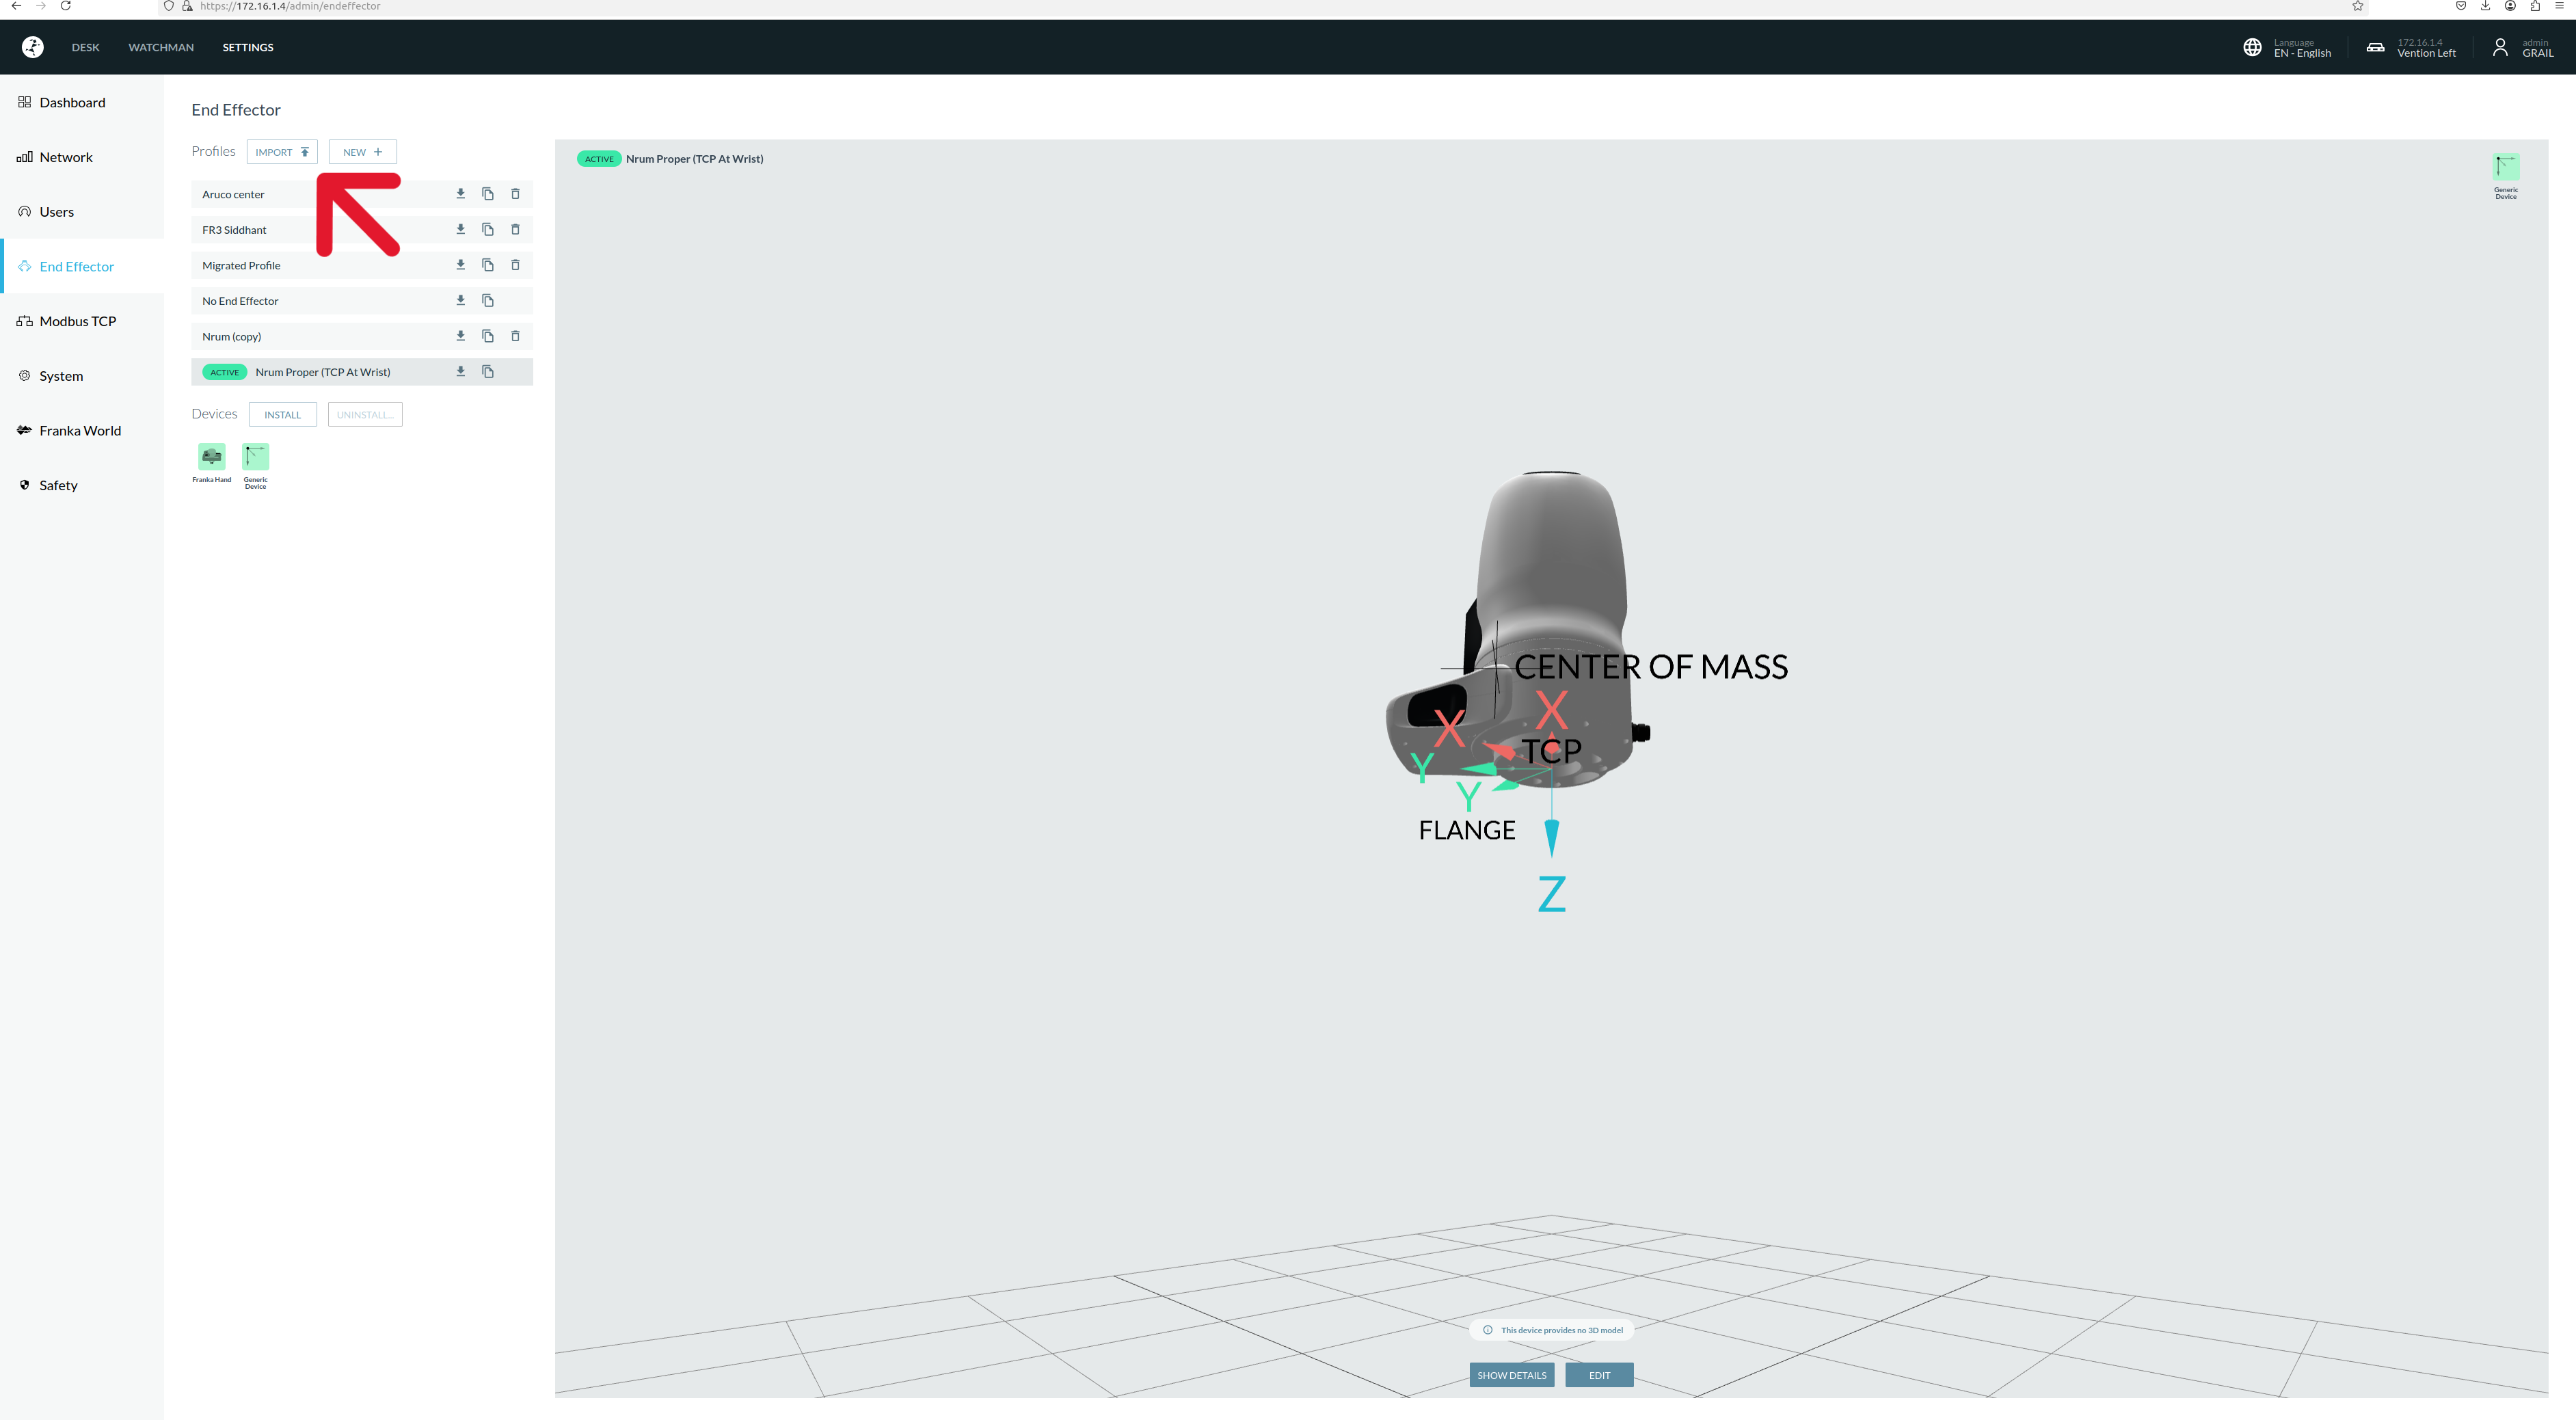
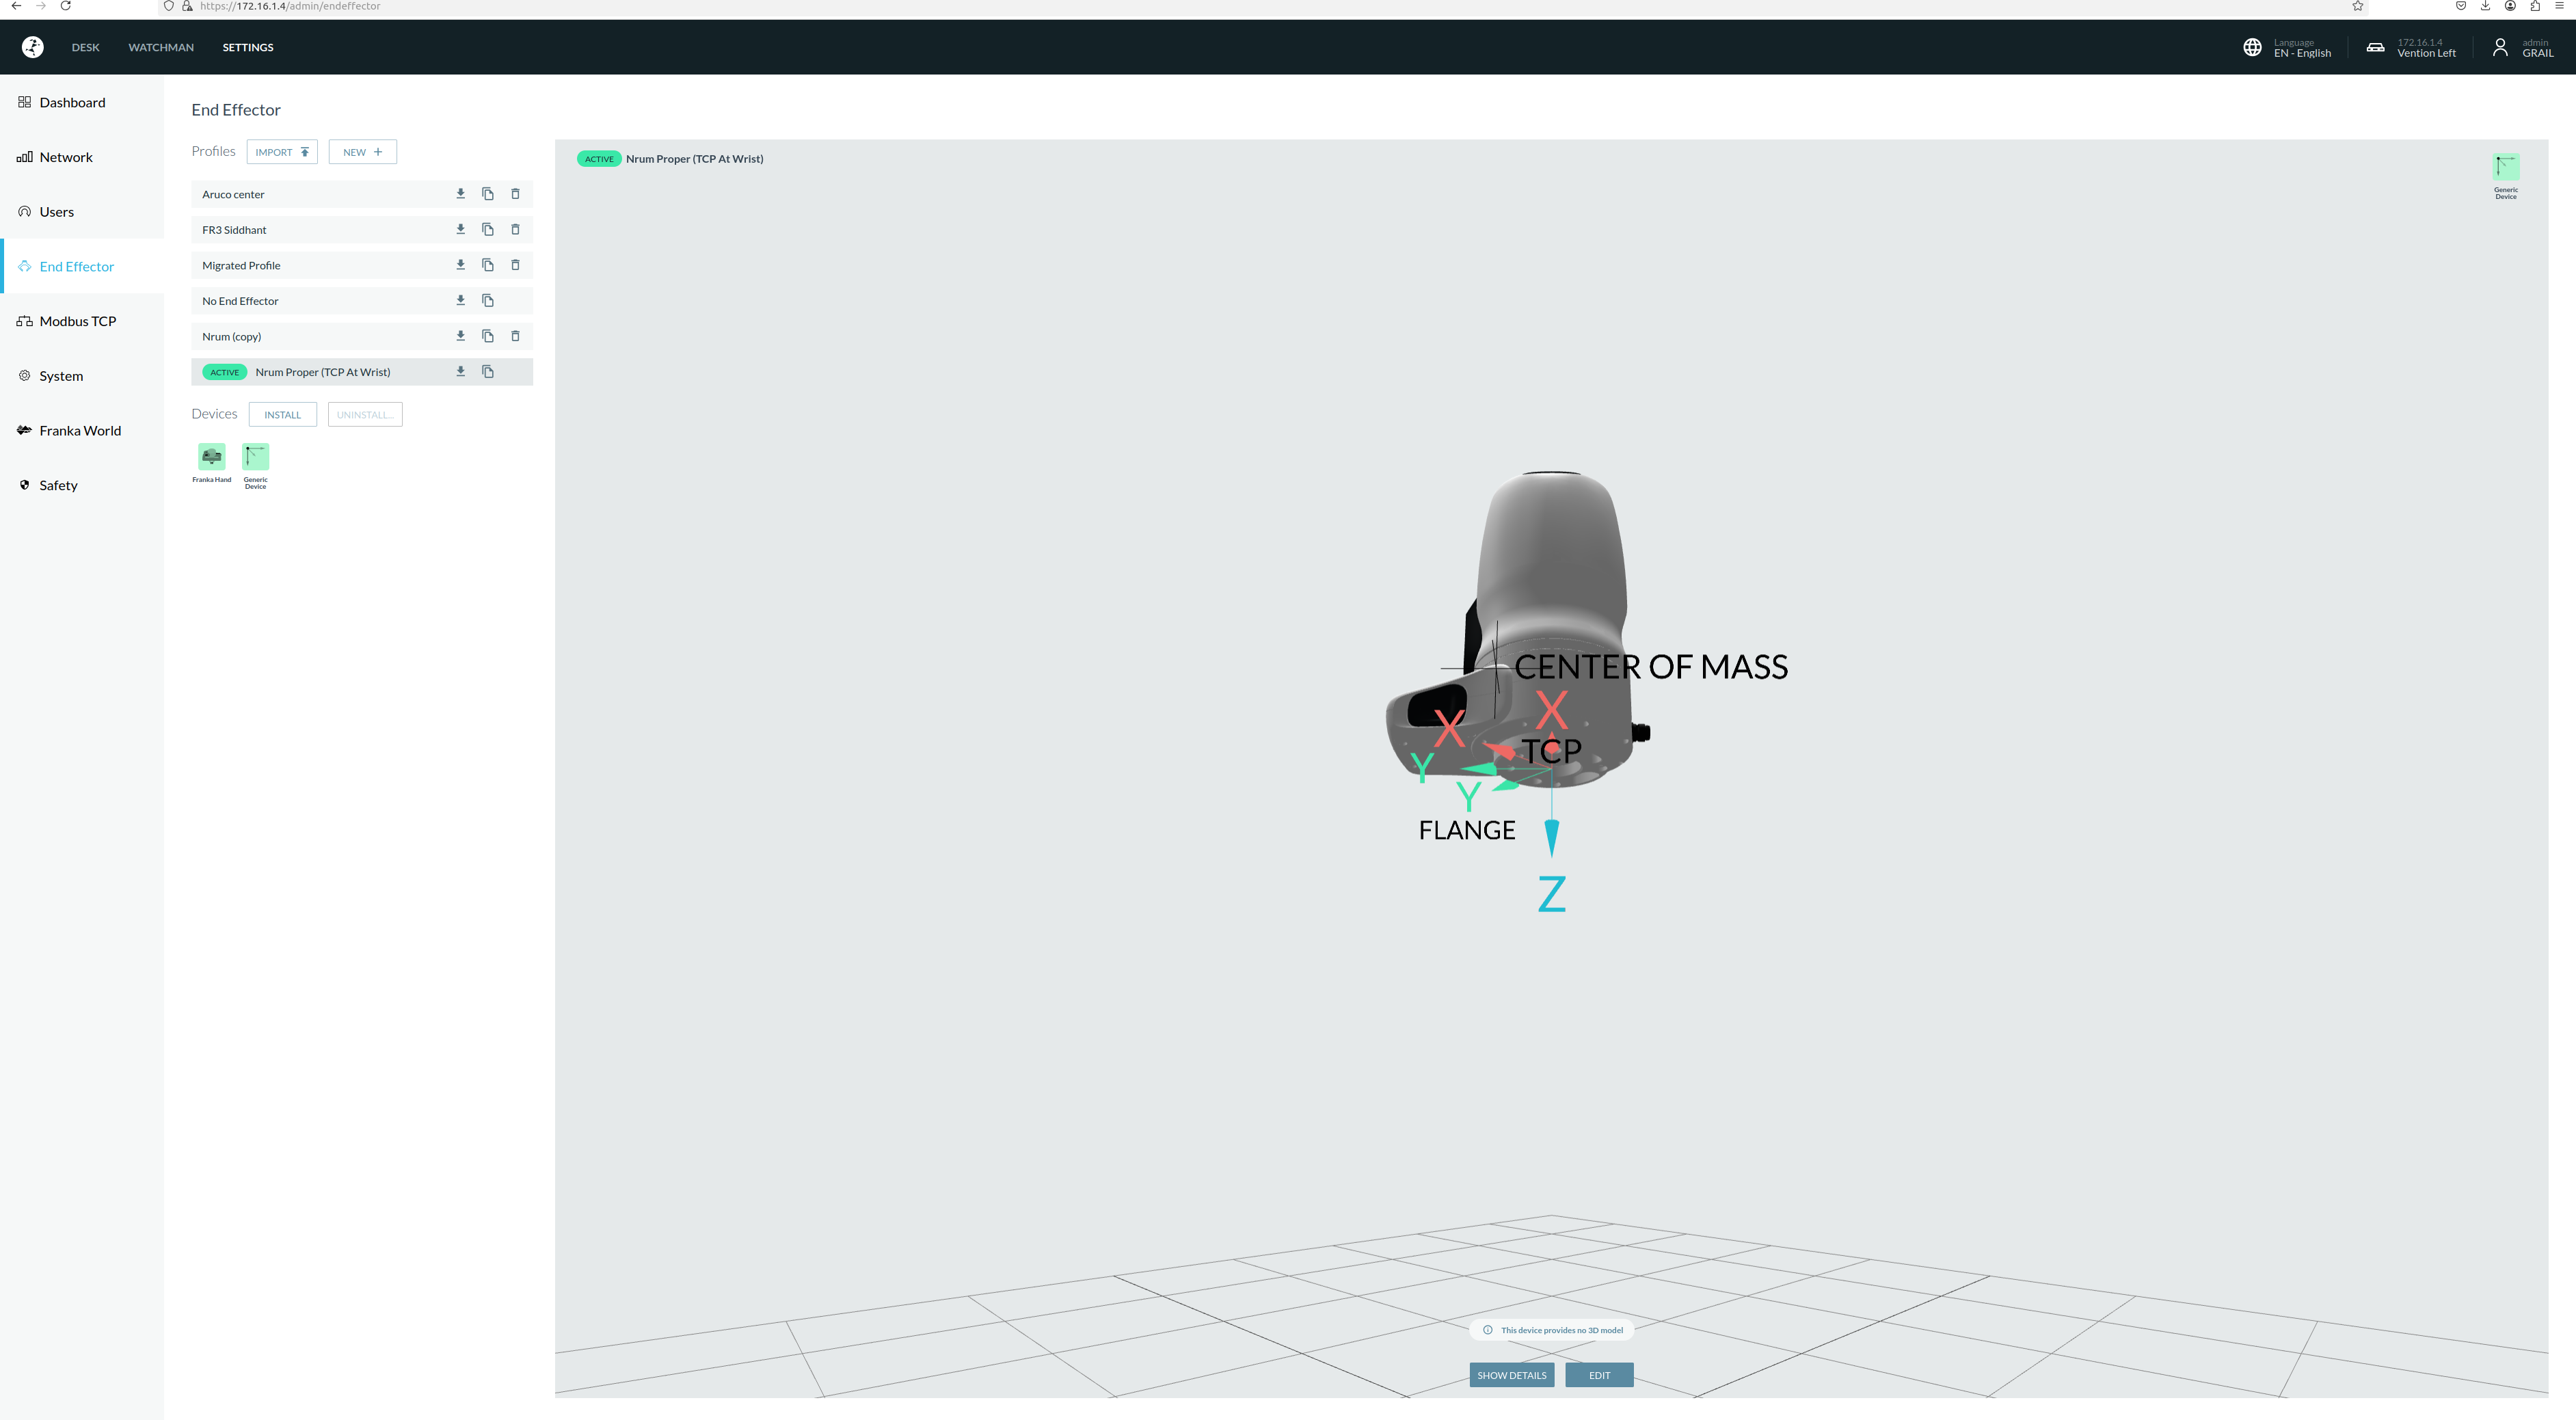
10. Import the JSON from the downloaded zip
11. Activate the Gripper Profile
## Deploying a Trained Policy
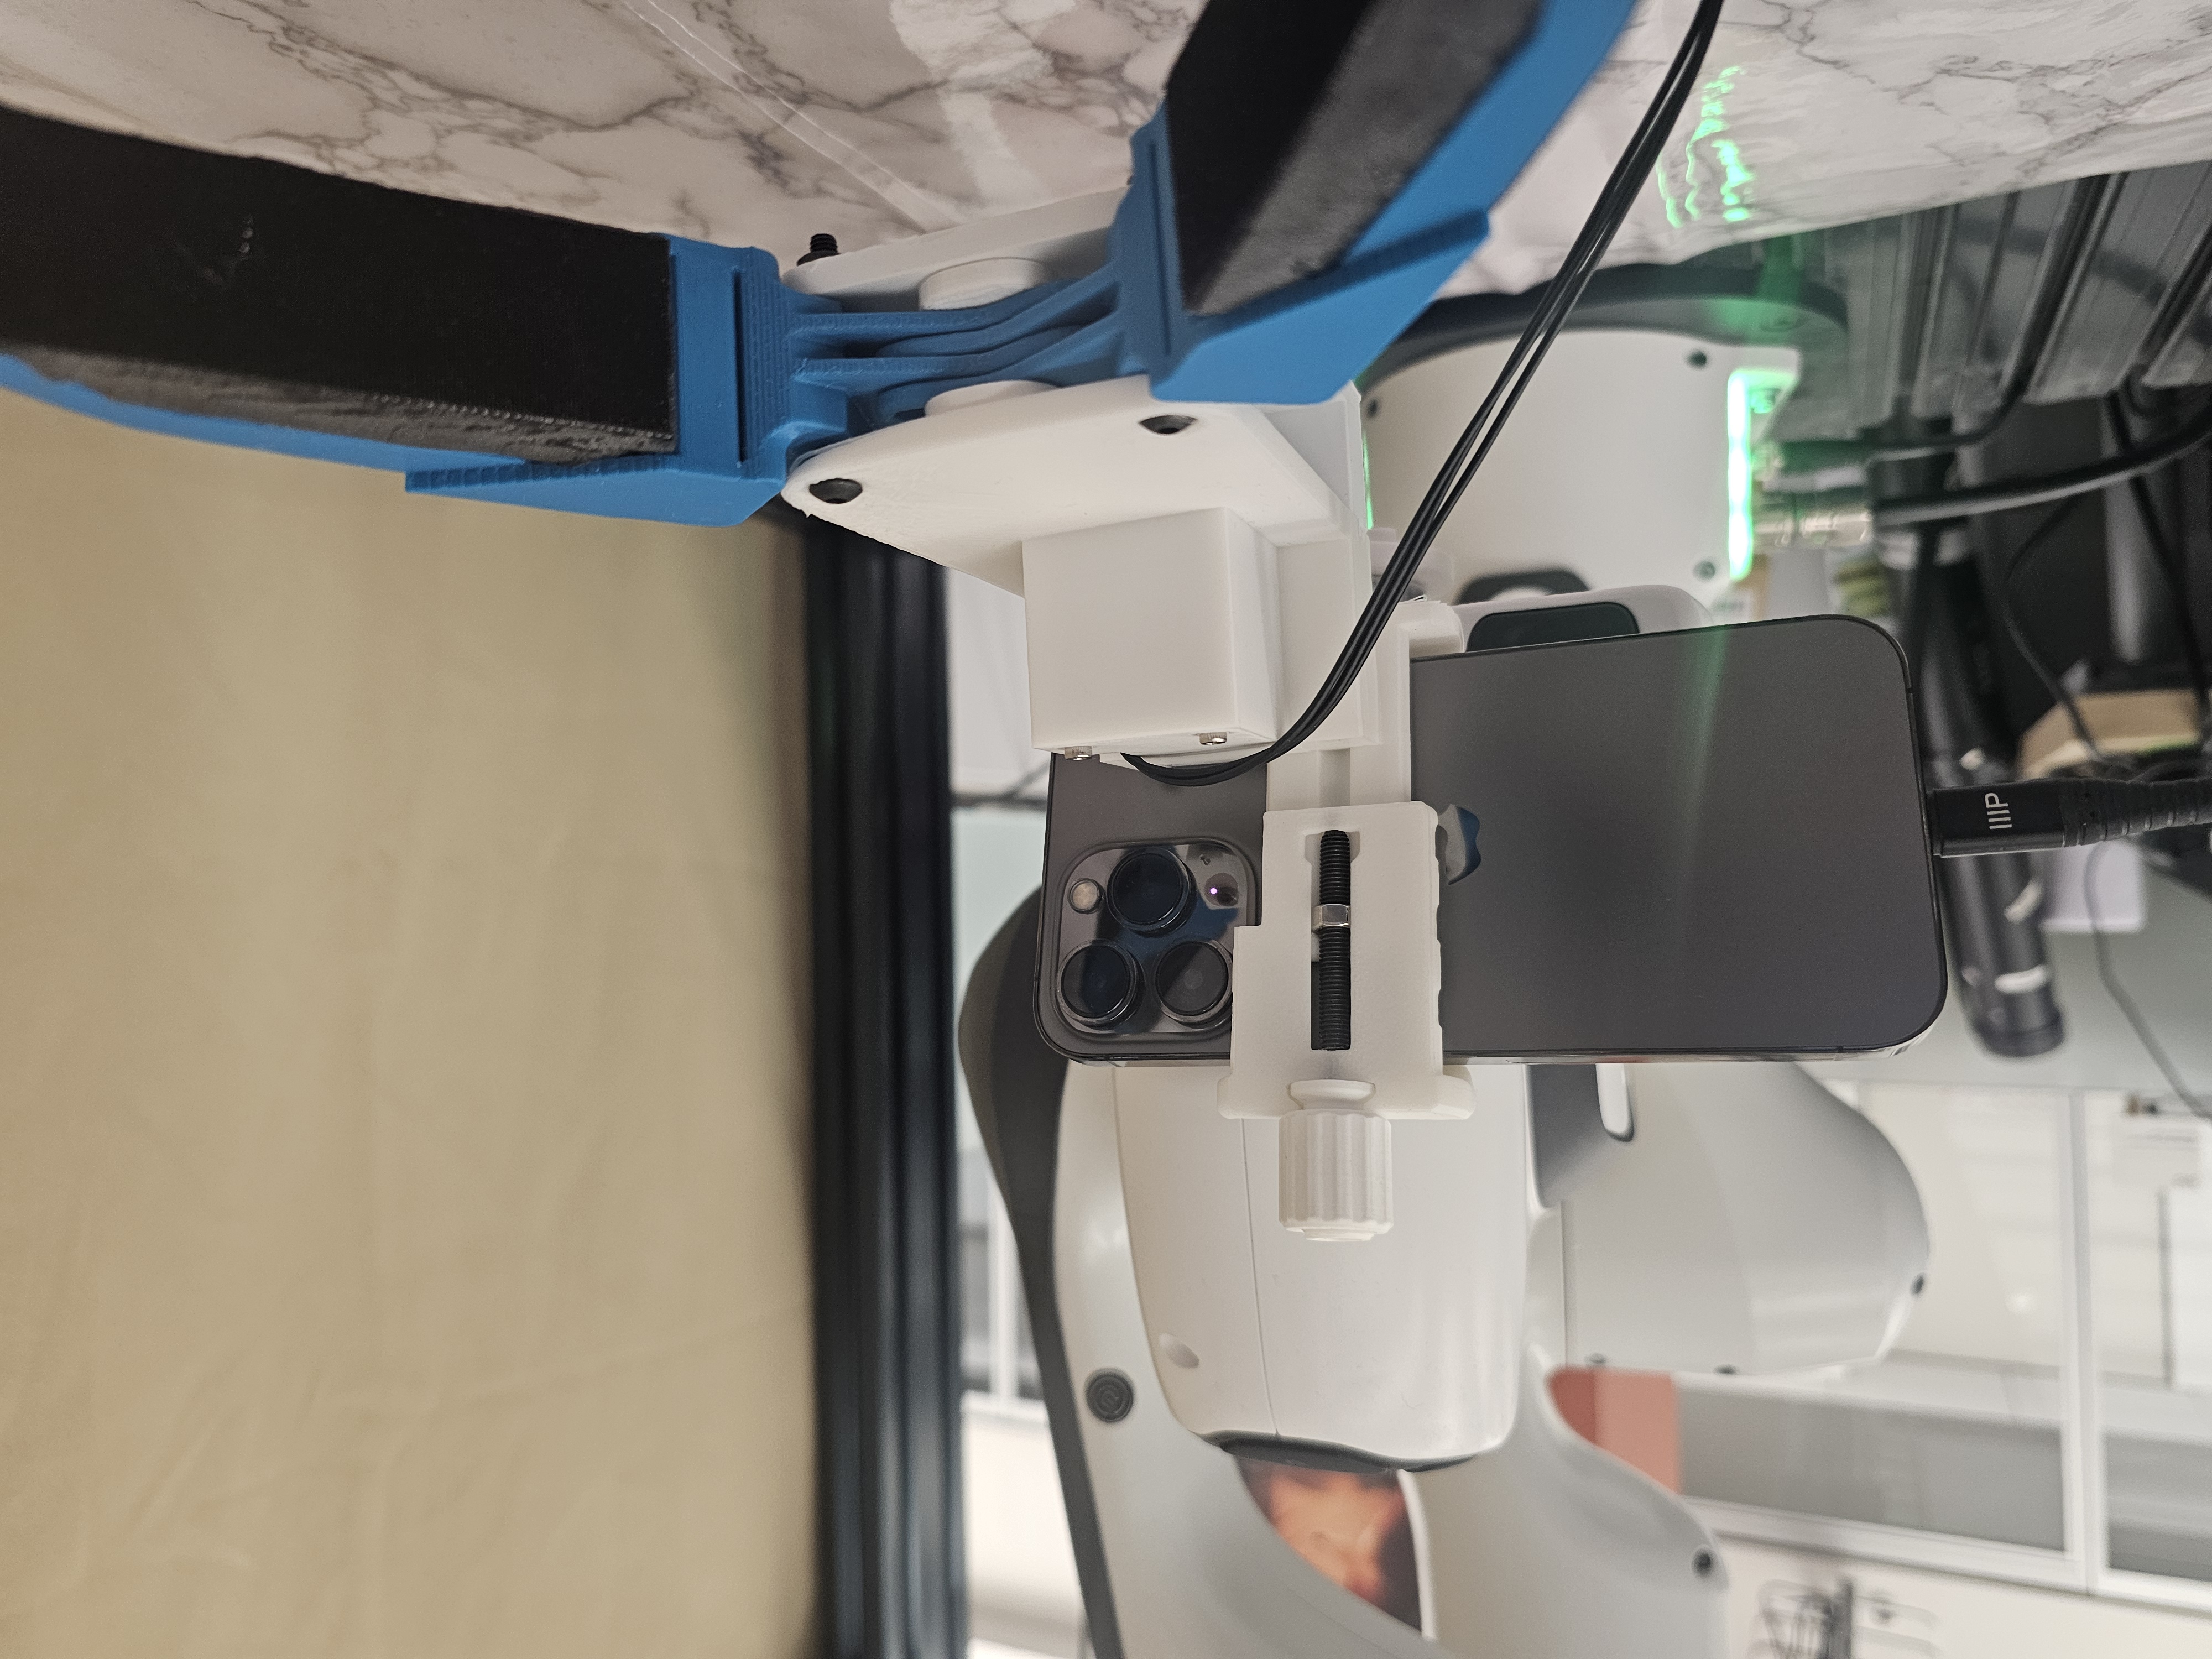
1. **Set up the iPhone** on the robot:
* Slide the iPhone into the gripper mount until the camera block hits the mount, then tighten the knob (snug, not over-tight).
* Connect the iPhone to the robot via USB.
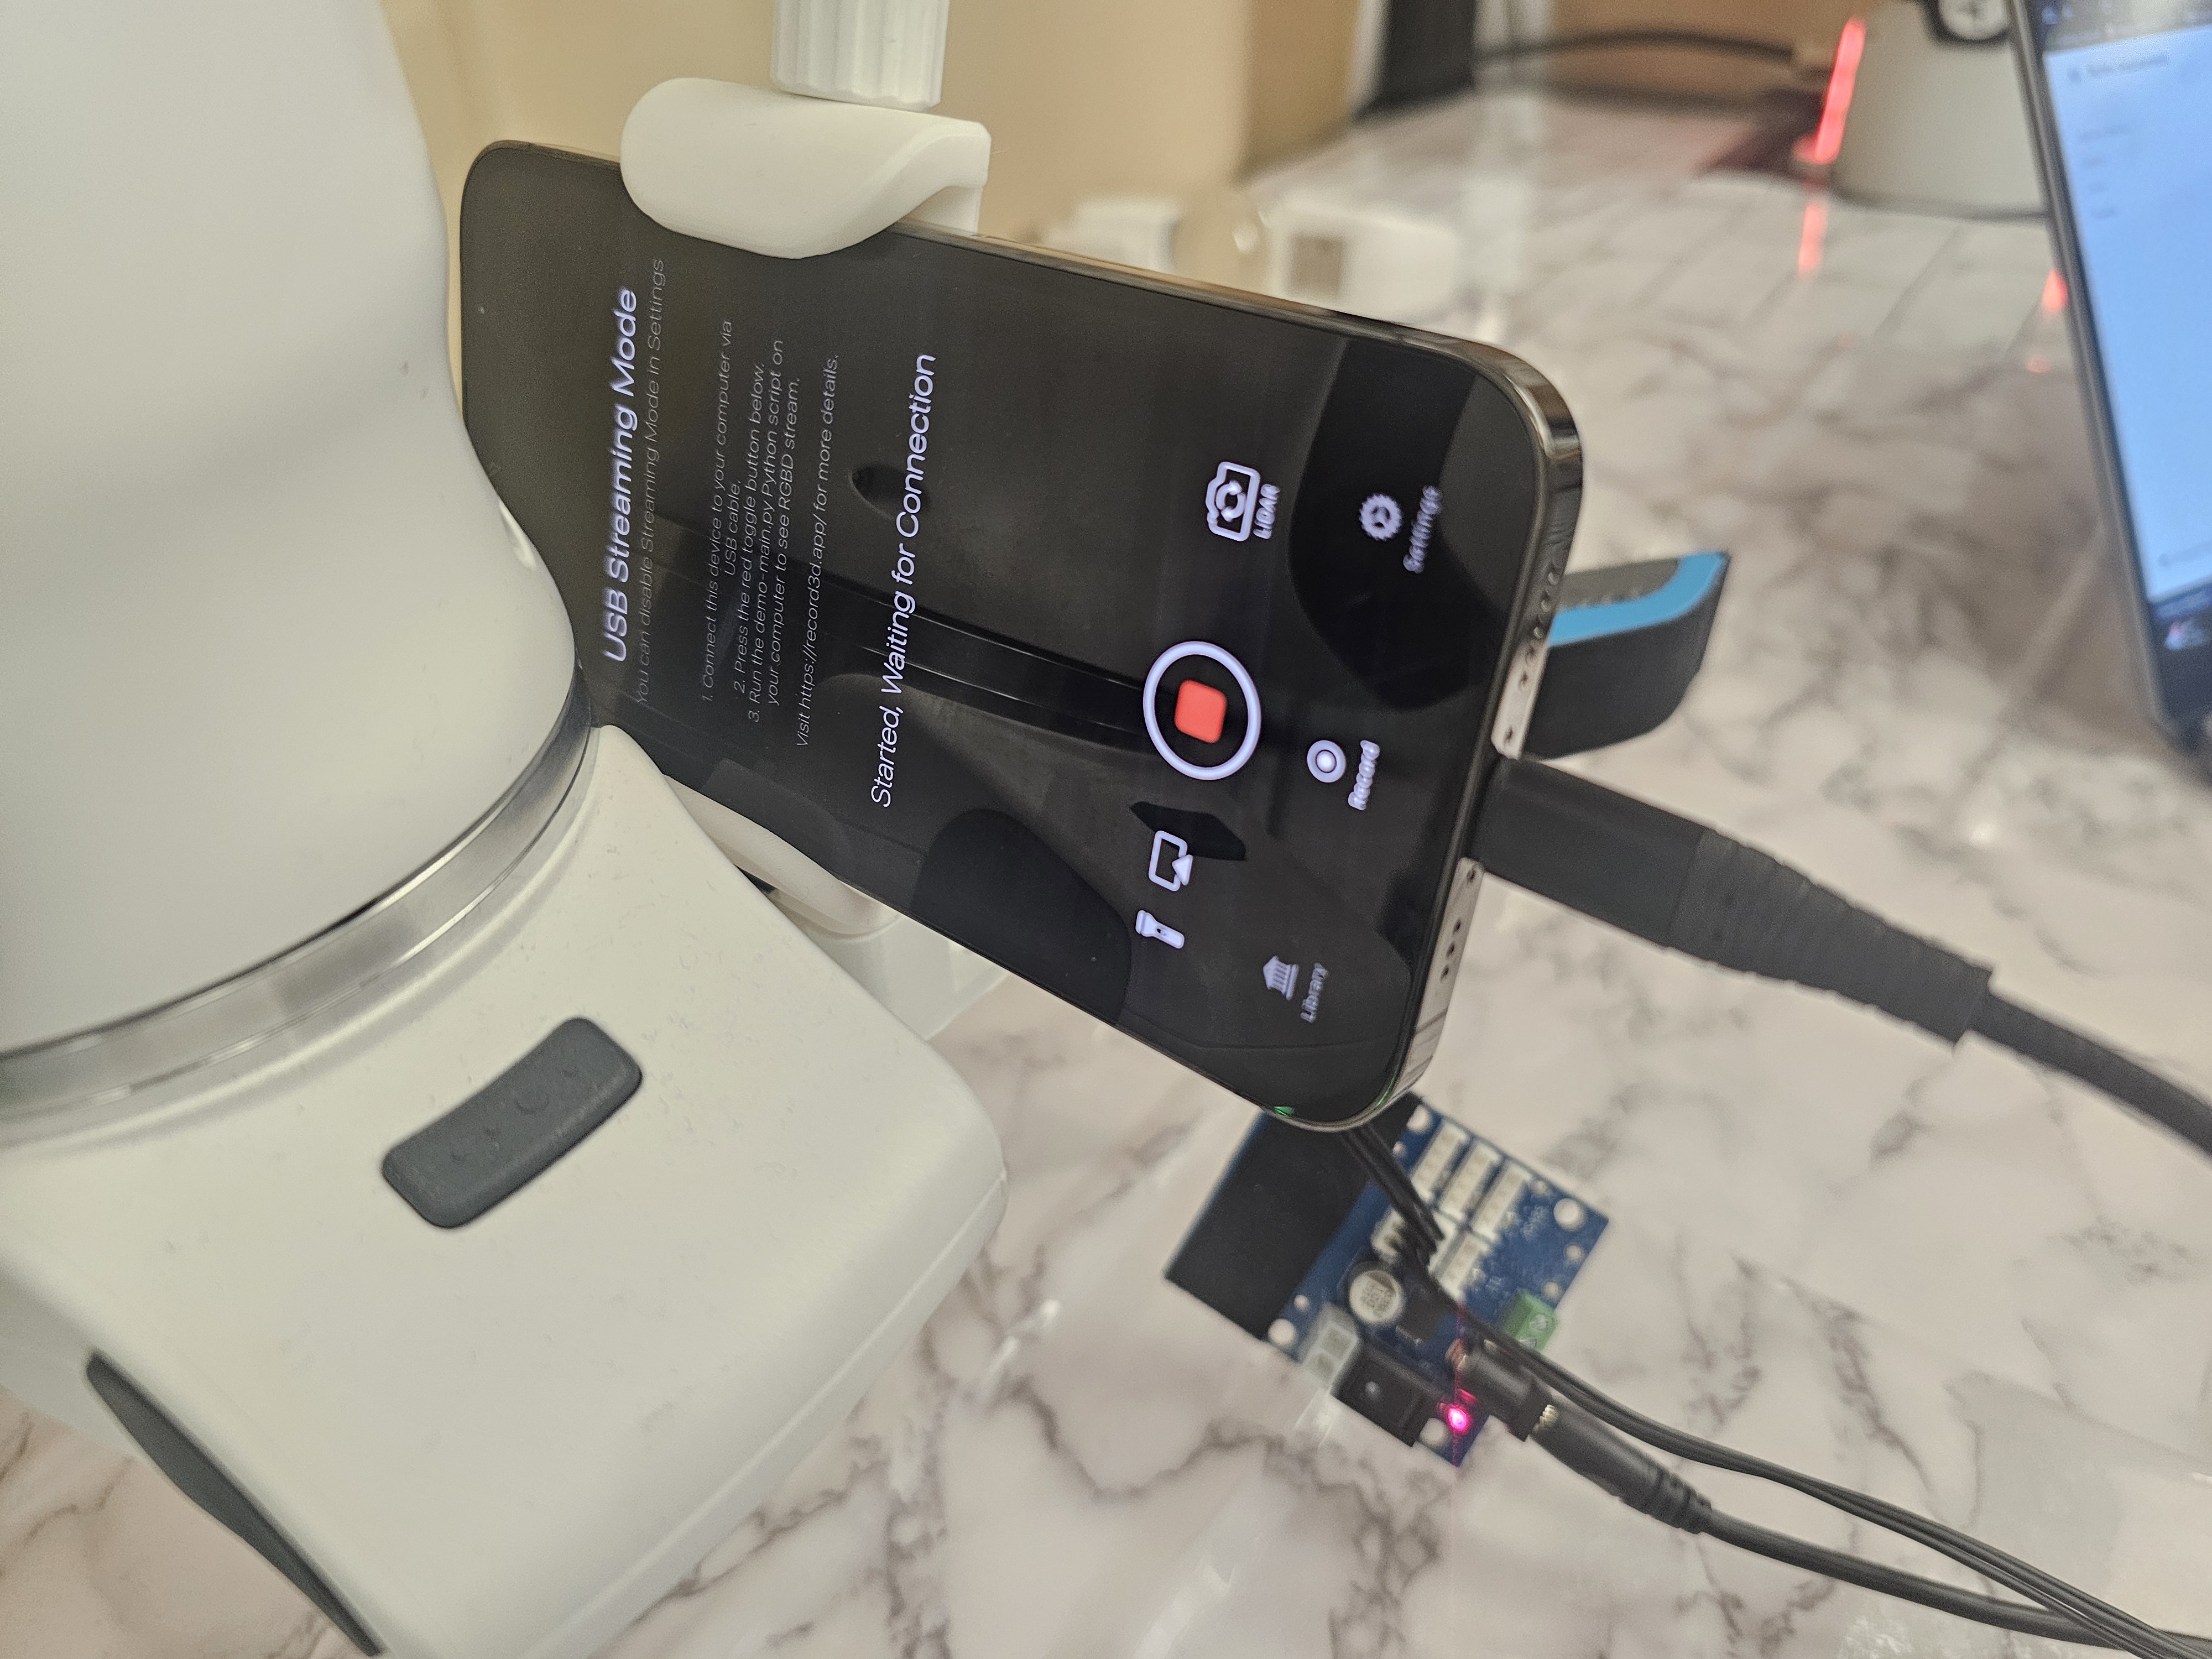
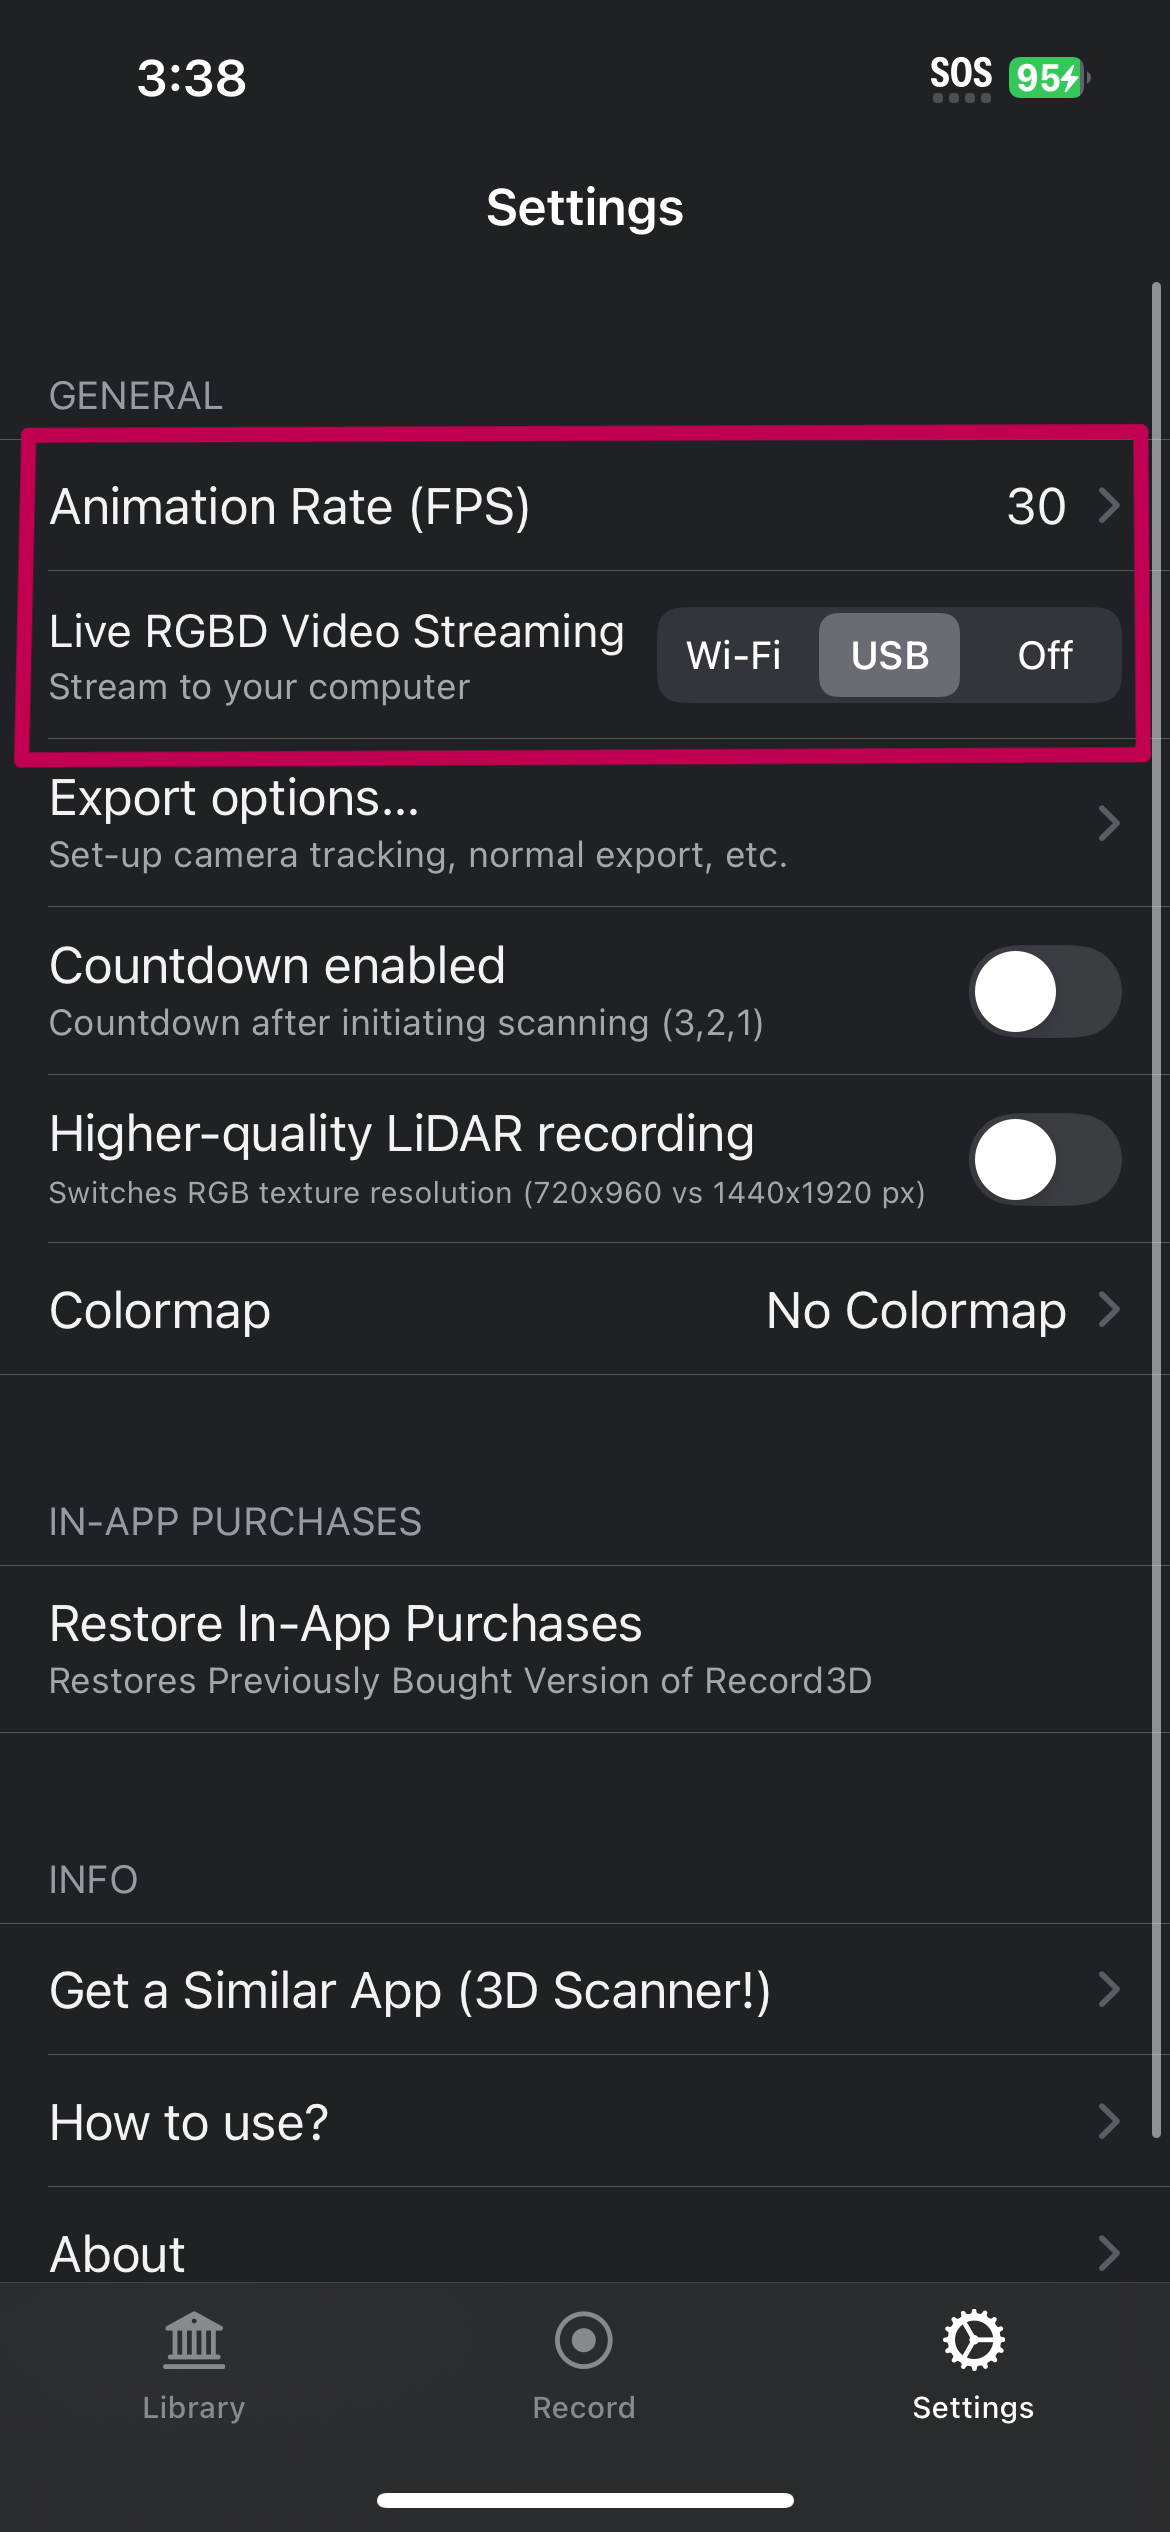
* In **Record3D** app settings: set **RGBD Streaming** mode to **USB** and **FPS** to **30**.
* Press **Record** to enter “stream-ready” mode.
Unless otherwise specified, the following steps assume that we are in the `min-stretch` repo root directory. 2. Set up Deoxys
```bash
git clone git@github.com:NYU-robot-learning/deoxys_control.git
conda activate home_robot
cd deoxys_control/deoxys
# Instructions from deoxys repo (this takes a while to build everything)
./InstallPackage
make -j build_deoxys=1
pip install -U -r requirements.txt
pip install -e .
```
3. Edit the following config and input necessary IPs
```
./min-stretch/robot-server/robot/franka/deoxys_utils/configs/franka_config.yml
```
```yml
PC:
NAME: "lambda"
IP: ??? ## <<<<<<
NUC:
NAME: "nuc"
IP: ??? ## <<<<<<
PUB_PORT: 5566
SUB_PORT: 5565
GRIPPER_PUB_PORT: 5568
GRIPPER_SUB_PORT: 5567
ROBOT:
IP: ??? ## <<<<<<
...
```
4. **Calibrate Gripper**:
```bash
cd robot-server
conda activate home_robot
python auto_calibrate_gripper.py
```
5. **Start the robot server**:
```bash
python3 start_server.py controller=franka
```
This starts streaming images from the iPhone and the robot begins listening for action commands. If you have missing imports, try `pip3 install hydra-core record3d` (and any other missing packages).
6. **Run the policy** in another terminal (requires display):
```bash
cd imitation-in-homes
conda activate home_robot
python run.py
```
7. Head to the [Playbook](https://docs.google.com/document/d/1nq0DX-a31FvFr1TDDIrt1seIKJJO8ftYRcByZvWp9IE/edit?tab=t.0)
### Available Policy Checkpoints
When running `python run.py`, you can select from these preconfigured checkpoints:
* **`run_vqbet_pick`**: default checkpoint for picking task.
* **`run_vqbet_open`**: default checkpoint for opening task.
* **`run_vqbet_close`**: default checkpoint for closing task.
* **`run_vqbet_pick_exp`**: experimental pick checkpoint.
Choose the config that matches your task and substitute it in:
```bash
python run.py --config-name=
```
***