# Stretch
## Gripper Assembly and Prep
Follow this guide to assemble the gripper: [Assembly Guide](https://nyu-gripper.pages.dev/robot-gripper)
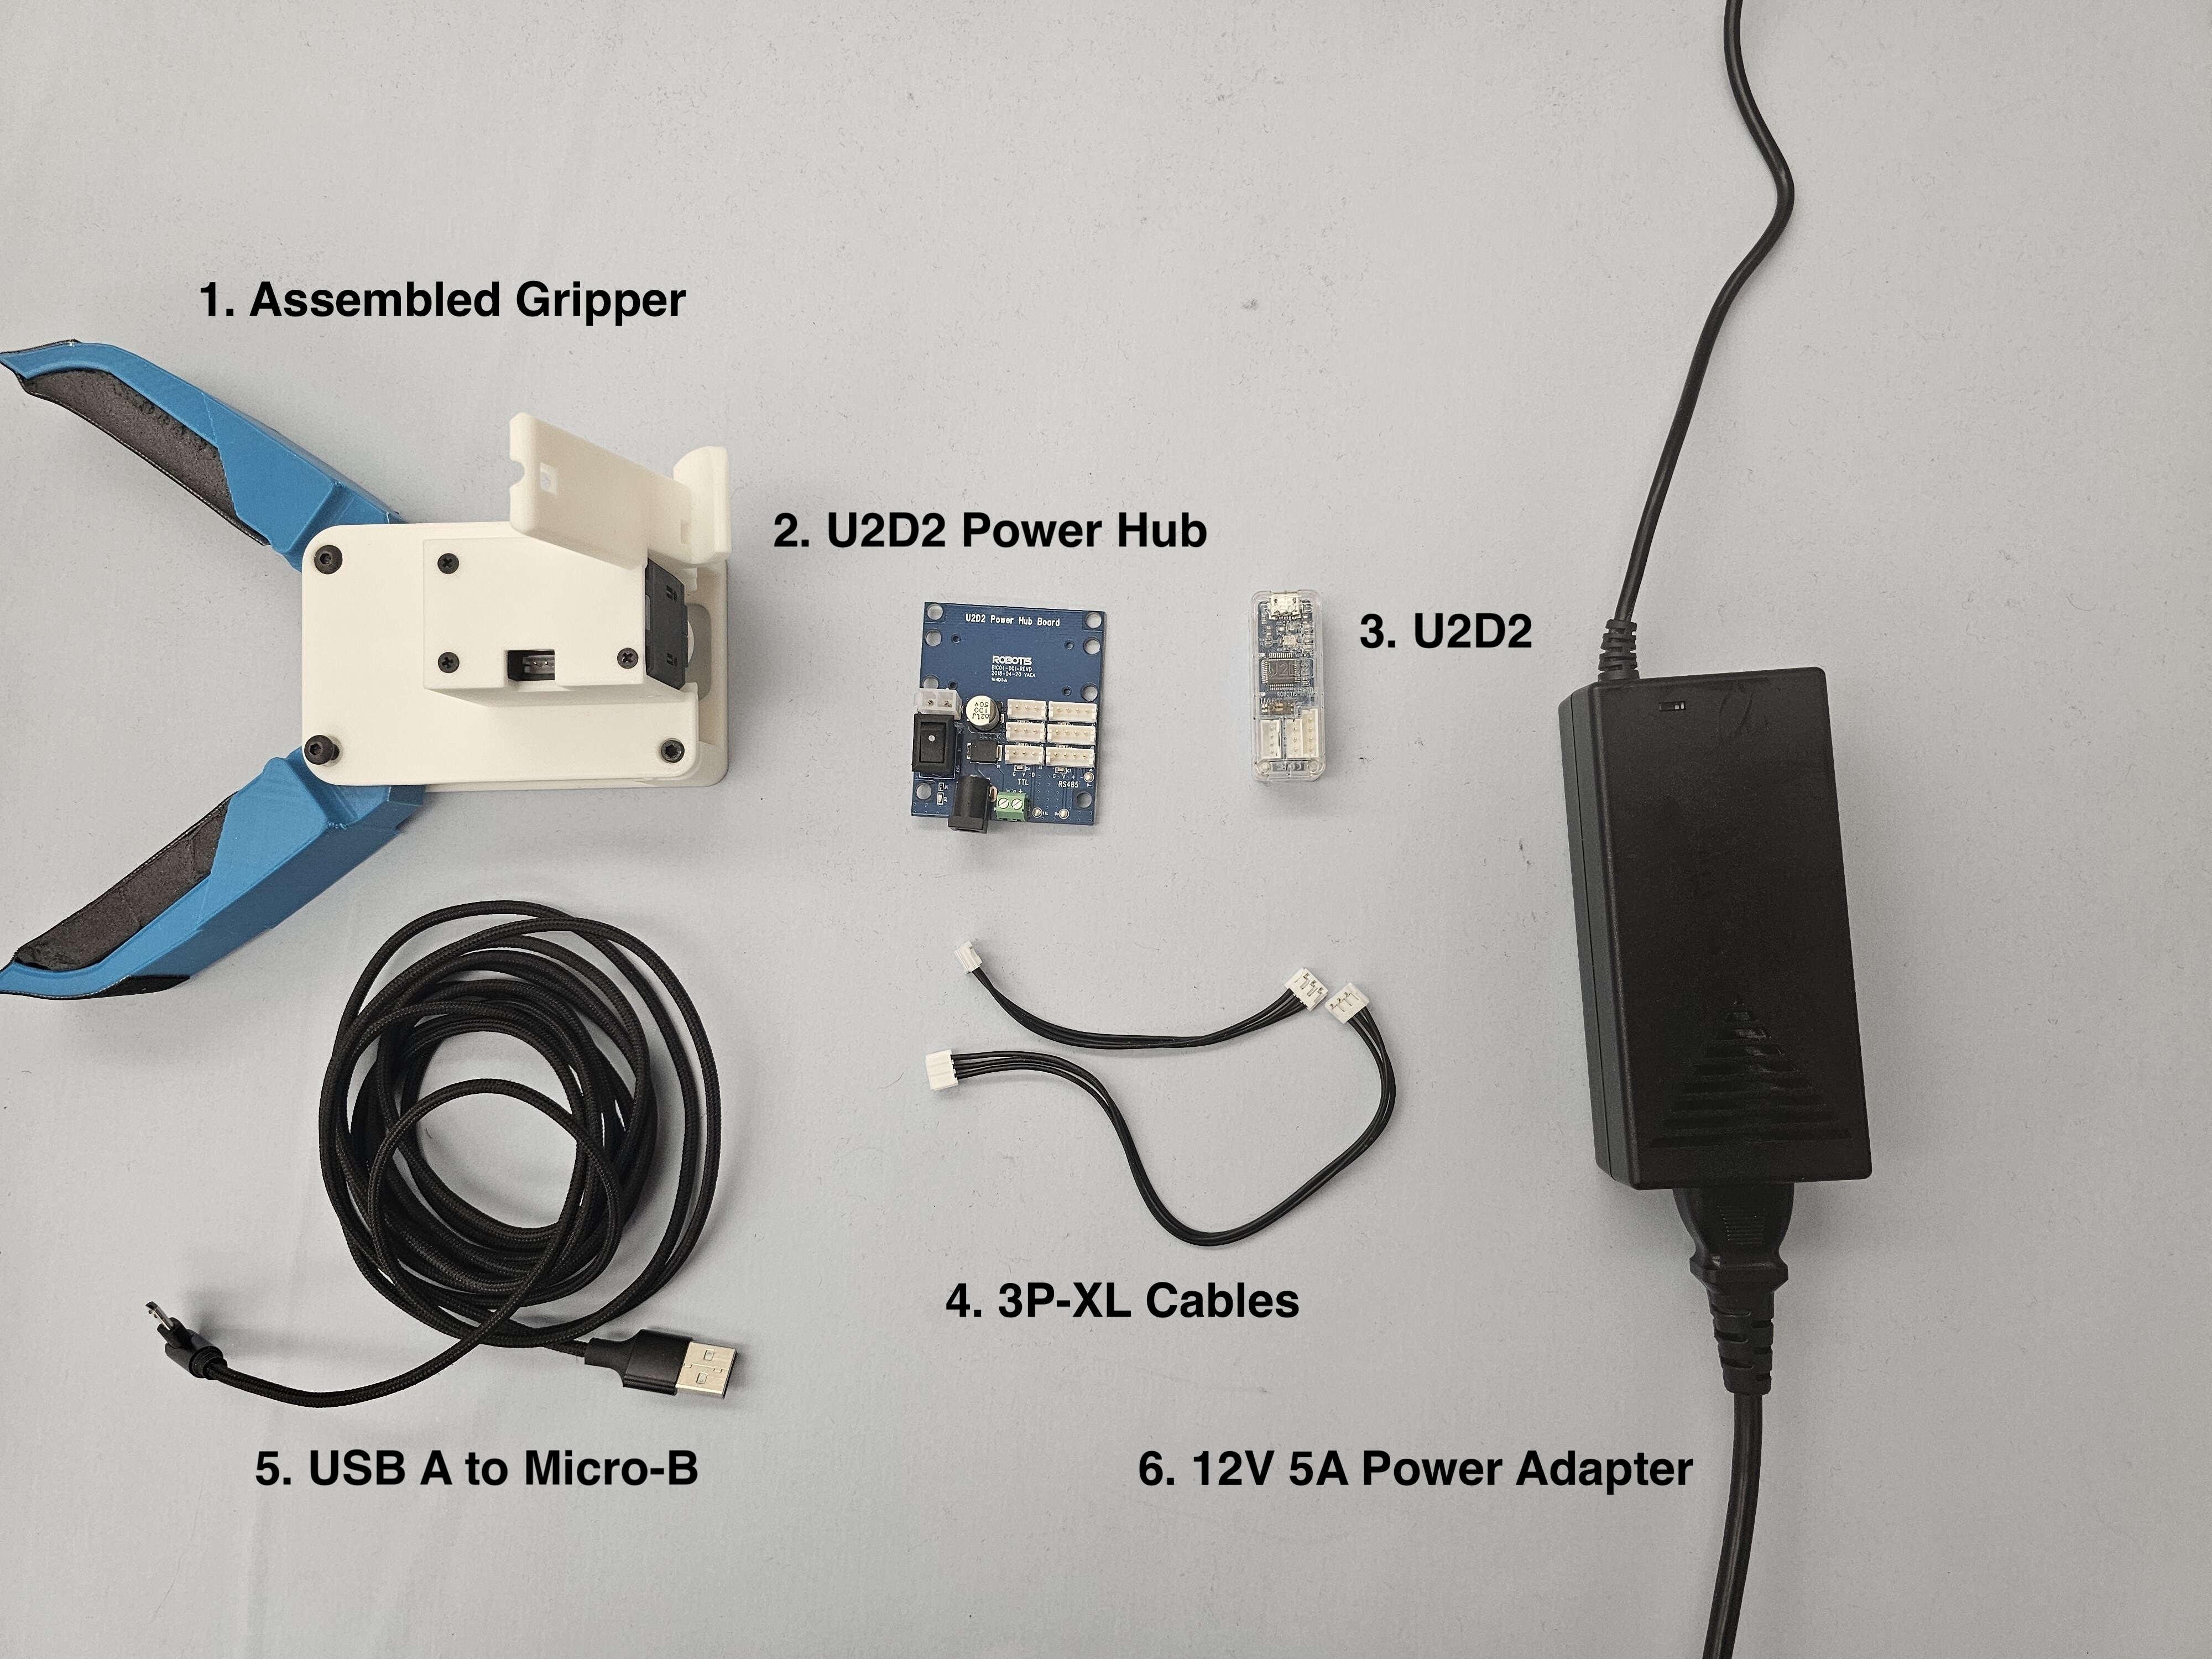
Have the following materials ready:
* Download and print the [gripper mount](https://nyu-gripper.pages.dev/cad/Robot%20_Gripper/quick-release-mount.stl)
* 4 M2.5 x 10mm Screws
* The [Dynamixel Starter Set](https://www.robotis.us/dynamixel-starter-set-us/), which includes parts 2-6 in the photo below:
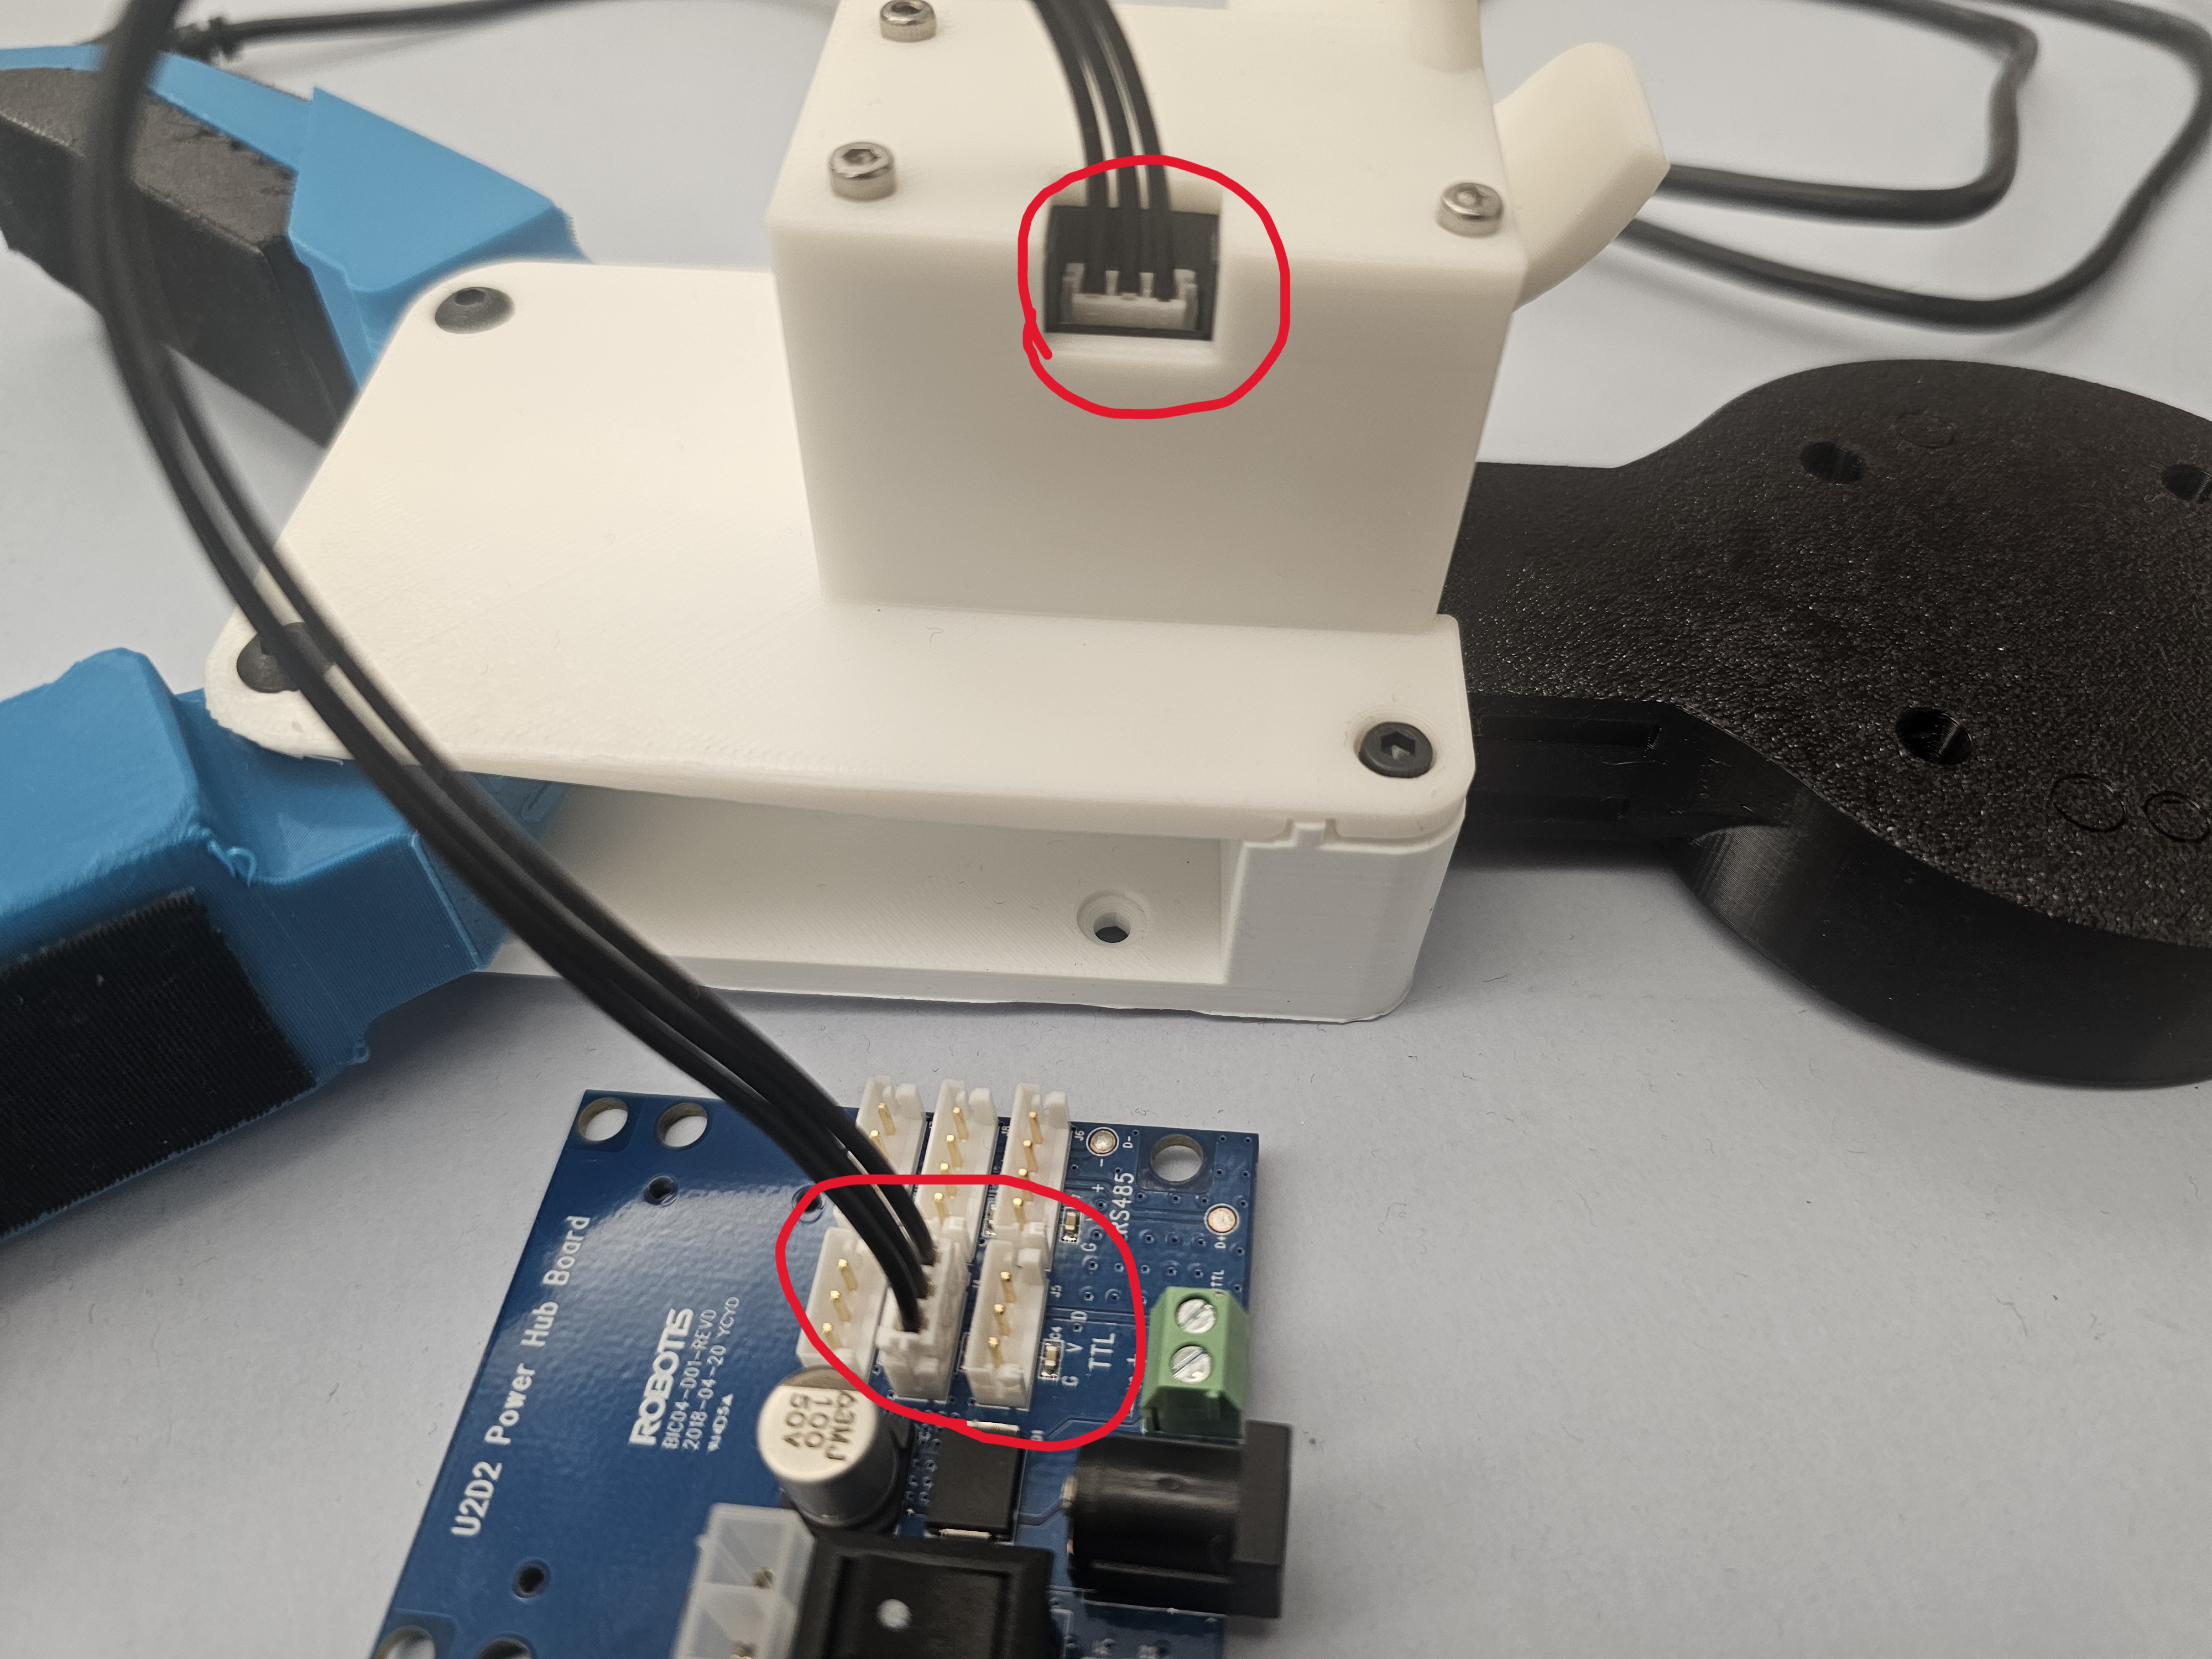
1. Connect the Dynamixel Motor to the U2D2 Power Hub. You will hear a clicking sound when connected:
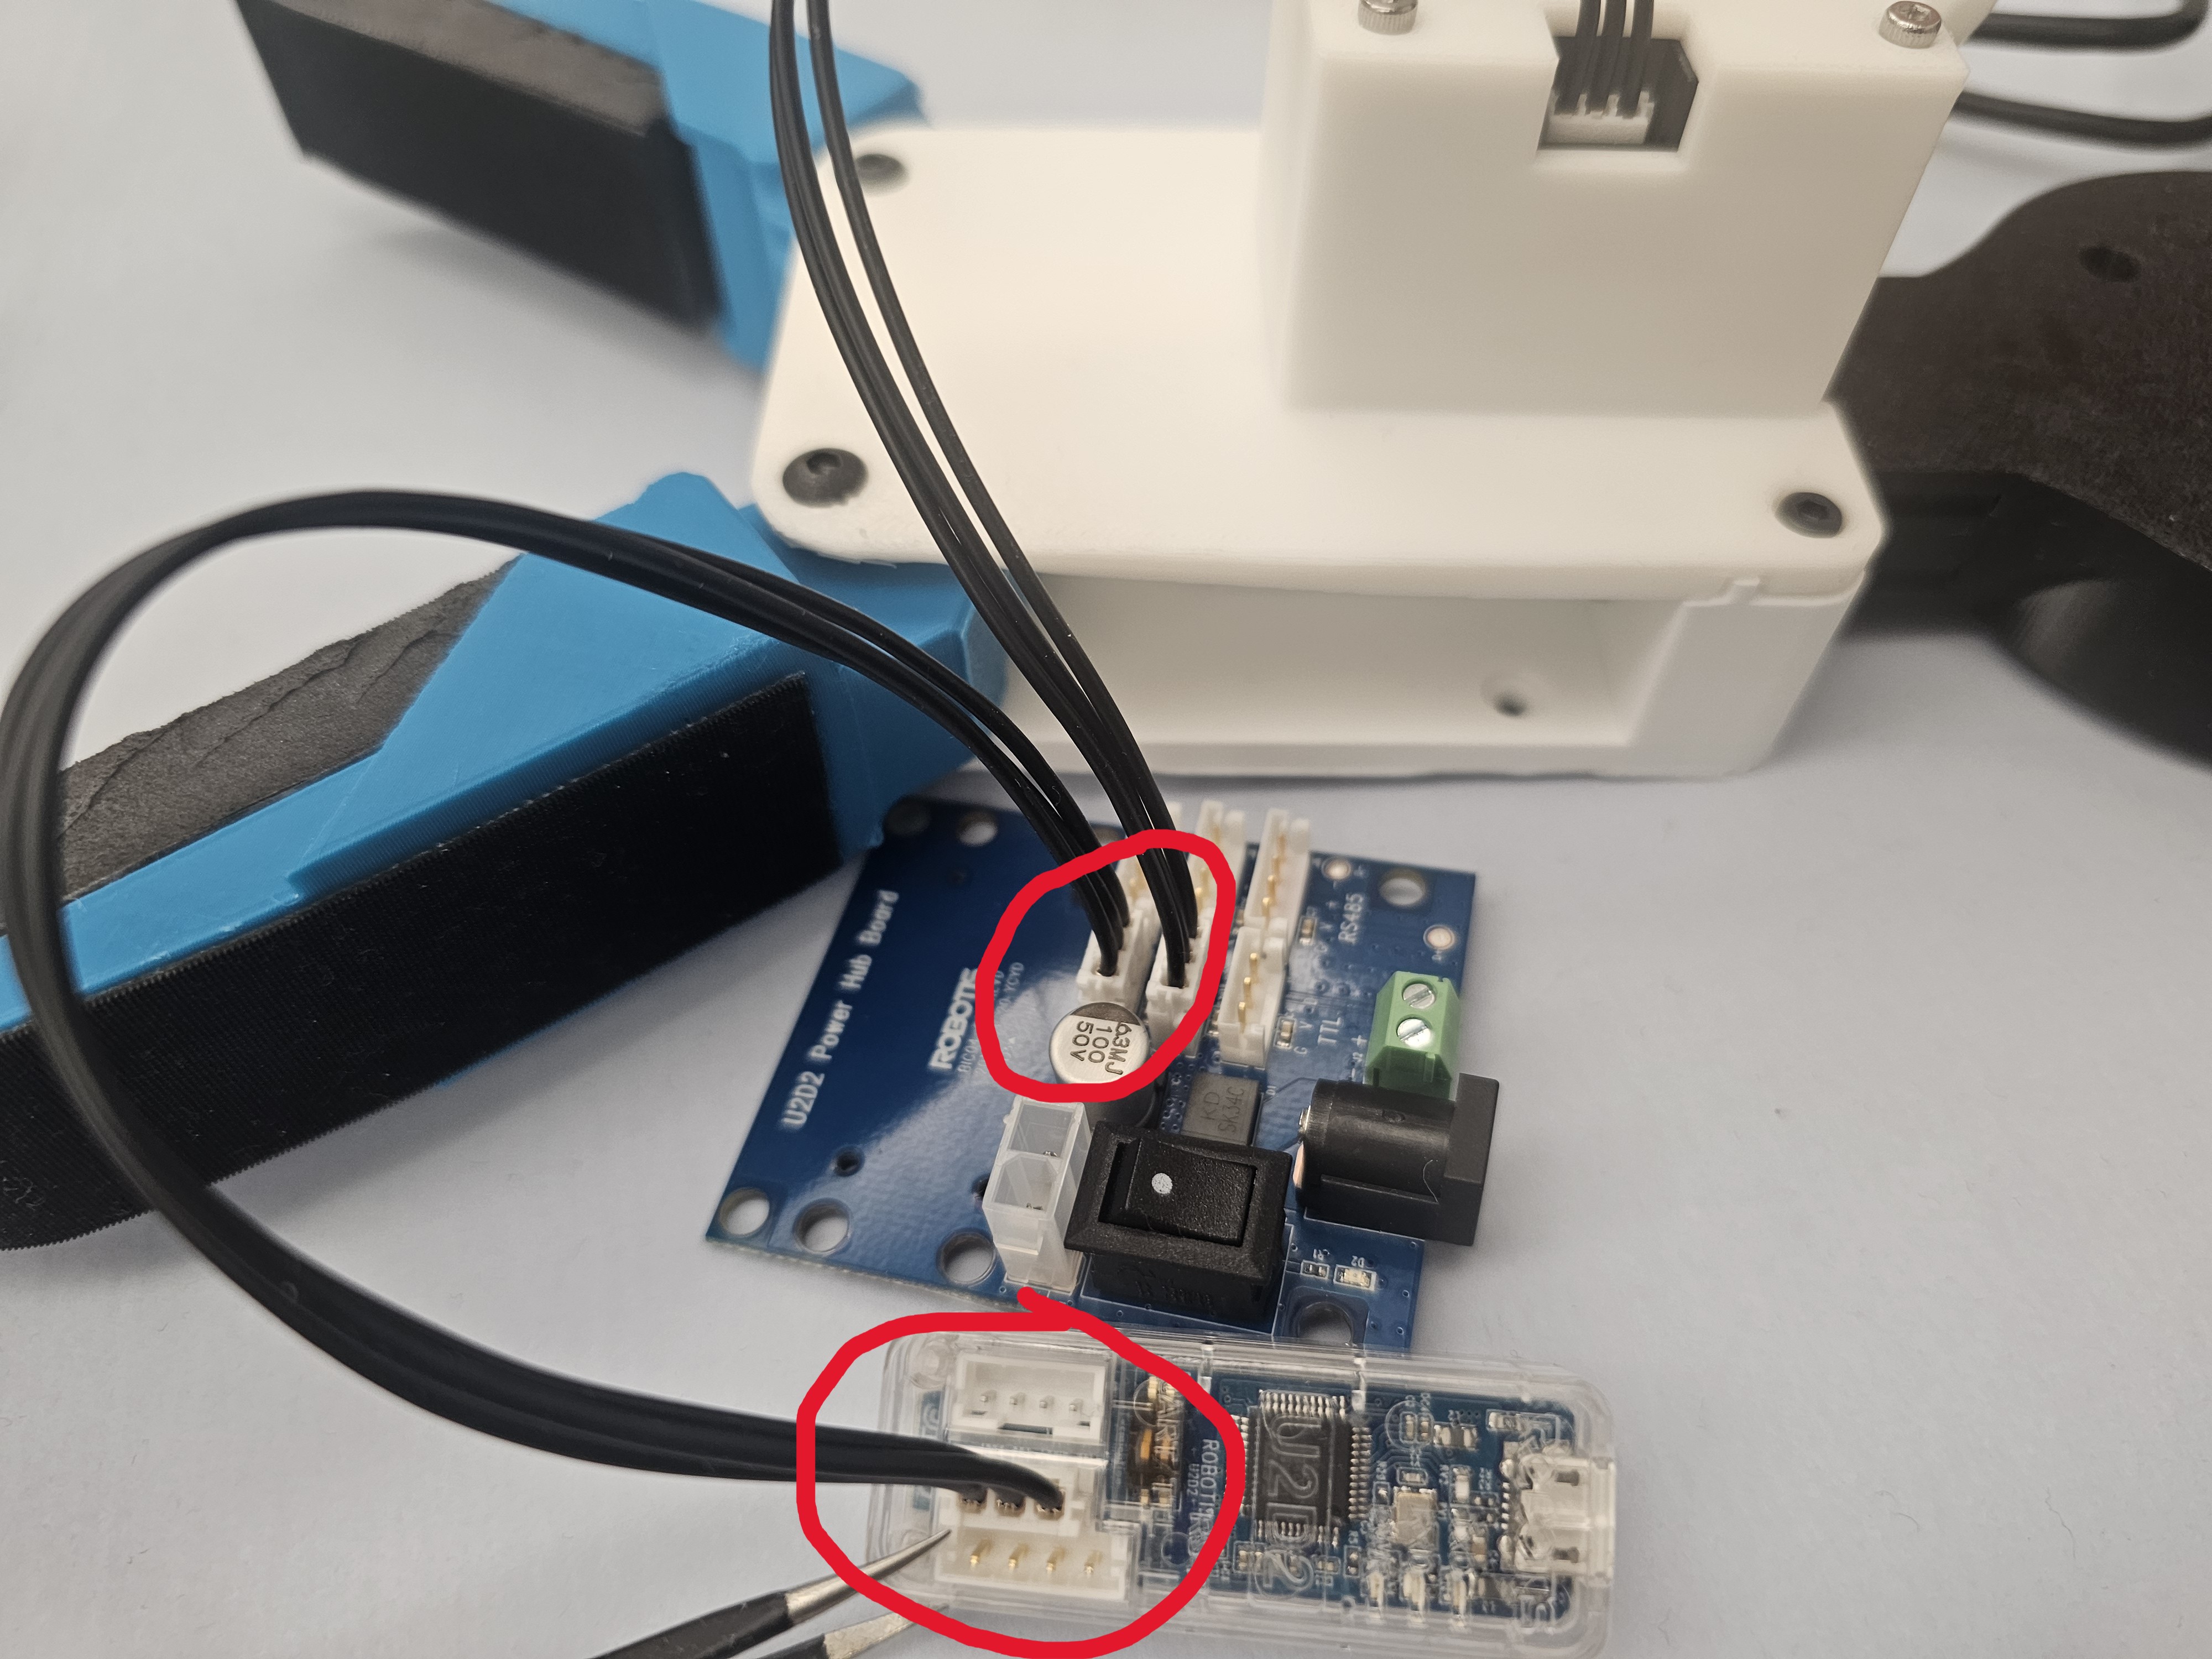
2. Connect the Power Hub to the U2D2 Board
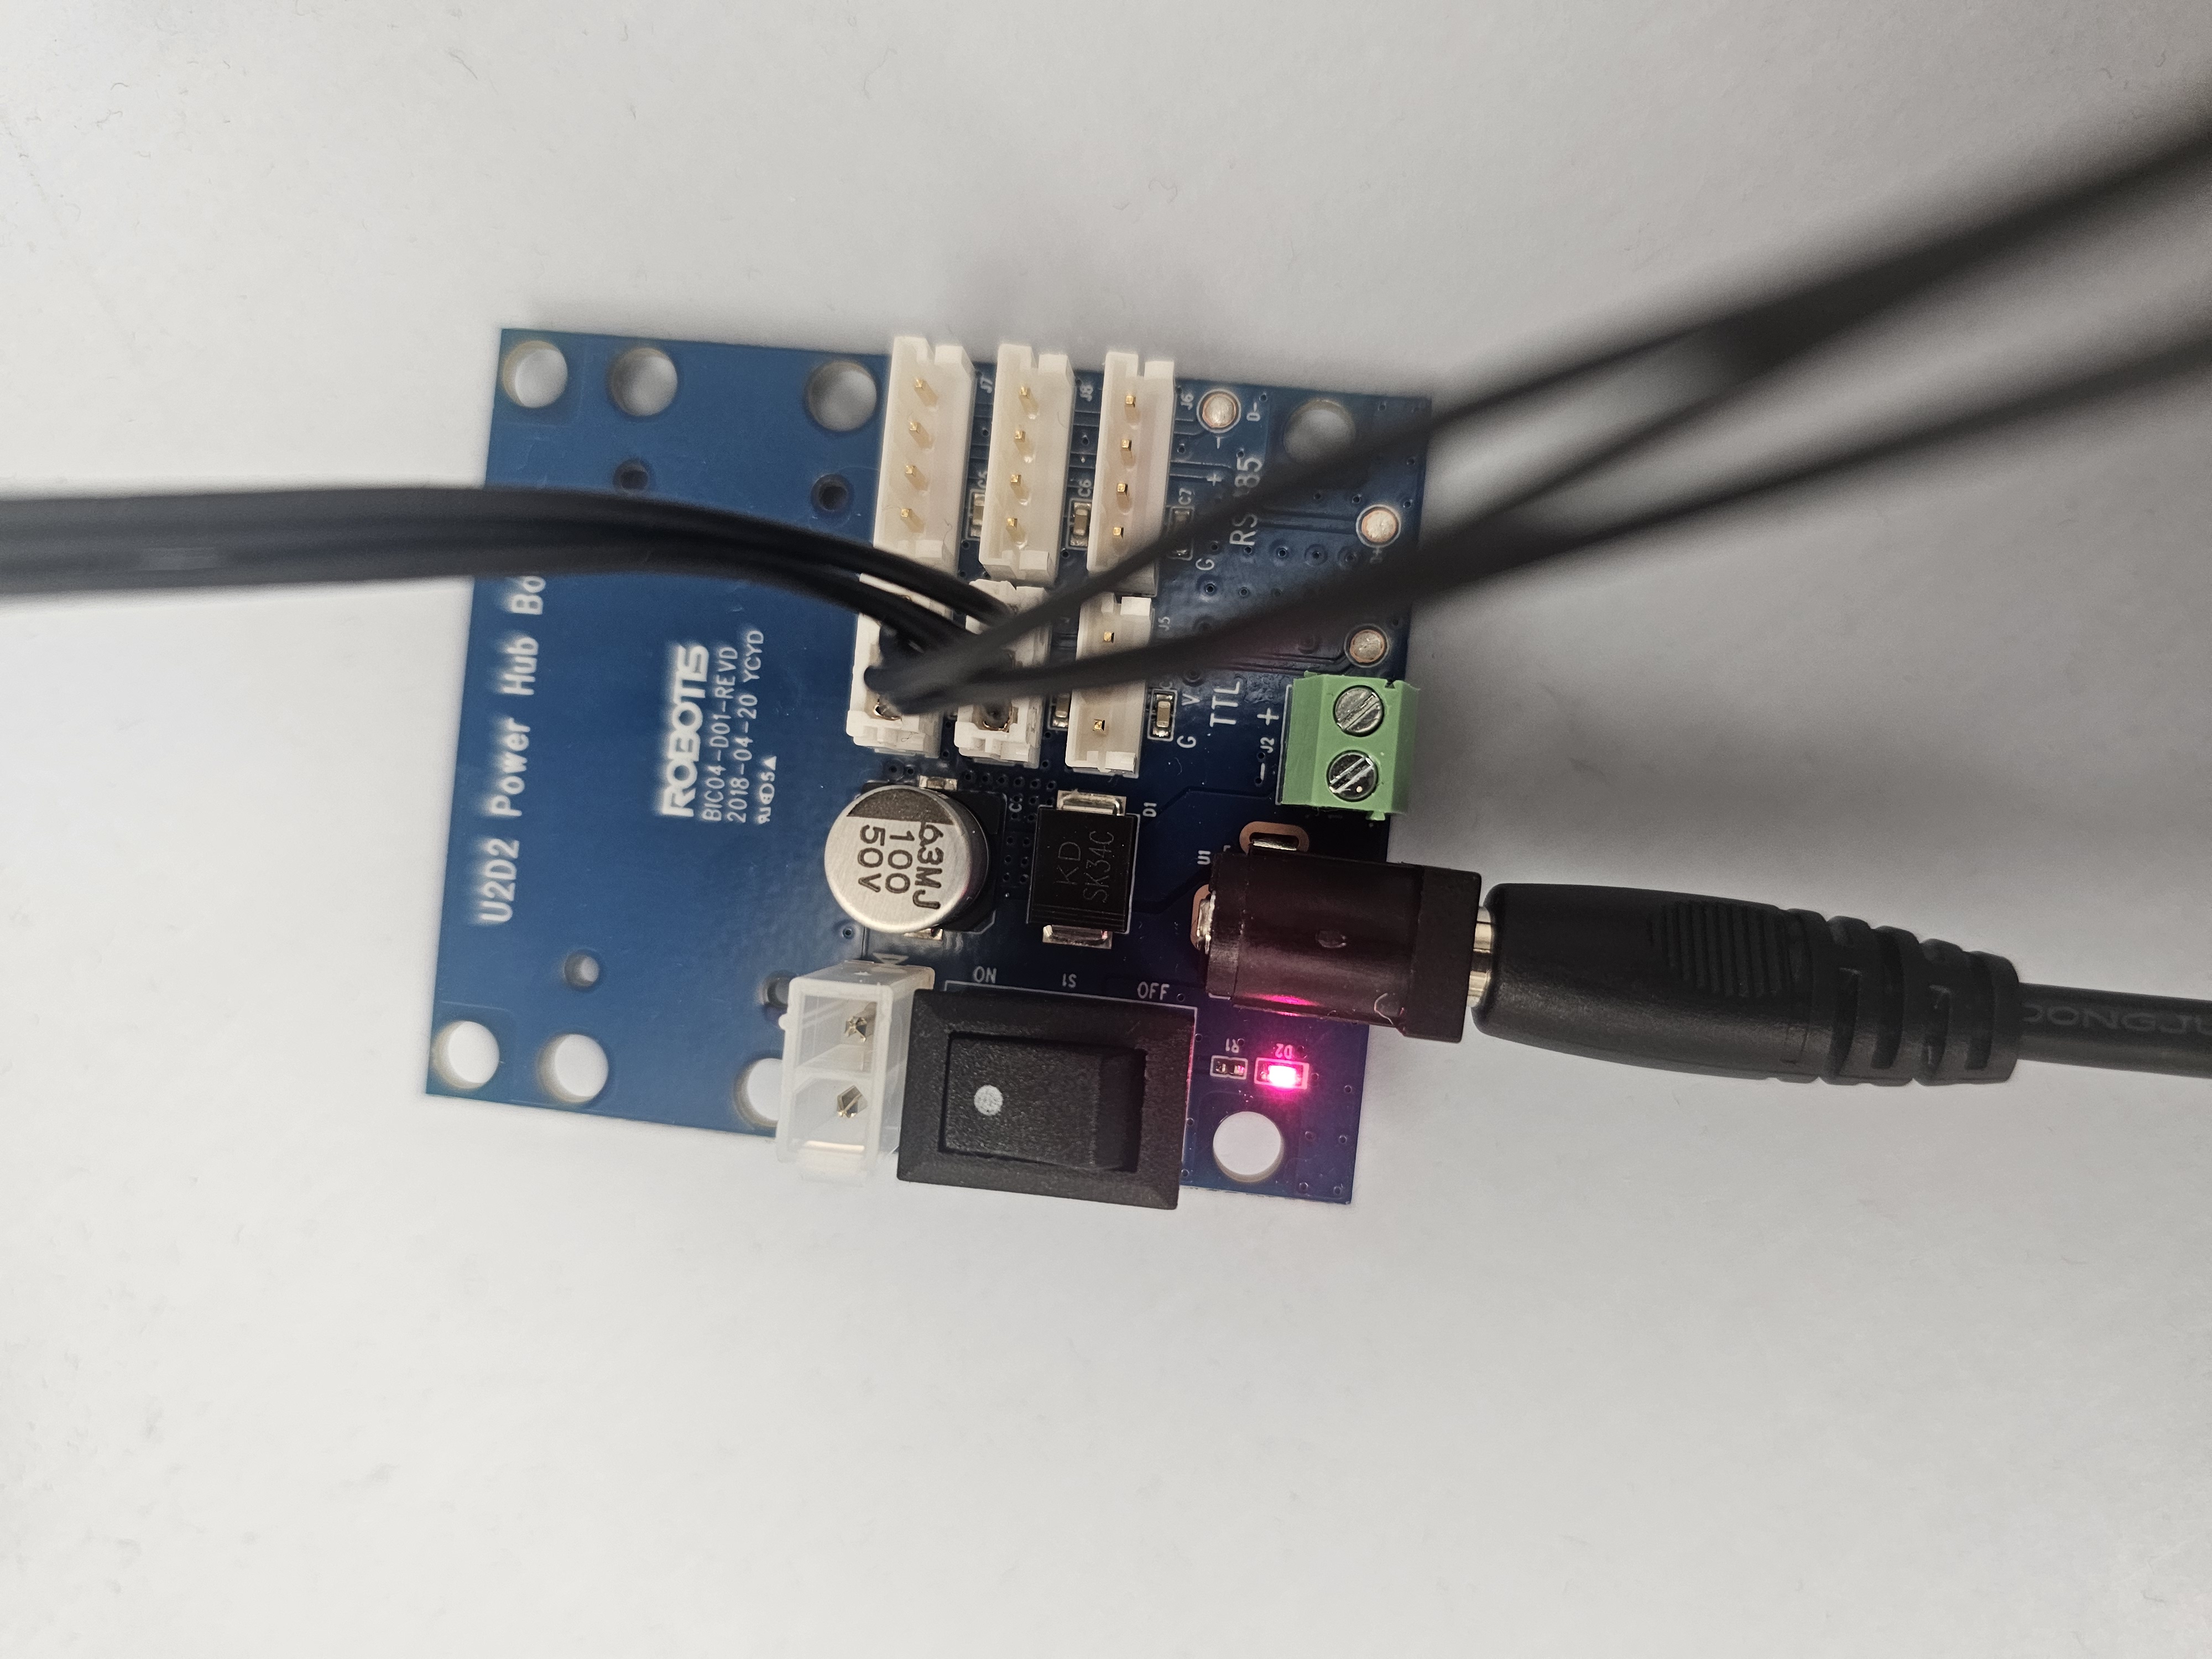
3. Connect the U2D2 and your computer with the USB cable. A red light will turn on.
4. Plug the 12V 5A power supply into the U2D2 Power Hub board and switch on the power. A red LED should turn on.
Go to the `robot-server` directory and run this script to initialize the gripper:
```bash
cd robot-server
python gripper_init.py
```
## Gripper Setup
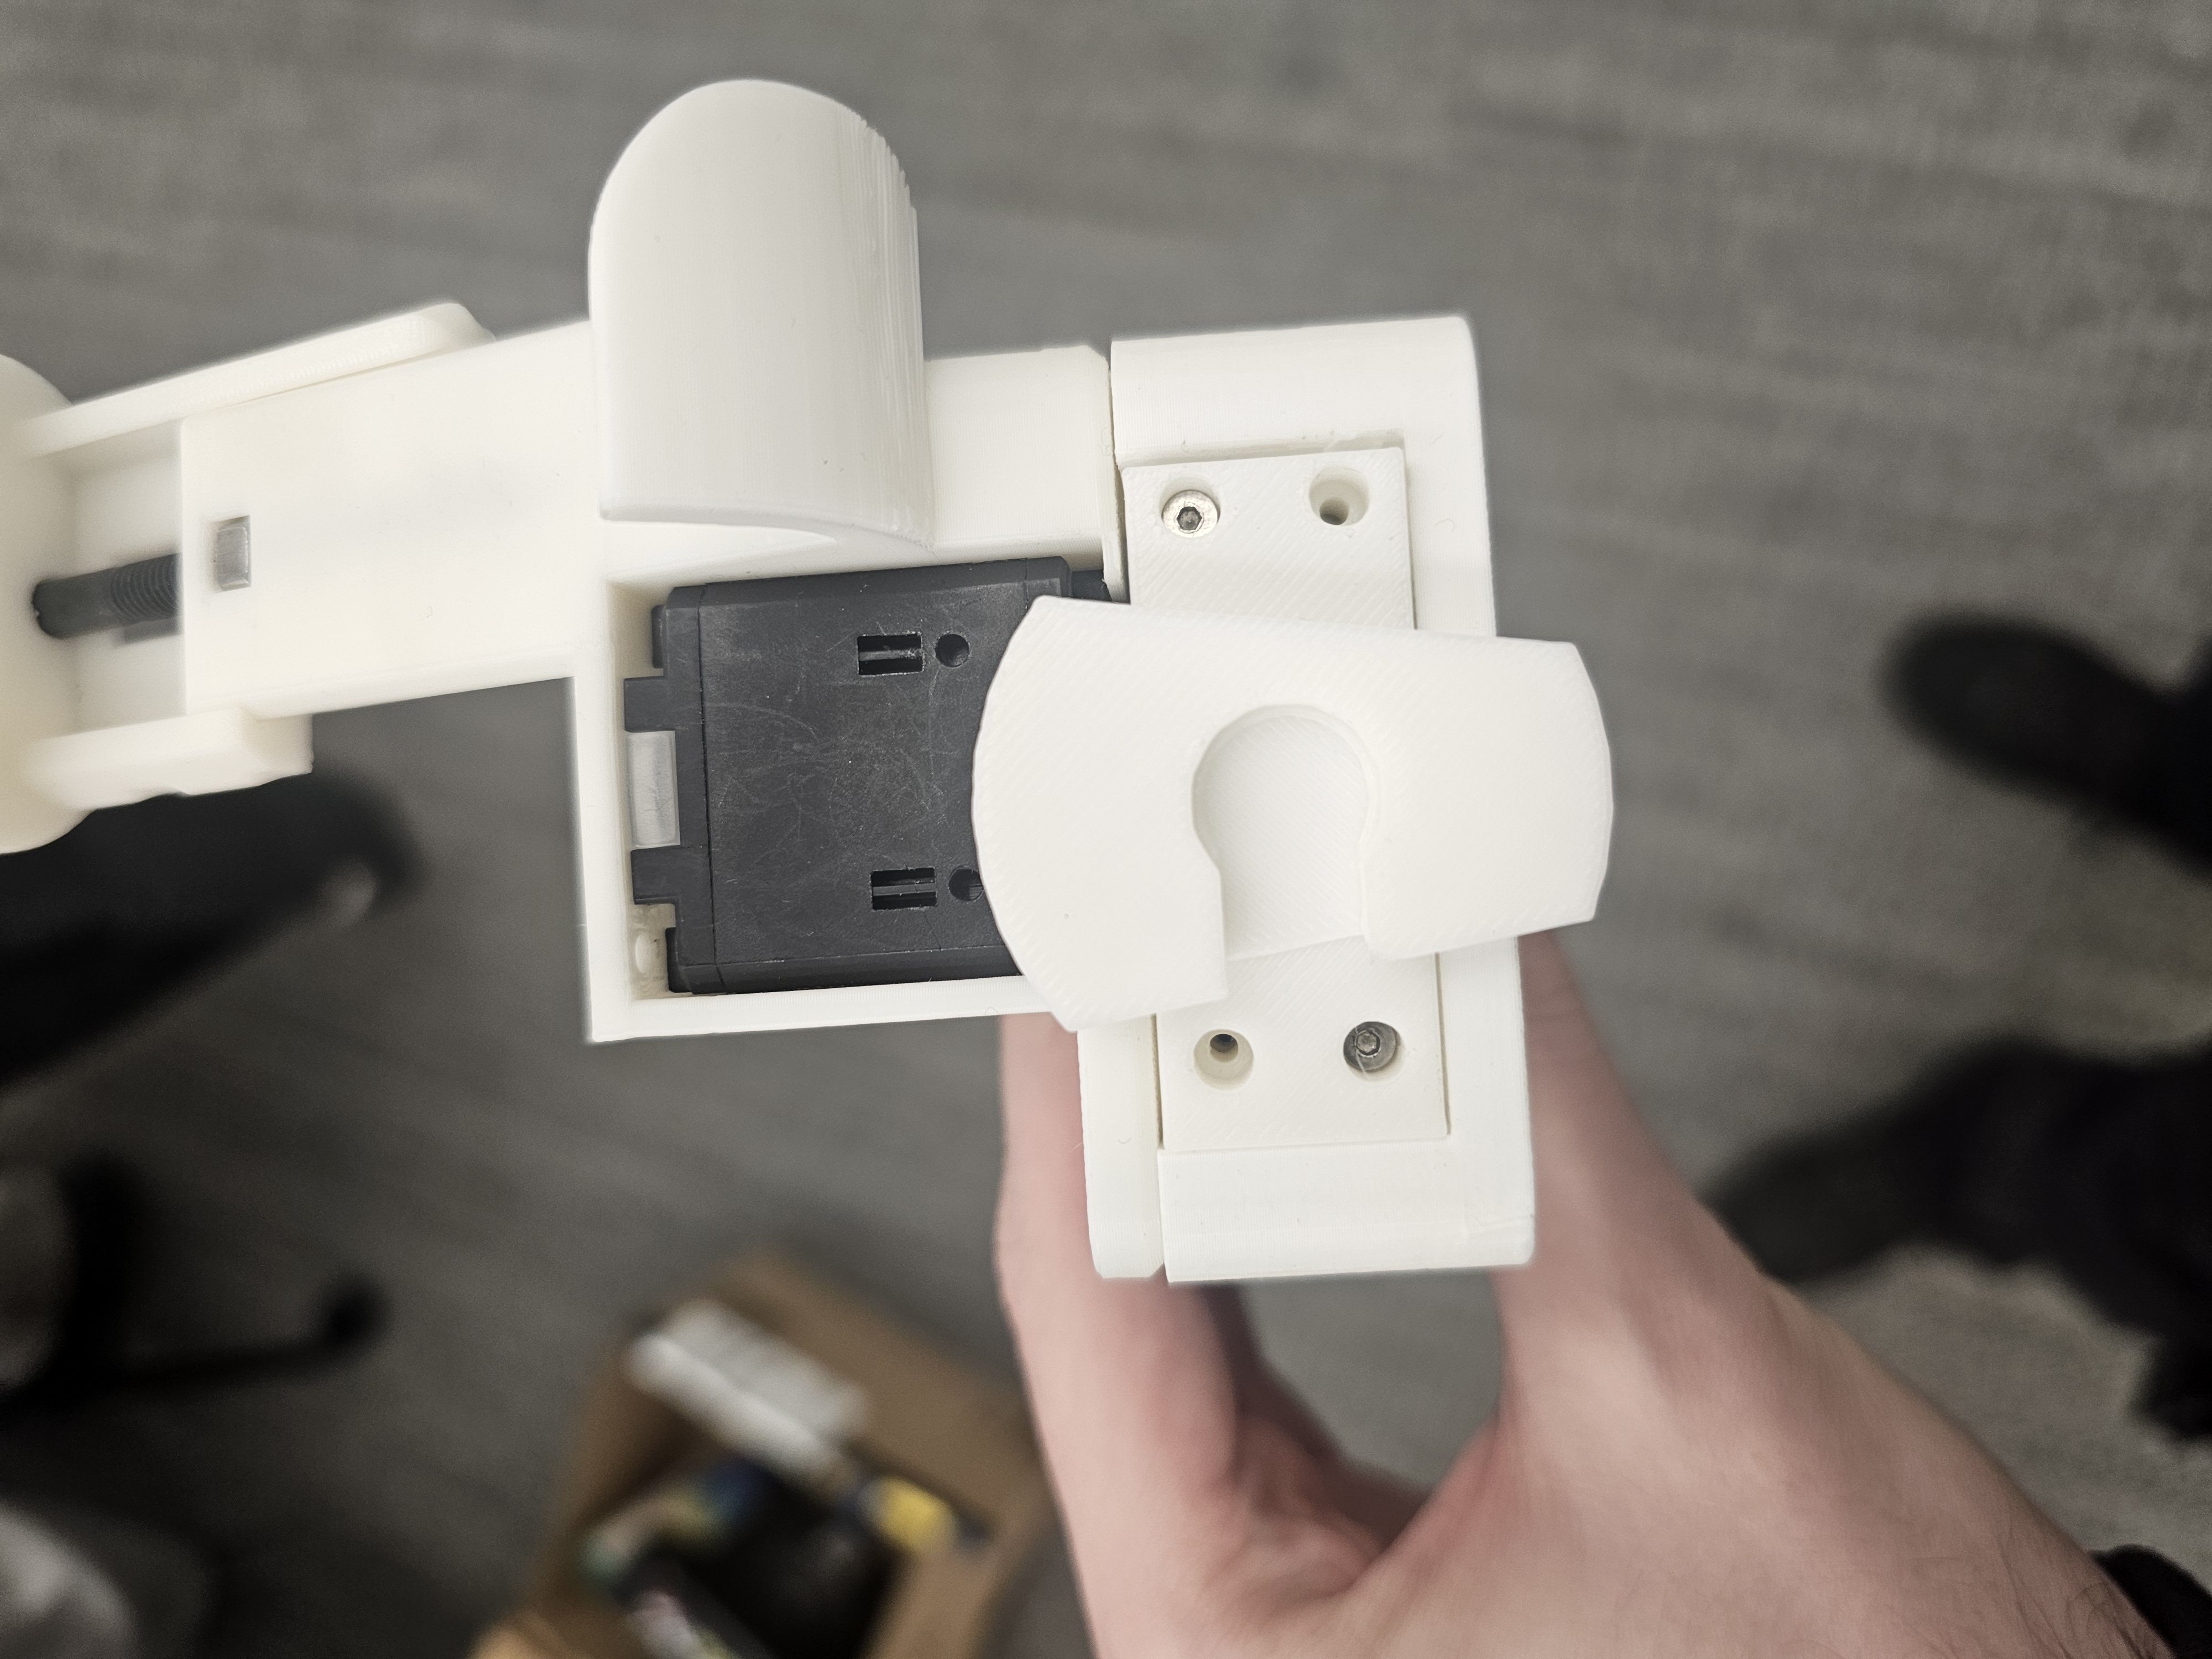
1. **Attach mount to the assembled gripper** using M2.5 x 10 mm screws
2. **Slide the mount onto the stretch**
3. **Connect motor to wrist joint**
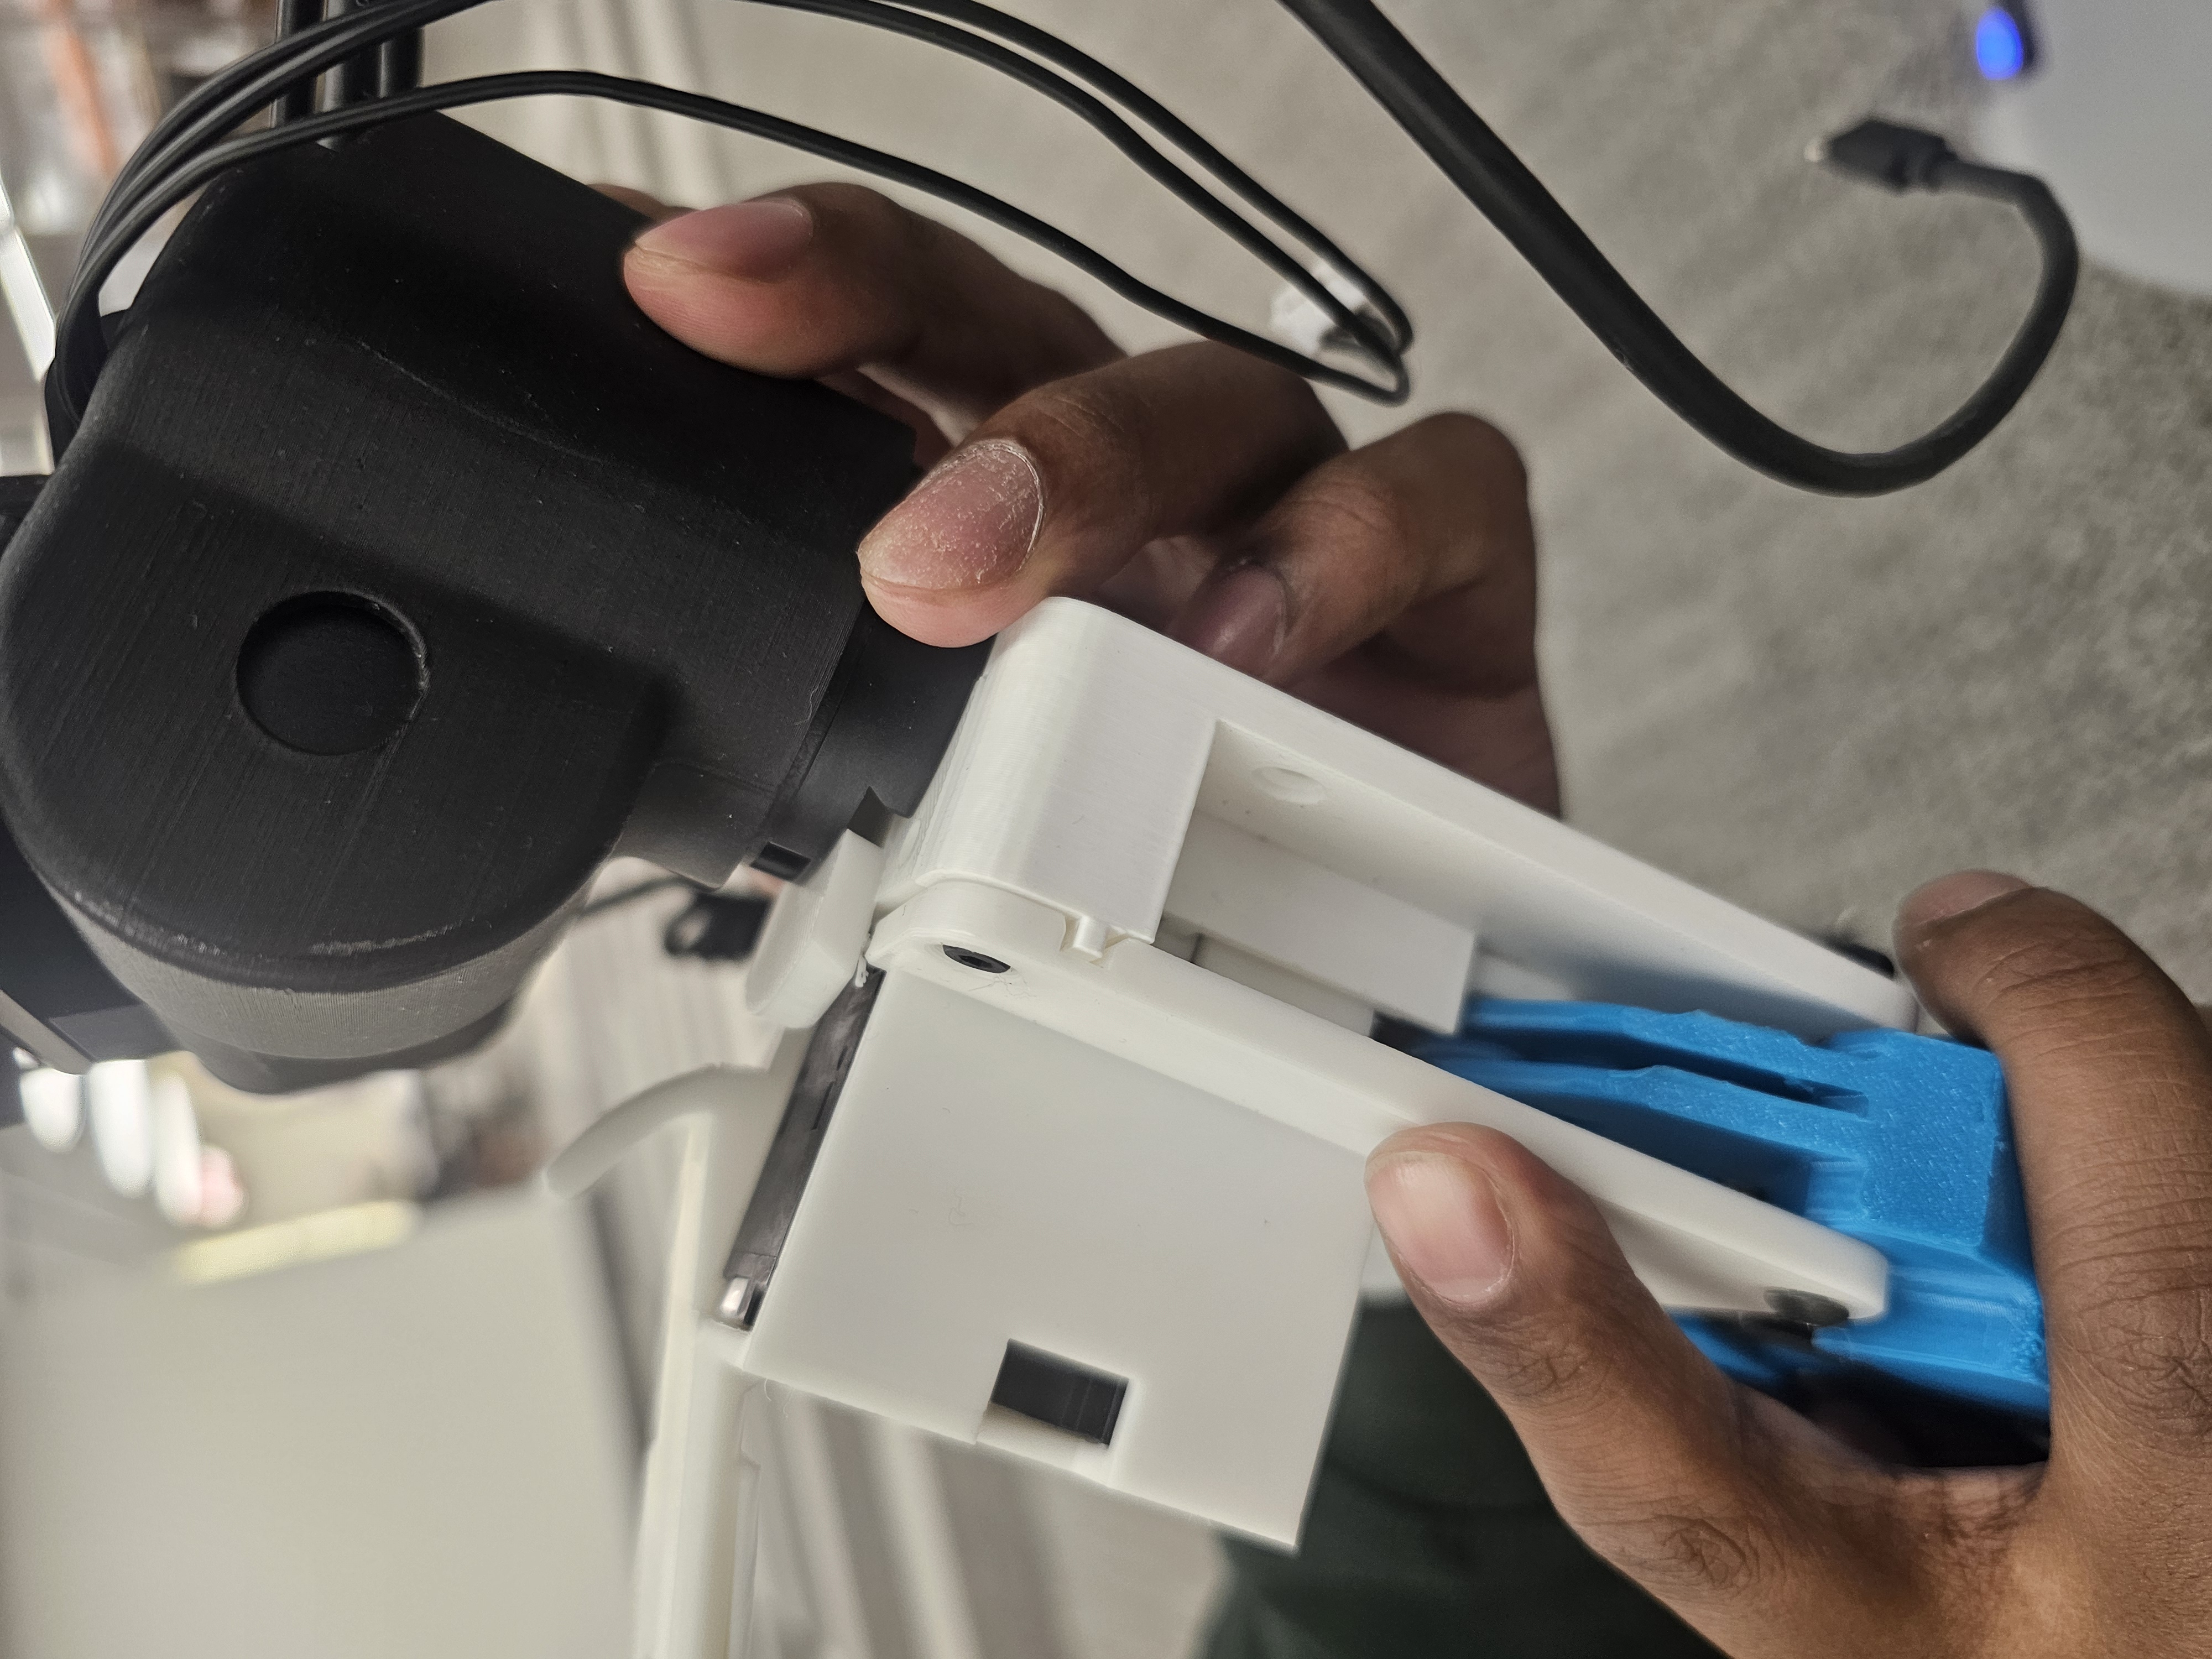
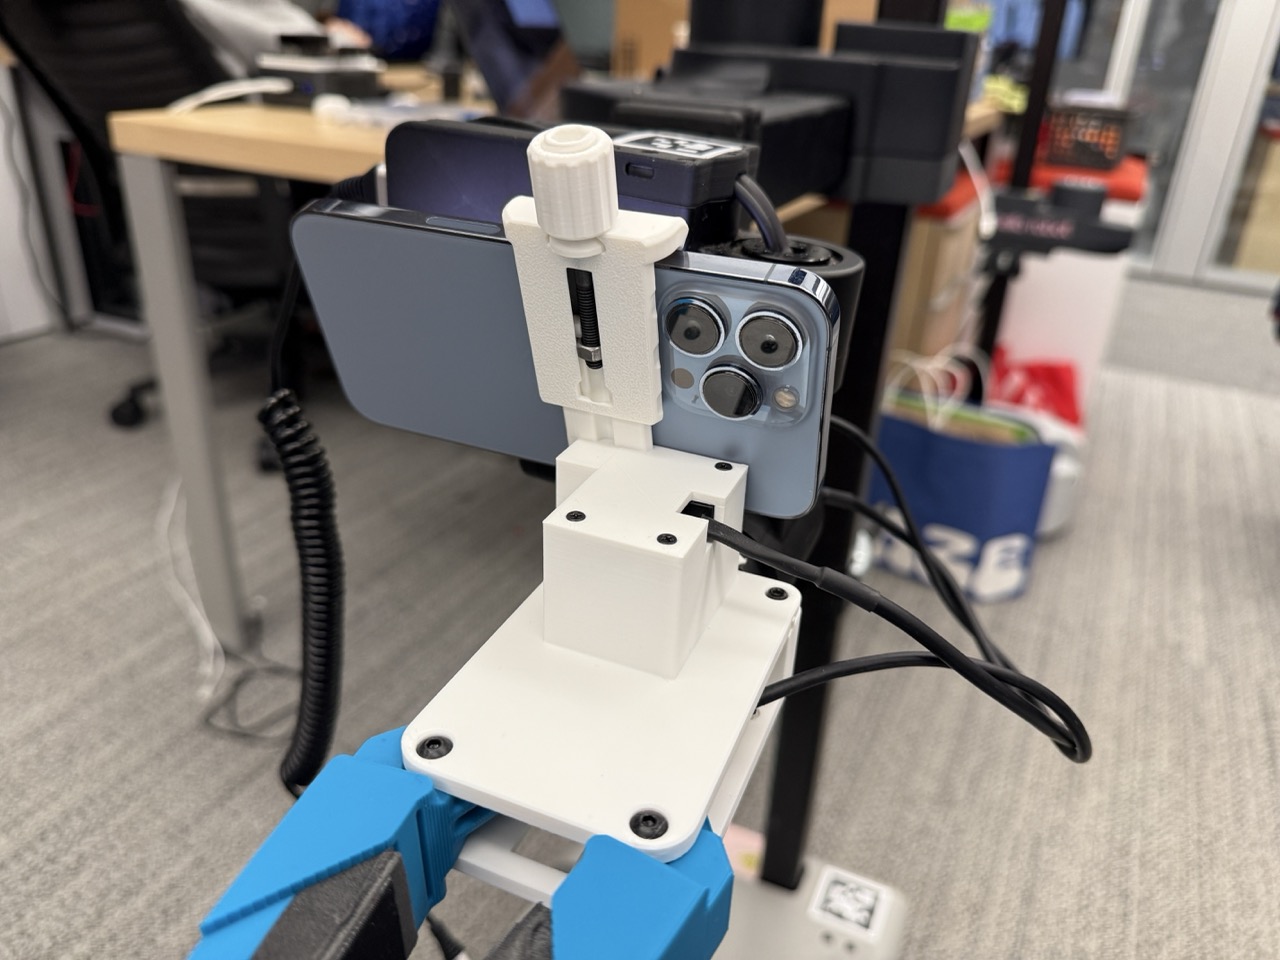
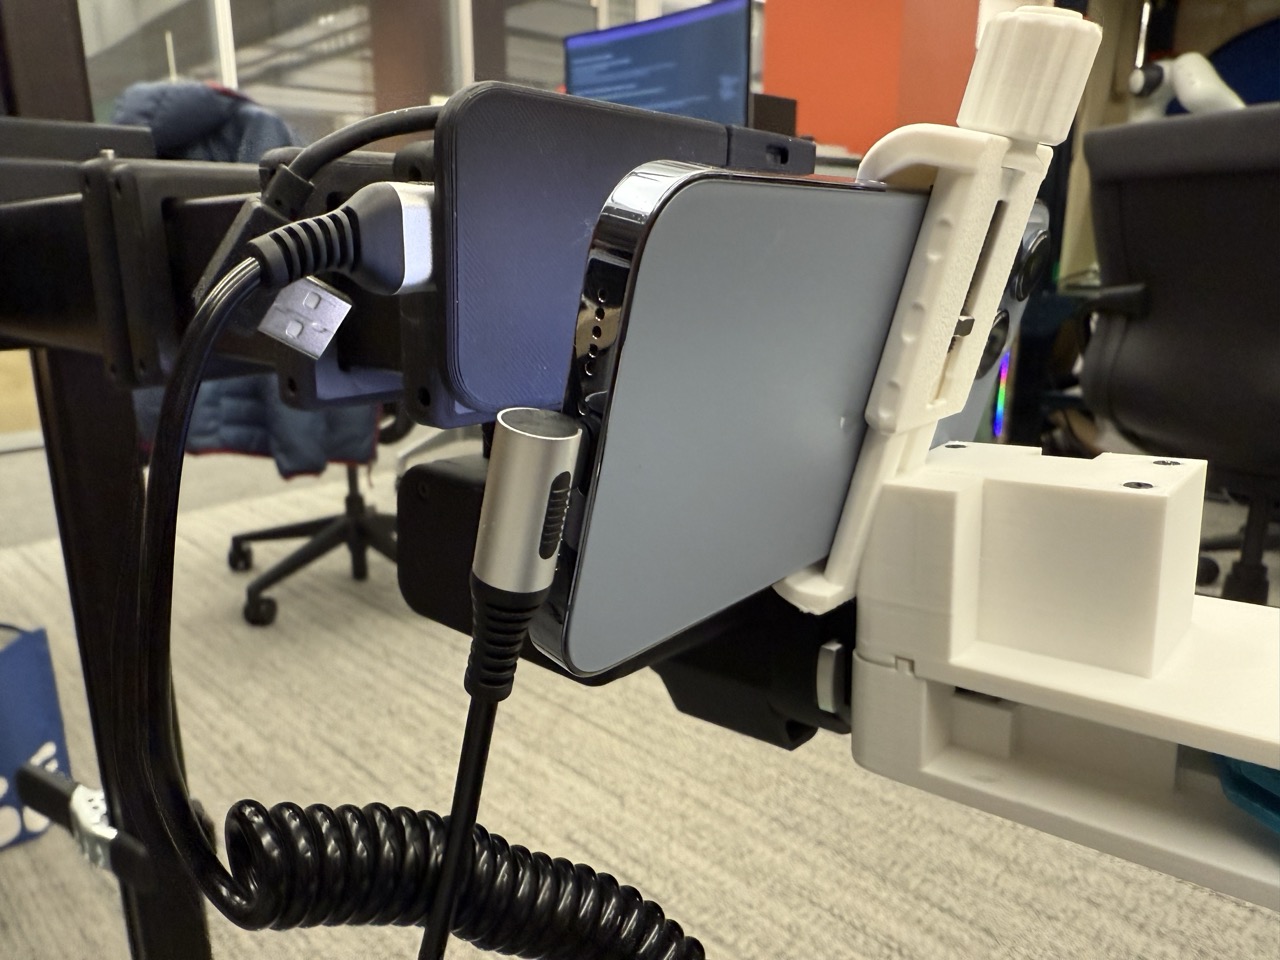
4. **Set up the iPhone** on the robot:
* Slide the iPhone into the gripper mount until the camera block hits the mount, then tighten the knob (snug, not over-tight).
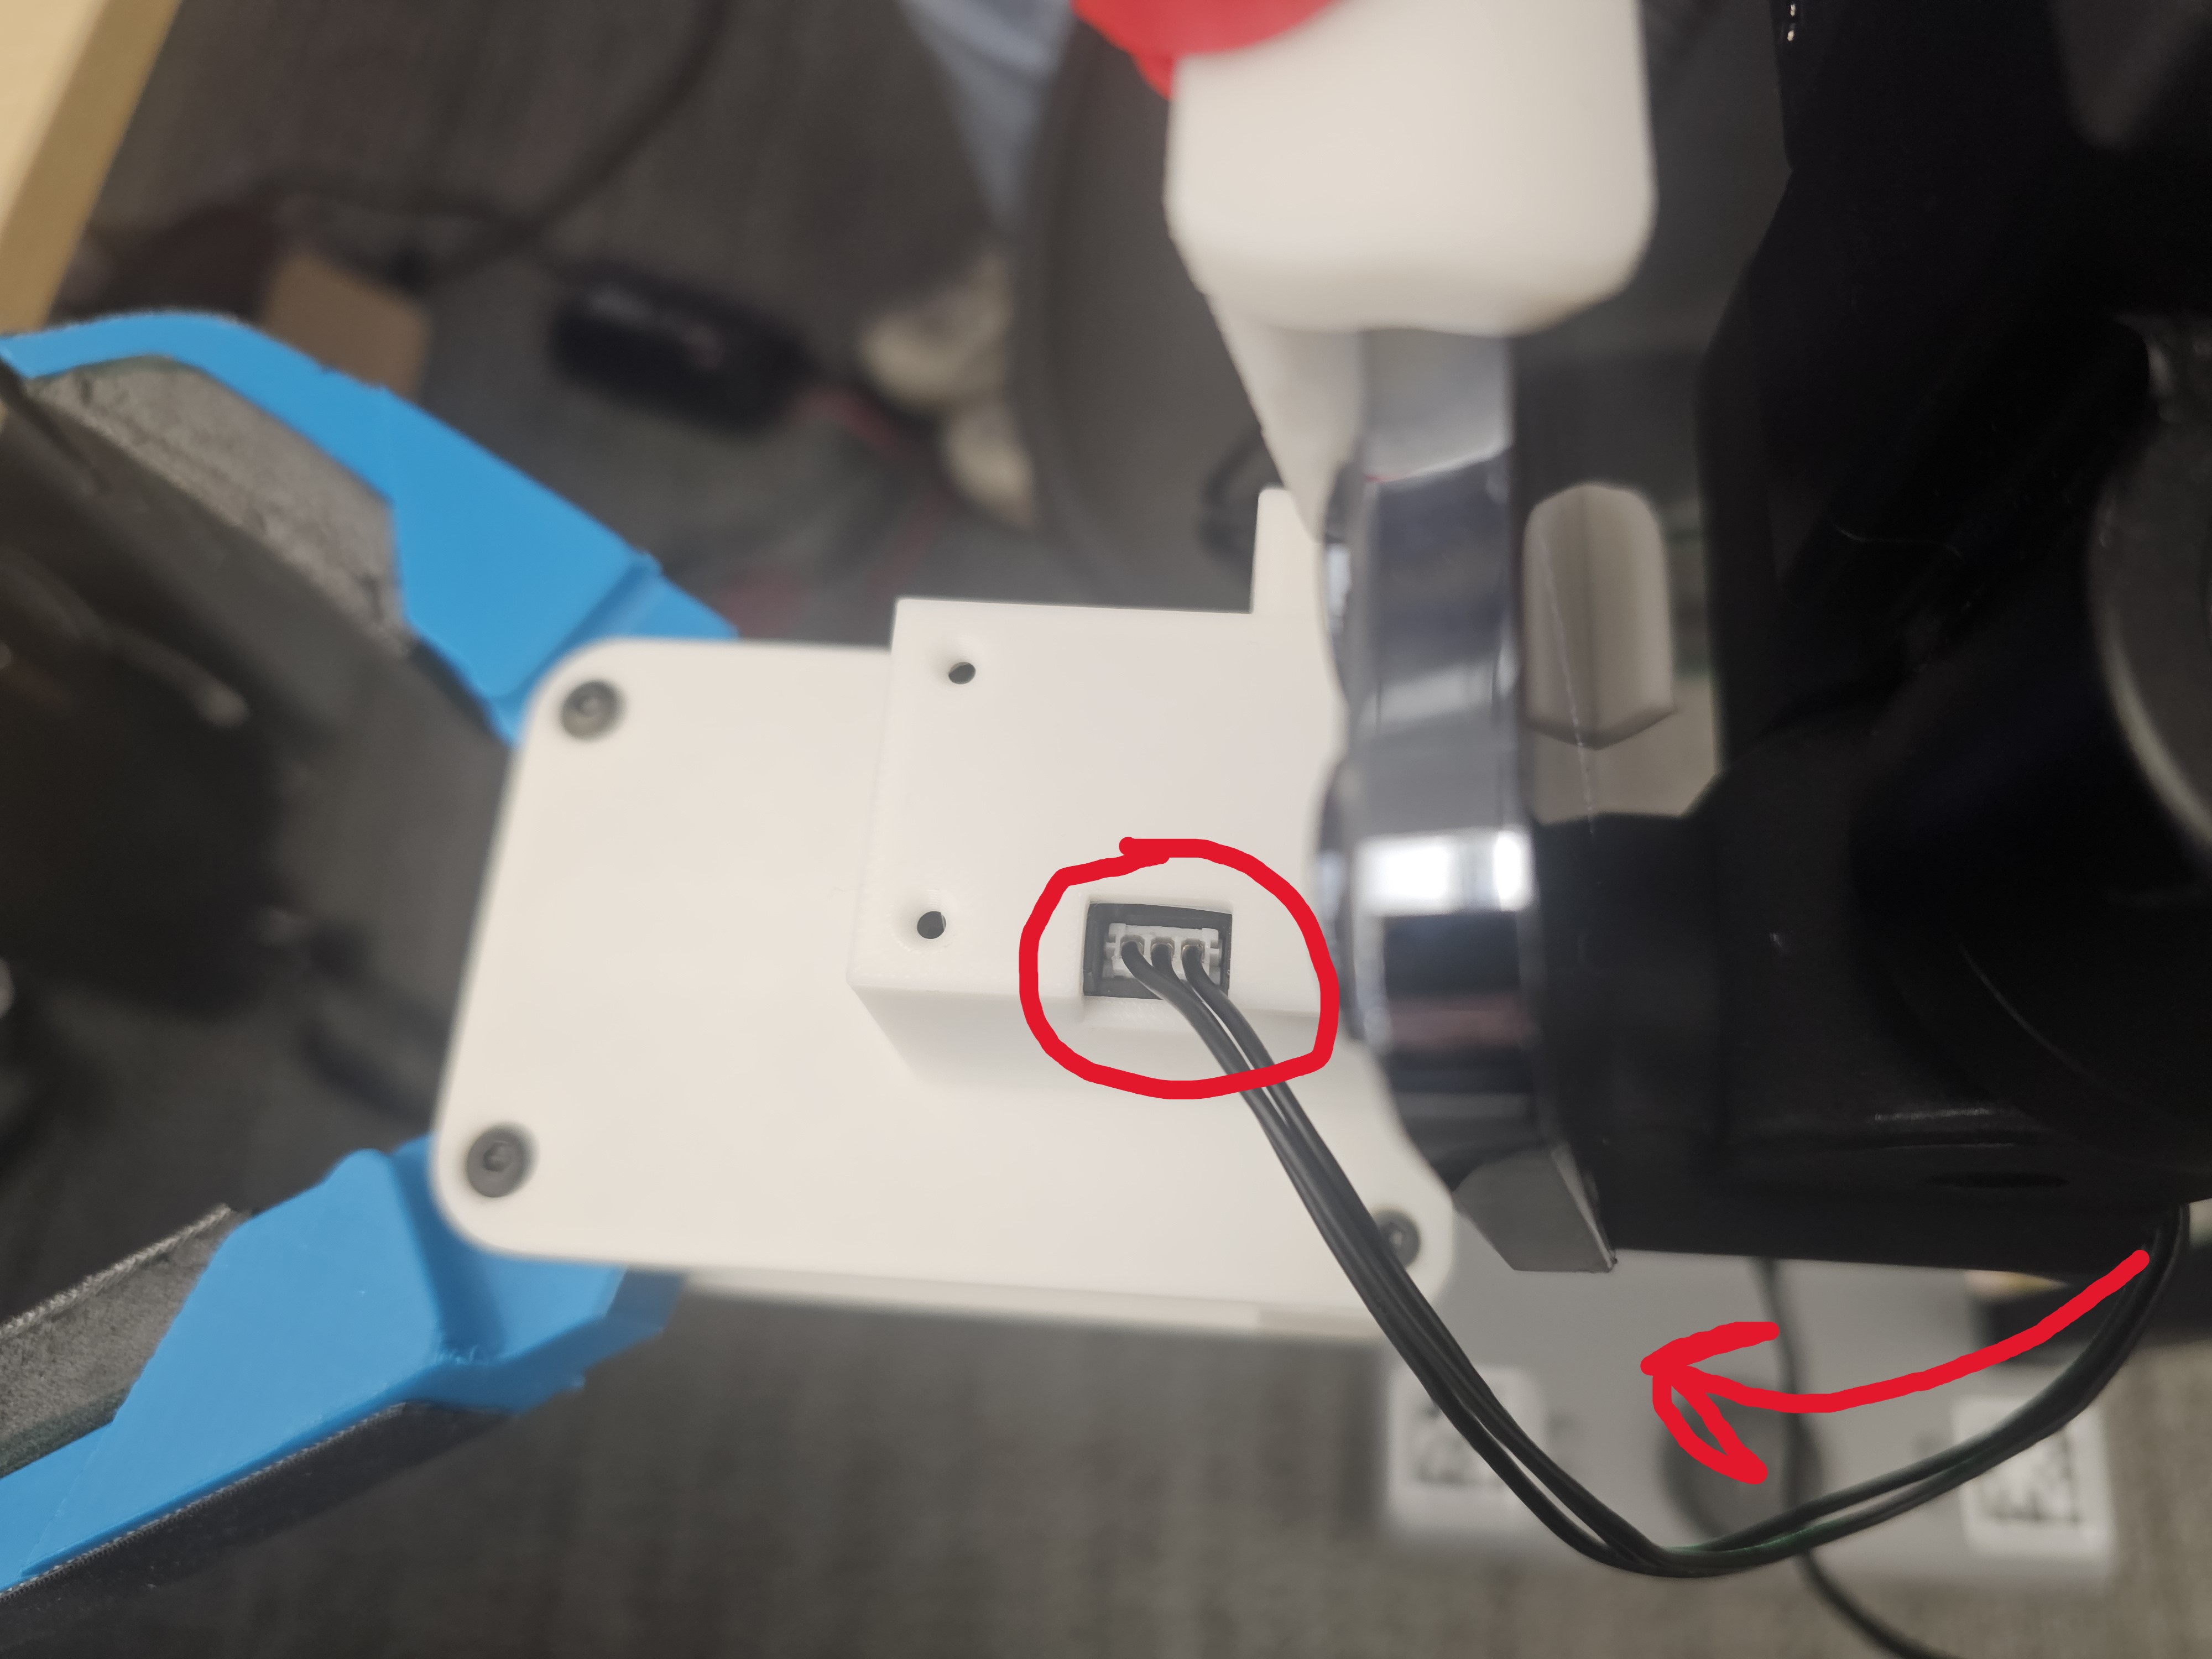
5. Connect the iPhone to the robot via USB.
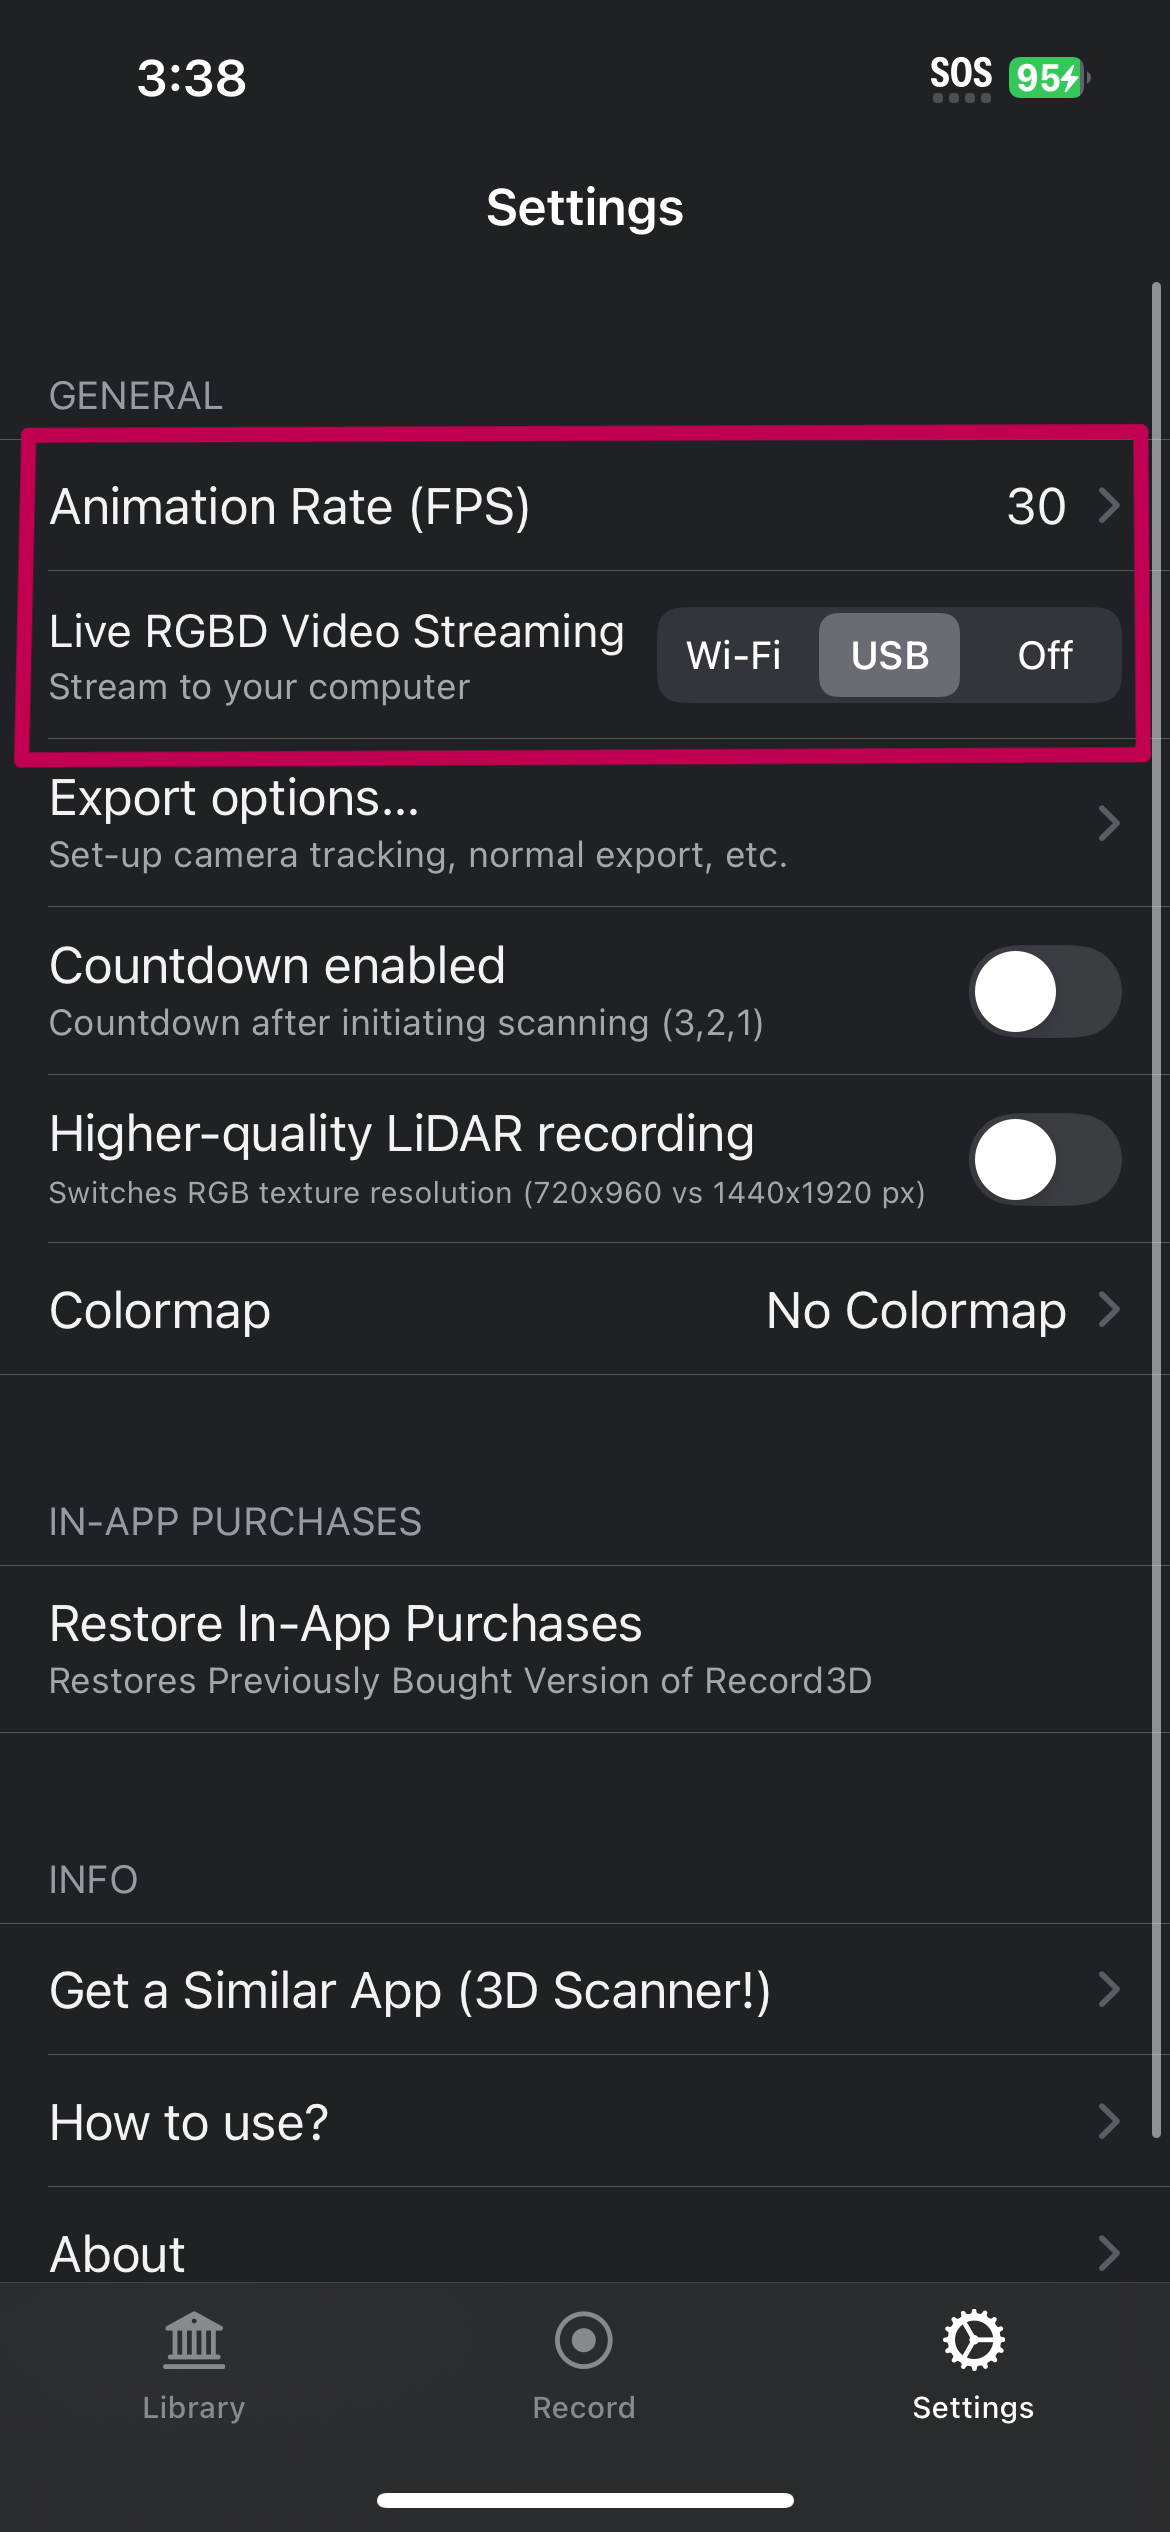
6. In **Record3D** app settings: set **RGBD Streaming** mode to **USB** and **FPS** to **30**.
7. Press **Record** to enter “stream-ready” mode.
## Operating the Stretch Robot
1. **Turn on the robot** and set the charger to **12V supply** mode (use **12V AGM** mode when turned off).
* In general, keep the robot charging unless it needs to move untethered.
2. **Calibrate the joints** (required every power-on).
* Place the clamp \~one-third from the bottom so the lift doesn’t collide.
* Remove the gripper during calibration so it doesn’t collide with the arm.
* Run the joint calibration script:
```bash
stretch_robot_home.py
```
***
## General Information
1. **Don’t move the robot or any joints unless it’s in “run-stop” mode.**
* There’s a white button on the robot’s head (the “run-stop” button)
* If the light is **not** flashing → joints can be locked; press once to enter “run-stop” so you can move the robot freely.
* If the light **is** flashing → the robot is already in “run-stop”; hold the button for a few seconds to exit it (necessary for operation).
2. The “run-stop” button functions as an **emergency stop**—press it any time the robot is unsafe.
3. If code runs but the robot doesn’t move, **check run-stop mode** first.
4. When finished:
* Shut down: `sudo shutdown now`.
* Wait a few seconds until the base LiDAR stops spinning.
* Move the lift down to the clamp.
* Power off the robot.
***
## Deploying a Trained Policy
We assume that your robot has a display (a physical monitor, or X11 forwarding, or a remote setup like [this documentation](https://docs.hello-robot.com/0.3/getting_started/connecting_to_stretch/#untethered-setup)).
1. Run `conda deactivate` until no conda environments are active, not even the `base` environment, so that Stretch SDK imports work properly.
2. **Start the robot server**:
```bash
cd robot-server
```
First, run the gripper calibration script. The gripper will calibrate itself by watching the blue pixels move, so make sure there are no blue pixels in the background.
```bash
python3 auto_calibrate_gripper.py
```
Then, start the robot server:
```bash
python3 start_server.py controller=stretch
```
This starts streaming images from the iPhone and the robot begins listening for action commands. If you have missing imports, try `pip3 install hydra-core record3d` (and any other missing packages).
3. **Run the policy** in another terminal (requires display):
```bash
cd imitation-in-homes
conda activate home_robot
python run.py
```
4. Head to the [Eval Playbook](https://docs.google.com/document/d/1DTy8G2XzWs01yTducmVBbdiEGack96QJm9dK1AOyS4Q/edit?tab=t.0)
### Available Policy Checkpoints
When running `python run.py`, you can select from these preconfigured checkpoints:
* **`run_vqbet_pick`**: default checkpoint for picking task.
* **`run_vqbet_open`**: default checkpoint for opening task.
* **`run_vqbet_close`**: default checkpoint for closing task.
* **`run_vqbet_pick_exp`**: experimental pick checkpoint.
Choose the config that matches your task and substitute it in:
```bash
python run.py --config-name=
```
***